We may earn revenue from the products available on this page and participate in affiliate programs.
Who says you have to completely demo your kitchen (not to mention your budget) to make it yours? In our new series, The No-Reno Kitchen, we’re highlighting total transformations that prove the power of paint, fixtures, and a little elbow grease.
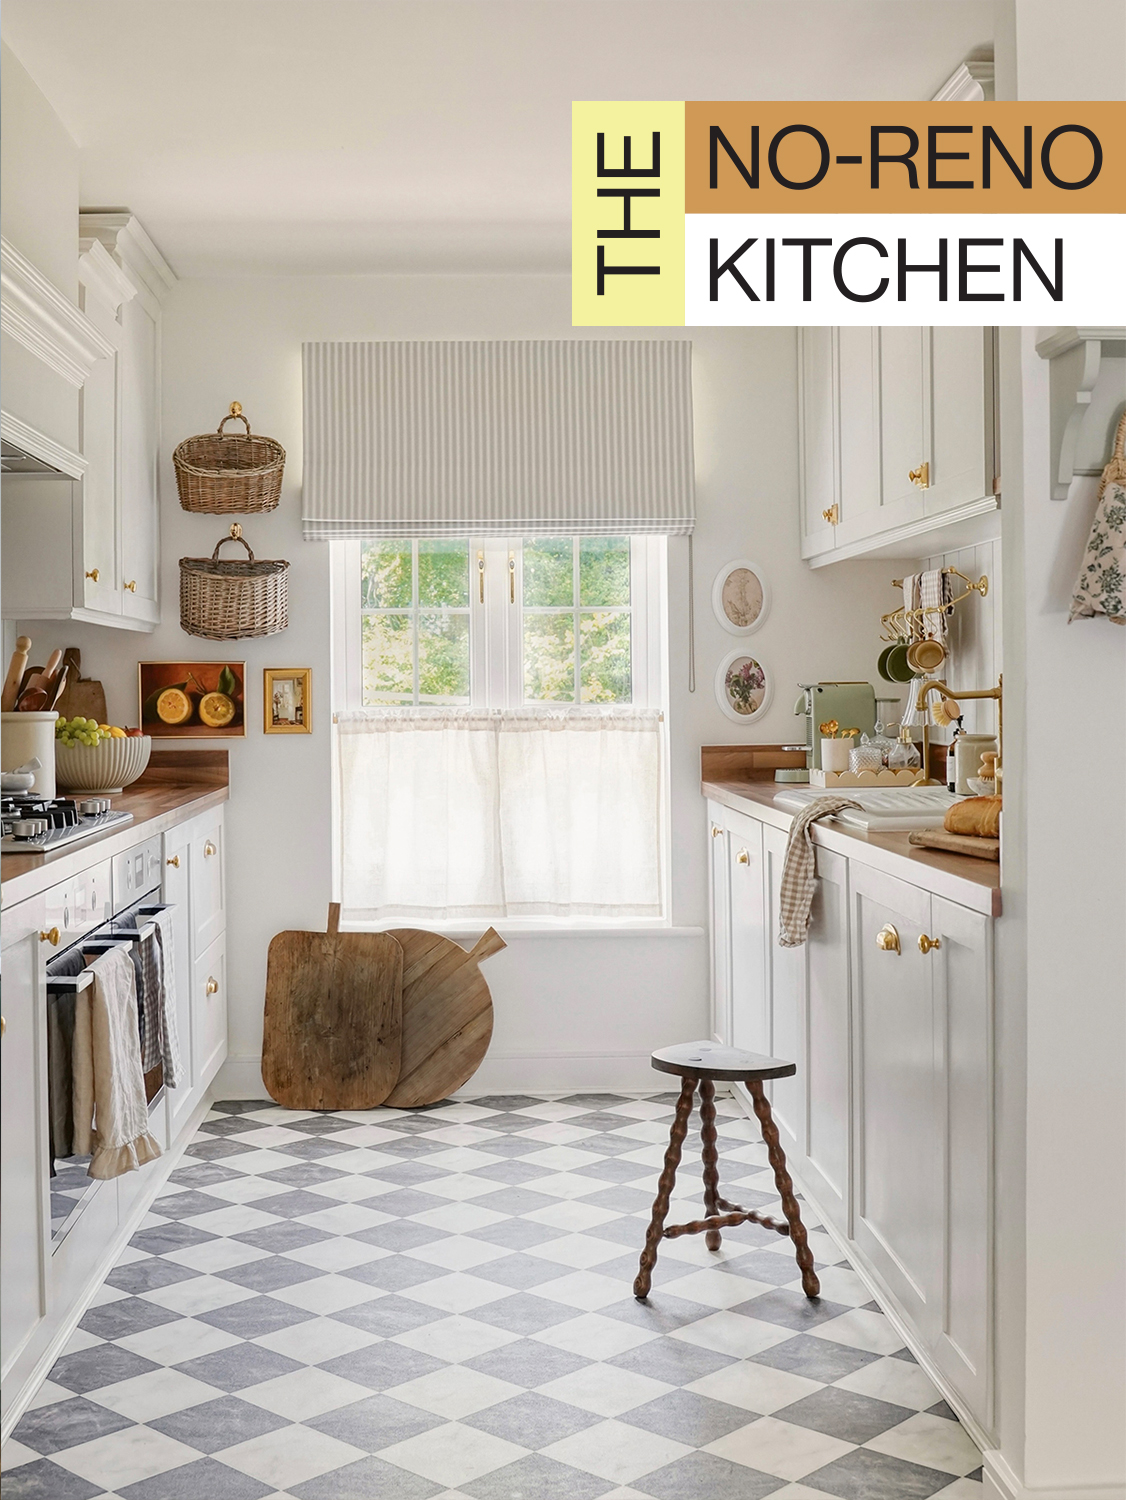
In the mornings, Hampshire, England–based designer Arthty Ragupathy will pour herself a cup of coffee and look out onto her backyard through the off-center window in her tiny galley kitchen. While not automatically noticeable to others, its misplacement is just one of the oversights made by her builders. “It’s not the kitchen I would design if I could do it from start to finish,” she admits. Ragupathy and her husband had some say in the finishes that would go into their new-construction home, but the choices were limited (for instance, she went with butcher block countertops even though, if all options were on the table, she would have chosen quartz). “As soon as we moved in, I told my husband that I couldn’t live with it for even a day,” Ragupathy recalls.

Once the construction crew was out, the couple took matters into their own hands. They built a new range hood cover, paneled and painted the cabinet doors, added crown molding, bought brass outlet covers, and so much more. The best part? There was very little demo involved, which meant less wasting materials and their money. Read on to learn how they brought character to their white builder-grade kitchen without—get this!—changing the color.
De-Gloss Shiny Cabinets

As soon as they got their keys, they got to sanding. The couple smoothed down the cabinets to remove the glossy finish, that way paint primer could adhere to it. (Looking back, Ragupathy wishes she would have saved herself time by using Zinsser’s BIN Primer Sealer, which doesn’t require any prep.) When they had a seamless canvas, they nailed rails and stiles made out of MDF to the doors for a Shaker-style look and painted them white once more. “I wanted something simple and something that would look good with the butcher block,” Ragupathy says of her decision to stick with the same hue.
The upper cupboards on the sink-side of the kitchen, however, were the only ones they totally replaced. The units were only a foot-and-a-half tall, leaving a huge gap up above—both a waste of space and a “dusting nightmare,” according to Ragupathy. The pair bought two large upper cabinets, accounting for open shelves from Folk Haus in the corner closest to the entry, and then tacked crown molding to all the uppers to give the illusion that they extend to the ceiling.
Lay Laminate Flooring Down Stat

The beauty of Ragupathy’s floor makeover is that they didn’t rip out any of the white porcelain tiles. Instead they paid someone around $90 to lay screed over the surface. The concretelike finish provided a level base that, once dry, they could stick the new laminate checkerboard tiles onto. The tiling process took all of a half hour, given the kitchen is so small.
Stick It to the Man—Er—Subway Tile

In an effort to save more money, Ragupathy used a similar strategy to add character to the backsplash. Rather than take a chisel to the walls, she bought tongue-and-groove panels and Gripfill adhesive and stuck them directly on top. The only obstacle they ran into was getting the boards to sit nicely along the countertop’s edge (there wasn’t enough depth for the panels to comfortably rest on). The owner of The English Paneling Company suggested gluing some sort of trim piece to the border—Ragupathy went to the hardware store and purchased half dowels. Between that and lots of caulk, they were able to achieve a clean finish. The small sliver of quartz above the cooktop was a bargain Facebook Marketplace find ($63!) that took strong adhesive and a good nudge or two to set in place.
Wrap the Hood Like a Present

If Ragupathy had to pinpoint one DIY that completely changed her perspective on their space, it would easily be the range hood box. It’s the first thing you see when you walk in, and the previous exposed stainless steel setup made the whole room feel very industrial. “We didn’t want to remove it and replace it with a different one, so we just built around it,” she says. The project involved adding wood studs to the wall for the new sturdy frame to attach to. Finally, they glued decorative crown molding made out of lightweight polystyrene around the top.
Hide Imperfections With Art

Back by that window, Ragupathy is reminded of all the little tweaks she made to her perfectly imperfect kitchen. To remedy the visual awkwardness of the off-center frame, she hung large baskets on the wall. Underneath them is a small lemon print mounted on a shadow box that conveniently disguises the thermostat. As she pours herself another cup, Ragupathy remembers that her coffee machine used to be black—but it was nothing that a can of green spray paint couldn’t fix. “Our kitchen is not perfect but it’s ours, and it was a product of our hard work,” shares Ragupathy. “That’s what makes it so special.”