Finally, a Foolproof Formula for Picking the Right Paint
Zio & Sons’s founder did the heavy lifting for us.
Updated Oct 10, 2018 5:17 PM
We may earn revenue from the products available on this page and participate in affiliate programs.
With our New Year’s resolutions freshly penned, January at Domino is all about change—the demo and construction kind. Welcome to Renovation Month, in which we pull back the curtain on the highs (mood-boarding!) and lows (finessing the budget—again) that come with creating the home you’ve always wanted, whether that involves a top-to-bottom remodel or a rental kitchen facelift. Sign up for our newsletter so you don’t miss a thing. In this four-part series, Zio & Sons’s Anthony D’Argenzio walks us through what it really takes to completely restore an old home from top to bottom.
Everyone knows that for a large-scale remodel, you’ve got to have a clear vision of exactly what the finished product will look like—you don’t go into a gut reno without a plan. Where things get murky is the in-between: Tearing down ugly wallpaper, picking the right finishes, and generally making a space livable is where the real headaches start. That’s where Zio and Sons’s Anthony D’Argenzio comes in. This month, we’re following his renovation of a 1915 building in Hudson, New York (did you catch his planning tips?), and today we’re focusing on all things restoration and paint.
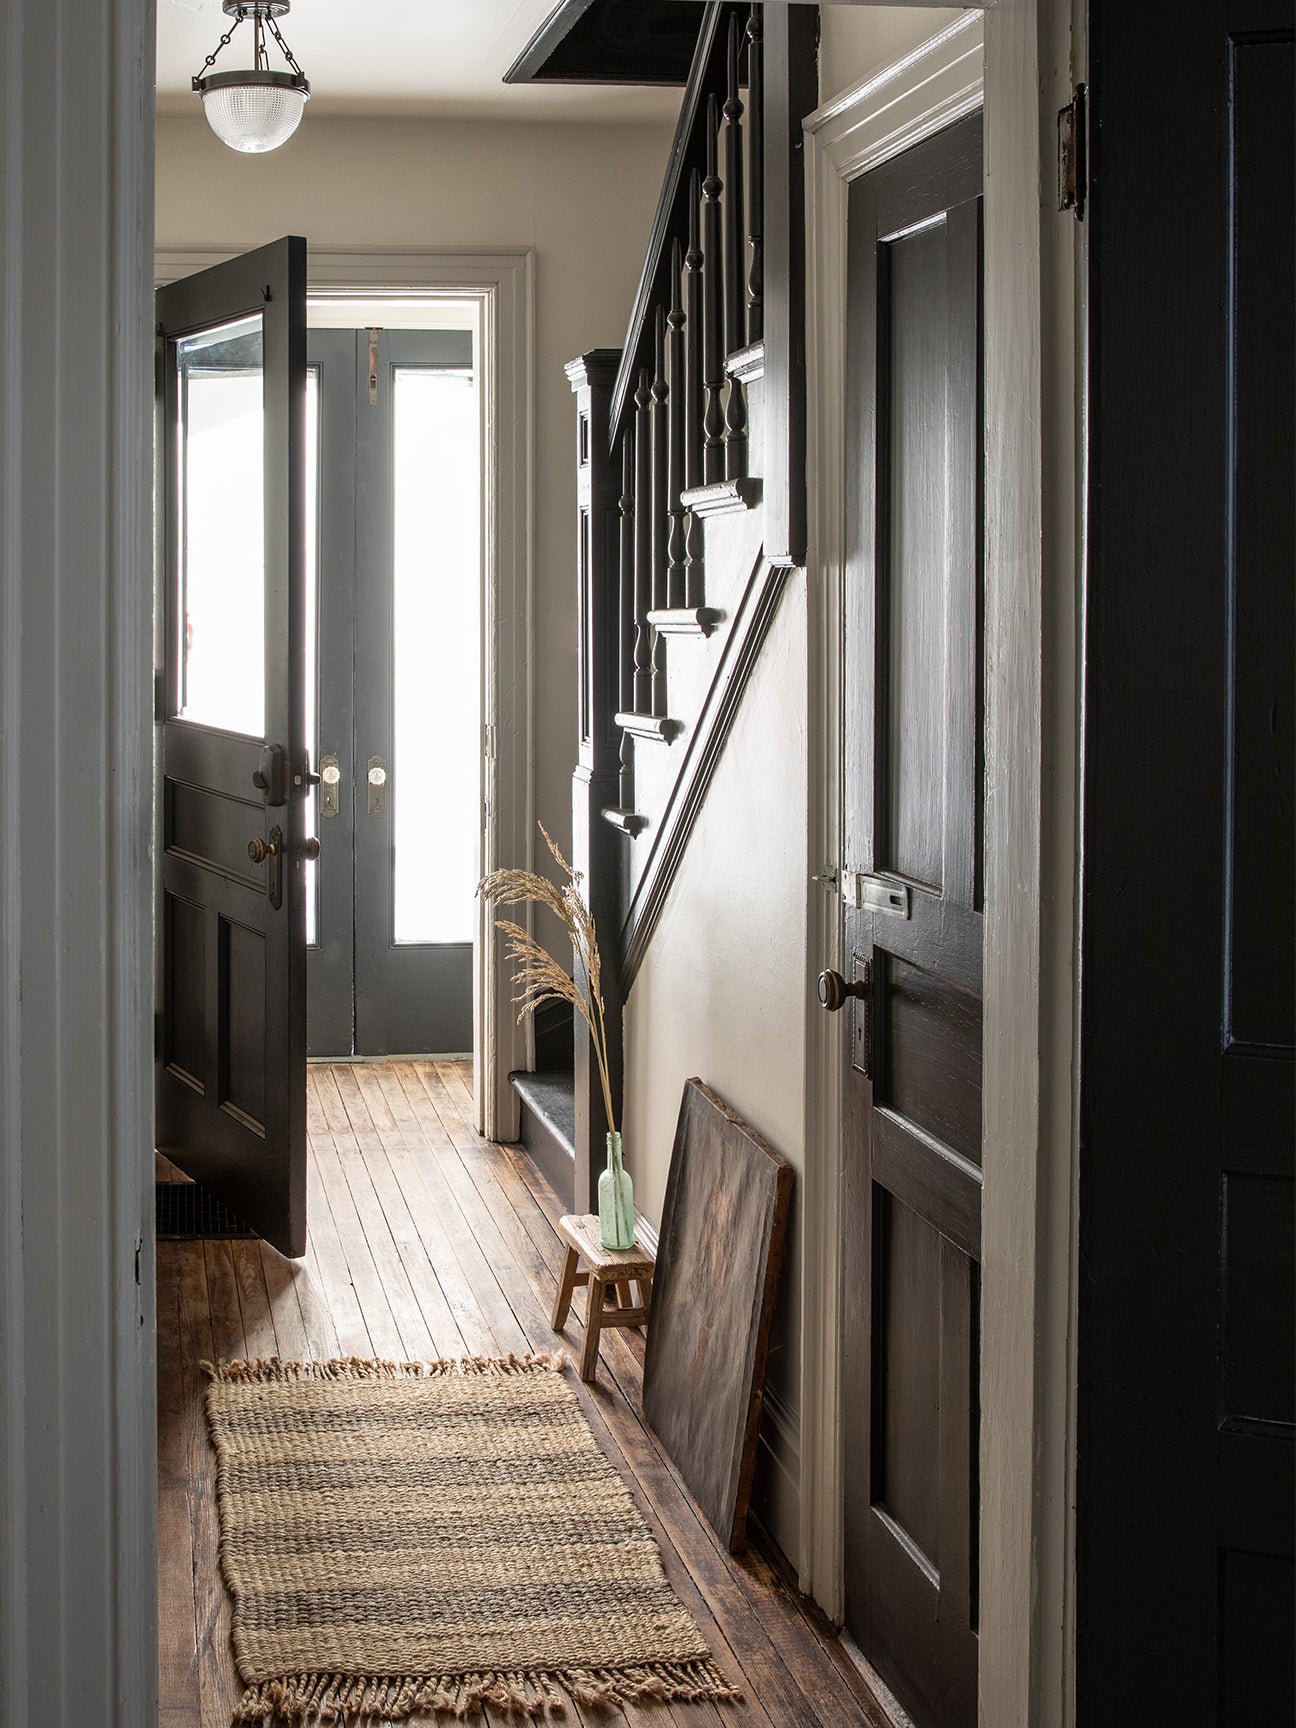
“I wanted a calming palette to make it feel really airy,” D’Argenzio says. Black accents—like on the fans and window trim—add bold contrast, though thanks to the original woodwork and architectural elements, the result doesn’t feel too modern. Here’s how he navigated the nitty-gritty and turned the living areas into something totally fresh:
Assemble the Right Team
Especially if your project is in an area you’re unfamiliar with, pick tradespeople who are local. “They know the area, they know the vendors, and they know how to find different materials,” D’Argenzio explains. Trust us, when it comes time to navigate a city’s unique regulations, you’ll be thankful you have someone with insider knowledge.
Don’t Let Permits Hold You Back
Make the most of your time by tackling small projects while you wait for paperwork to be approved. In D’Argenzio’s case, he spent those days taking down wallpaper with a steamer. “It’s more labor-intensive, but you’ll get a better-looking wall,” he explains. “It was kind of like removing all the layers of time and history.” After every surface has been steamed, cleaned, and primed, you’re ready to paint.
Set Up Boundaries
You know that one feature that made you fall in love with the house? Chances are, your contractor won’t share that same passion. Before anyone comes in to start the restoration process, D’Argenzio recommends making a checklist of all the details you want to keep and putting blue painter’s tape over them so they won’t get sucked into the demo.
Even if you don’t end up using the pieces in that particular project, you never know when they’ll come in handy, says D’Argenzio: “In the kitchen, there were old sinks that I didn’t end up needing for this exact renovation, but I saved them. You can also donate them to salvage yards or Habitat for Humanity ReStore—it doesn’t need to go in a landfill.”
Ask Yourself: Replace or Restore?
“Sometimes, restoring something might outweigh the cost of just replacing it,” says D’Argenzio, though his first inclination is always to try and revive an item rather than just tossing it. In this home, he left a majority of the trim, restored 35 percent of the windows, and kept most of the original flooring by painting over the hardwood in the living areas that looked dated. “It’s an over-100-year-old house—you don’t need to have perfect finishes. I like to embrace the imperfections,” he adds.
Fix the Floors Last
All of the home’s doors, millwork, and trim were thoroughly cleaned, repaired as needed, and lightly sanded before so much as a drop of paint went their way. D’Argenzio suggests tackling floors last (with contractors coming through and scuffing them up, it will be a pain to keep cleaning them) and making sure you lightly sand them to remove old varnish. Then a special primer and two coats of paint will take care of the rest.
Overtest Your Paint
Speaking of paint, D’Argenzio says choosing it was one of the most time-consuming parts of the whole process. For starters, he tested at least eight shades of white before coming up with a winning formula: one neutral hue for the trim (dove gray), another for the walls (white), and one more for accents (black). He credits a Farrow & Ball Color Consultancy (check the company’s site to make sure it’s available in your area) with helping him pick the finalists.
As you’re choosing colors, think about how the various tones will live in the space over time. For example, the home’s dark accents (including the stairs) look fantastic, but he found that they presented their own set of problems: “I didn’t realize that black shows so much dust!” he says.
Don’t Forget About Sheens
One you have your shades finalized, take some time to think about finishes, too. “If it’s a rental, I’ll go with an eggshell, because it cleans easier,” says the designer. “Matte looks better, but it’s not as durable.” As a general rule, avoid anything too glossy on walls or ceilings (they reflect light!) and choose a semigloss or eggshell sheen for all doors and woodwork.
Respect the History of the Property
No one books a rental in upstate New York because they’re craving sleek modernity; chances are, they’re after some cozy, rustic charm—think: old floors and architectural light fixtures. “I incorporated vintage and warmer pieces that have a bit of history to embody that lifestyle,” says D’Argenzio. If your house underwent an unfortunate renovation that left it sans charm, don’t worry: You can fix it. “Try to bring that feeling back by using salvaged pieces,” he advises. His go-to is Rejuvenation’s antiques section, which includes everything from hardware to furniture. He combs through the pages until he finds something that looks like it could have come from the original home, proving that it’s okay to fake it till you make it, as long as you fake it right.
See more renovation stories: The Clever (Free!) Tool a Reno Expert Uses to Plan Every Project I Totally Transformed My NYC Rental Kitchen for $7,500 I Spent 5 Years Painstakingly Restoring My 1850s Victorian


