We may earn revenue from the products available on this page and participate in affiliate programs.
My shower and I have been on bad terms since day one. The first time I ever went to turn it on—mind you, tired and sweaty from moving on a summer day in New York City—the temperature handle flew right off. Even simply standing in it is a nuisance: It’s technically a bath-shower combo and the spout faces the long side of the tub wall, meaning I have to awkwardly shuffle from side to side to get under the water. The existing showerhead is as no frills as they come—H2O comes out of the fixed piece in a steady, straight stream. This was a relationship I knew needed mending if I ever wanted to zen out in my space, but figuring out how to do it in a way that wouldn’t cost me my security deposit was the challenge.
Chic, smart showerheads seem to be the It bathroom purchase these days. In the past three years alone, Hai came out with its Bluetooth-enabled product, which is designed to help you cut down on your water consumption; Jolie set out to repair dry skin and hair with one that filters out contaminants; and Kohler released an oblong version that doesn’t leave your shoulders out in the cold. In my search for rental-friendly options, I discovered Sproos! on Instagram. The newish DTC brand (it launched in 2020) appeared to check all the correct boxes: It was good-looking, offered three spray settings, and could be installed and removed without damaging my tiled walls. Here’s what I thought when I tested out the buzzy home improvement.
The Sproos! Shower
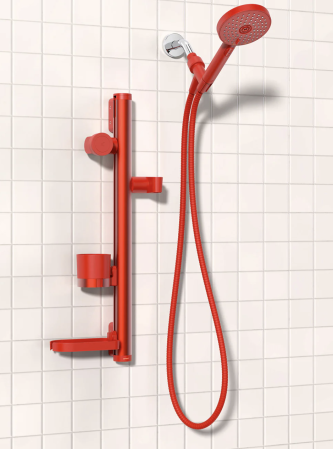
Unlike some of the more techy showerheads on the market, Sproos! products prioritize ease of installation, customizable storage, and aesthetically pleasing colors. There are four models to choose from now, plus seven different hues. Sproos! recently added pink, green, and blue for its straightforward hand shower option. The fresh colors are available for pre-order now and will begin shipping on August 8.
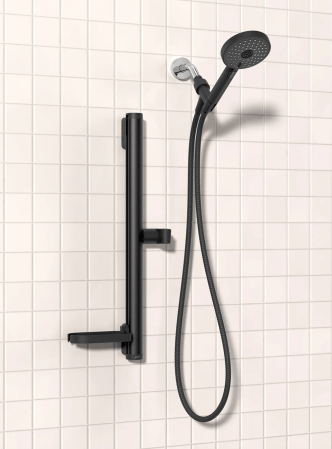
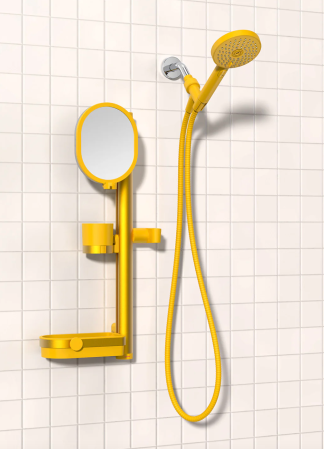
I opted for the Minimalist in black, which retails for $163 and features a hand shower on an adjustable slide bar and a soap dish with drain holes. Then there’s the Stayin’ Connected ($211), which tacks on a magnetic phone dock and cup holder (ideal for multitaskers who want to watch Netflix and drink a White Claw while conditioning, I suppose). The Lookin’ Good ($235) is a riff on that, but instead of a place to prop your phone, it comes with an anti-fog mirror and a more substantial shelf that can support large bottles.
A bonus for the eco-minded out there: The Sproos! showerheads are free of chrome plating, a common element that gives most a metallic appearance. The process of manufacturing pieces with this material is highly toxic, both for the environment and factory workers. These are instead made out of a combination of a premium silicone (the nozzles) and high-grade anodized aluminum (used for the shower rail), and the colors are baked into an injection-molded ABS plastic, similar to that used to make Legos. There is also a new filter system you can tack onto your showerhead, which traps rust, silt, and other large particles and eliminates chlorine, chloramine, and heavy metals.
The Setup

Everything I needed to get my system up and running arrived in two lightweight cardboard boxes. As I began opening them, I quickly realized that I didn’t have to stress about misplacing the instruction manual: There isn’t one. All of the steps are written inside the packaging, alongside the tools and pieces they coordinate with. There are also QR codes for each part that will take you to a short video tutorial (I relied on these heavily, given I’m more of a visual learner). In addition to the primary components of the shower system, my boxes included: pliers, a reusable silicone pad, biodegradable gloves, screws and Allen keys, and the brand’s glue-mounting technology.
The whole assembly is essentially broken down into three steps. The first should be easy for most (remove your old showerhead!), but, honestly, this took me a few minutes to pull off because whoever tightened the old one did a really good job. The silicone pad (it sort of looks like one you’d use to open up a jar of pickles) is especially handy here, as you are meant to wrap it around the old fixture before unscrewing it with the metal pliers. This ensures the old one looks as good as new if you ever want to reattach it.

The next phase: screwing the connecting bracket, the 70-inch-long hose, and showerhead to the spout and to one another. Connecting them was a breeze, but once I turned on my water to test out how solid it was (per the instructions), I spotted a leak at the top. After toying with the tightness for a few minutes, I resorted to the company’s online help chat. Around an hour later, someone got back to me. I sent them a few photos of my hose and they noticed that a small rubber buffer was missing from one of the ends. Mystery solved: The bit had come loose and was floating around my box. I popped it back in and—voilà!—flow.
I was most nervous about the final step (gluing the bracket to my subway tile–clad wall), but it turned out to be straightforward once I figured out where I wanted to place it. The adhesive that Sproos! gives you isn’t your average Gorilla Glue. The superstrong, very gooey product (you squeeze the tube inside the hardware’s holes until you see it ooze out) is made in partnership with a German brand called Tesa, and it’s so strong that it allows for drill-free installation.
The Removal
After enjoying my Sproos! for around a year and a half, I decided to move apartments. Admittedly, I dreaded taking it down, fearful of any damage it might leave behind and what that would mean for my security deposit. The showerhead hose was luckily easy-peasy to unscrew, but when it came to getting the wall-mount off, I had to resort to yanking the bar. (My mistake was losing the small Allen key that came in the original package, as I could have used it to detach the bar from the attachment glued points.)
After a few tugs, it popped off and there was noticeable glue residue left behind. The tile, however, appeared unscathed. With a plastic putty knife and piece of sandpaper, it came off in seconds—phew! While I assumed my Sproos! was a total loss at that point, I then uncovered the company’s moving kit, which allows you to reinstall the shower bar in a new home.
The Verdict

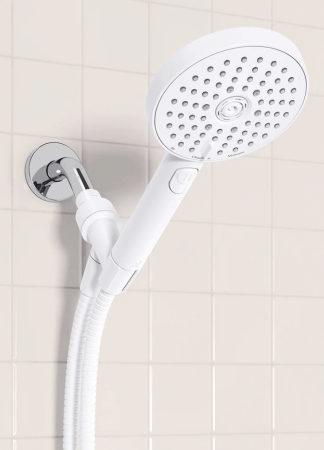
Aside from the small leak crisis, the only other part of the project that slowed me down was the fact that the glue requires 12 hours of drying time, meaning I had to be strategic about what day and time I started this DIY (in hindsight, I recommend doing it late in the evening if you are a morning-shower person). While the small soap dish was handy as a prop for my face wash, the biggest perk of the whole upgrade was the simplest one: the large round head itself. I no longer felt like I was bathing under a hose.


