We may earn revenue from the products available on this page and participate in affiliate programs.

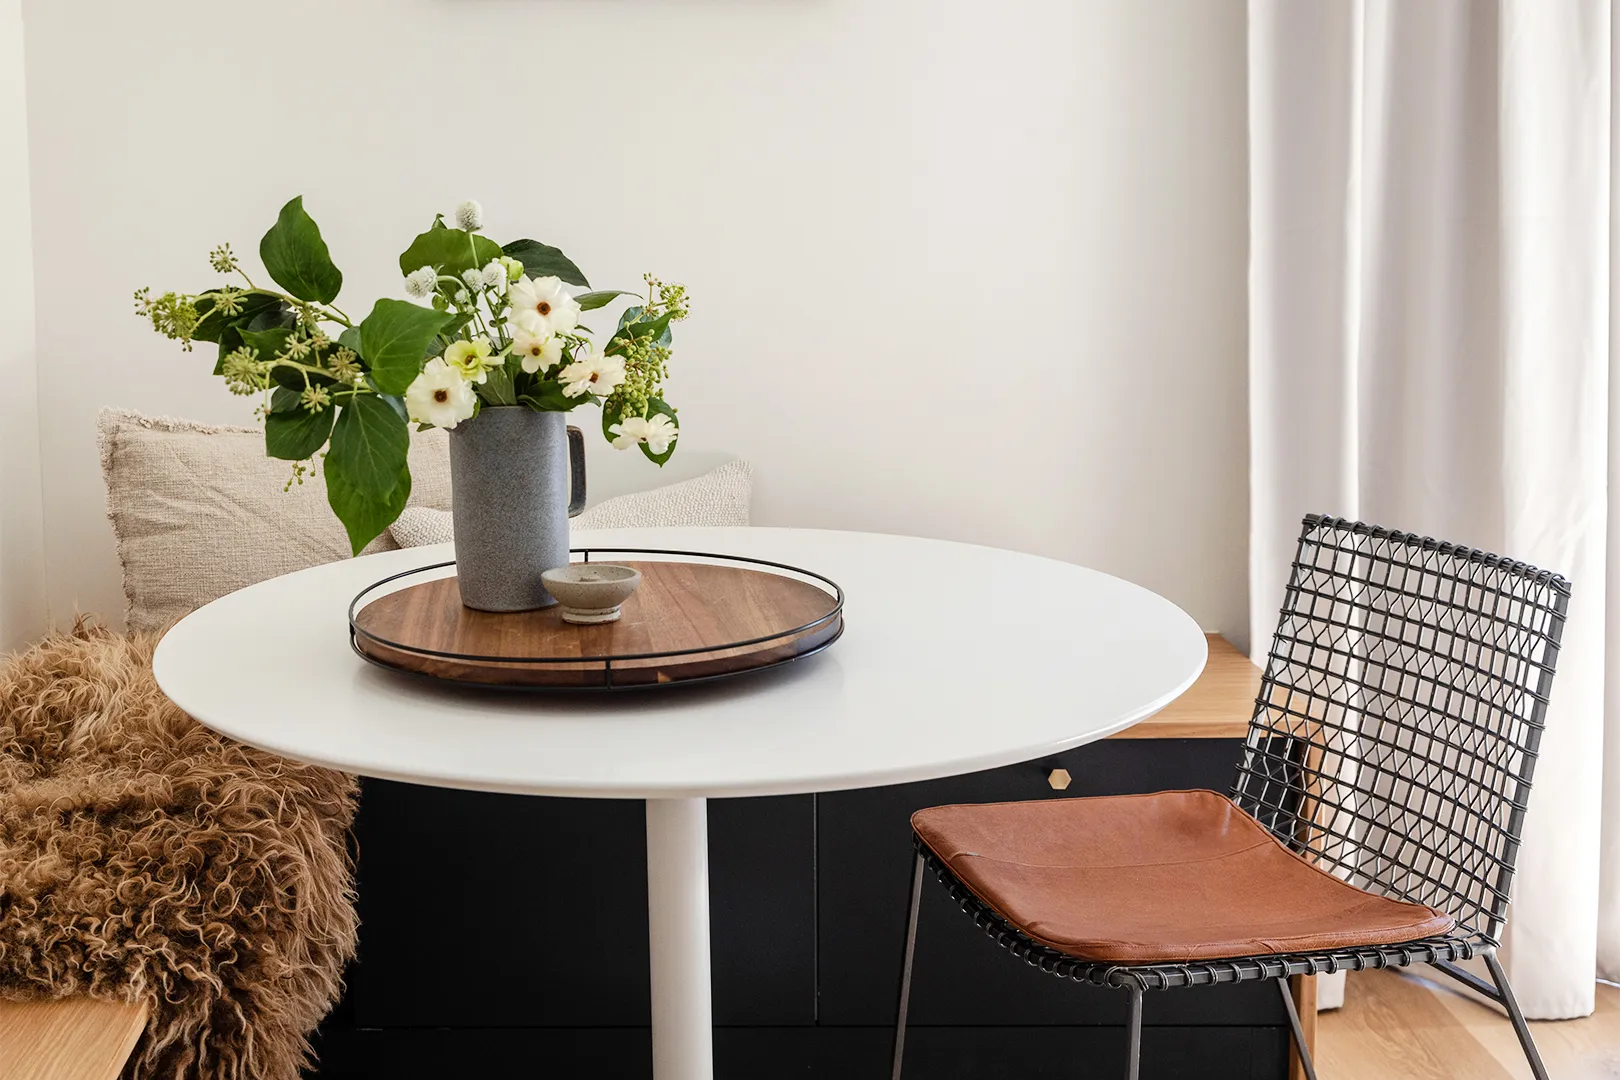
We’ve seen hundreds of IKEA Besta hacks, and most people stick to using it as a traditional media cabinet. Kendra Joseph, the Bay Area–based designer and founder of Rise Up Home, had other plans for her two base units. Instead of a credenza, she turned them into a banquette.
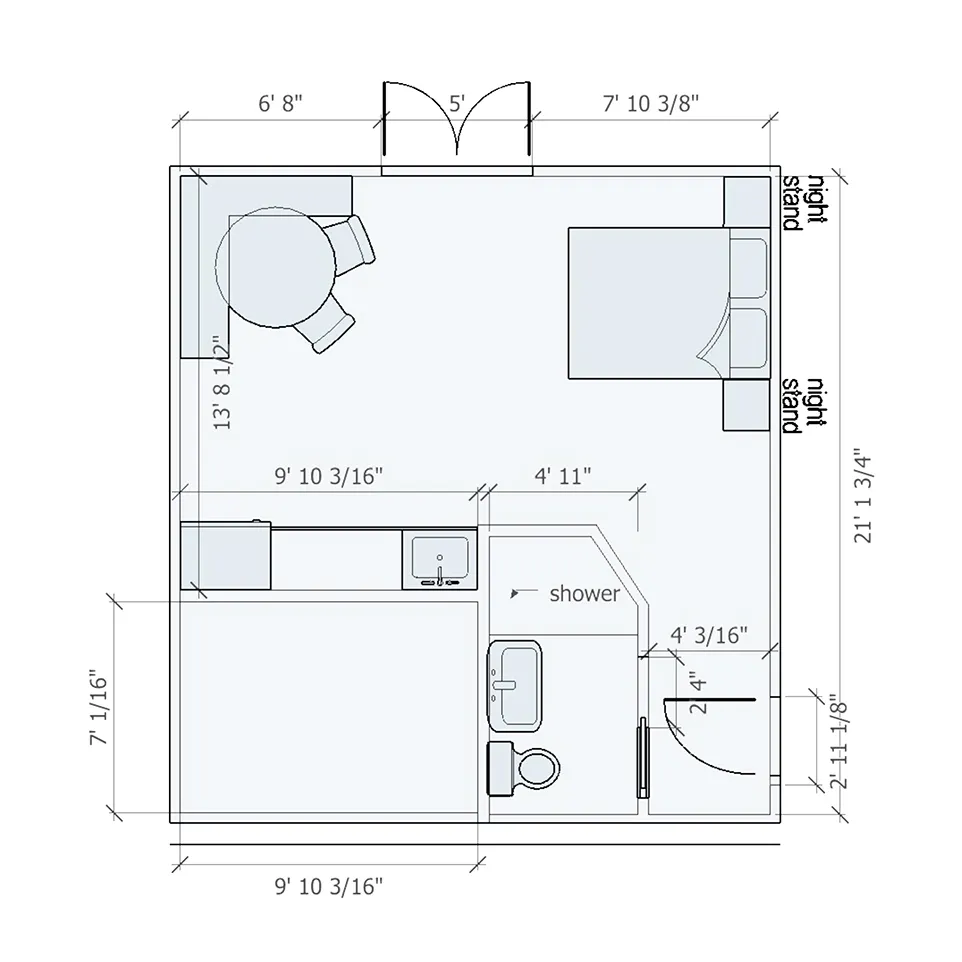
Since they wanted to comfortably host friends and extended family from back East, Joseph and her husband decided to convert their roughly 400-square-foot detached two-car garage into a guesthouse complete with a bathroom, bedroom, and kitchenette. Finding ways to incorporate storage without soaking up precious real estate was key. “The bench was ideal in allowing us to do that,” she shares. Measuring just under 16 inches deep, the pieces proved to be the perfect fit for seating guests and simultaneously hiding blankets, board games, and serving platters.
In total, they spent between $250 and $300 on the whole thing (the pair saved money by using some materials they had on hand such as the lumber and screws, in addition to the tools). “The biggest costs were the IKEA materials and the wood for the waterfall top,” notes Joseph. Here’s how they made the basic white cupboards look a little less Besta-y and a little more benchlike.
The Supplies

- 2 Besta drawer base units with soft closing drawers
- Impact drill
- Screwdriver
- Hammer
- Wood screws
- Pressure-treated or redwood 2-by-4 lumber
- Laser level
- Torpedo level
- Measuring tape
- Table saw and clamps
- Paint
- Paint sprayer
- Wood glue
Step 1: We Have Liftoff
After purchasing the Besta units from IKEA, Joseph and her husband assembled the products per the retailer’s directions. Then with an impact drill, they constructed a rectangular frame to fit perfectly underneath the boxes, adding cross beams for support, out of redwood 2-by-4s that they salvaged during the garage demo process. In between checking the evenness of the frames with a traditional torpedo laser, the pair also used a laser level to make sure the seating height on both sides was the same.
Step 2: Safe and Sound
After connecting the two base frames to each other with wood screws, they screwed the entire structure to the wall with base plates. Filling the corner where the two benches meet with a support box (also constructed out of 2-by-4s) allows guests to sit comfortably there too. They swathed the entire thing in Benjamin Moore’s Midnight using a paint sprayer so it matched the kitchenette cabinets.
Step 3: Bench Warmer

Joseph and her husband sourced the maple-wood boards for the top and sides of the banquette from their local lumberyard, Aura Hardwoods, and cut them according to the dimensions of the existing structure. The key to the perfect waterfall is a seamless mitre-edge joint, which comes down to preparation: The pair measured the planks several times before making any cuts with their table saw. “We watched a lot of tutorials on YouTube,” notes Joseph. “Lumber can be expensive, so it’s best to put in the time to ensure no errors, or you can hire a carpenter if you don’t feel comfortable.” After applying wood glue to the undersides, they nudged the boards into place with a hammer, making them as snug as possible. Once dry, it was entertaining ready.