We may earn revenue from the products available on this page and participate in affiliate programs.
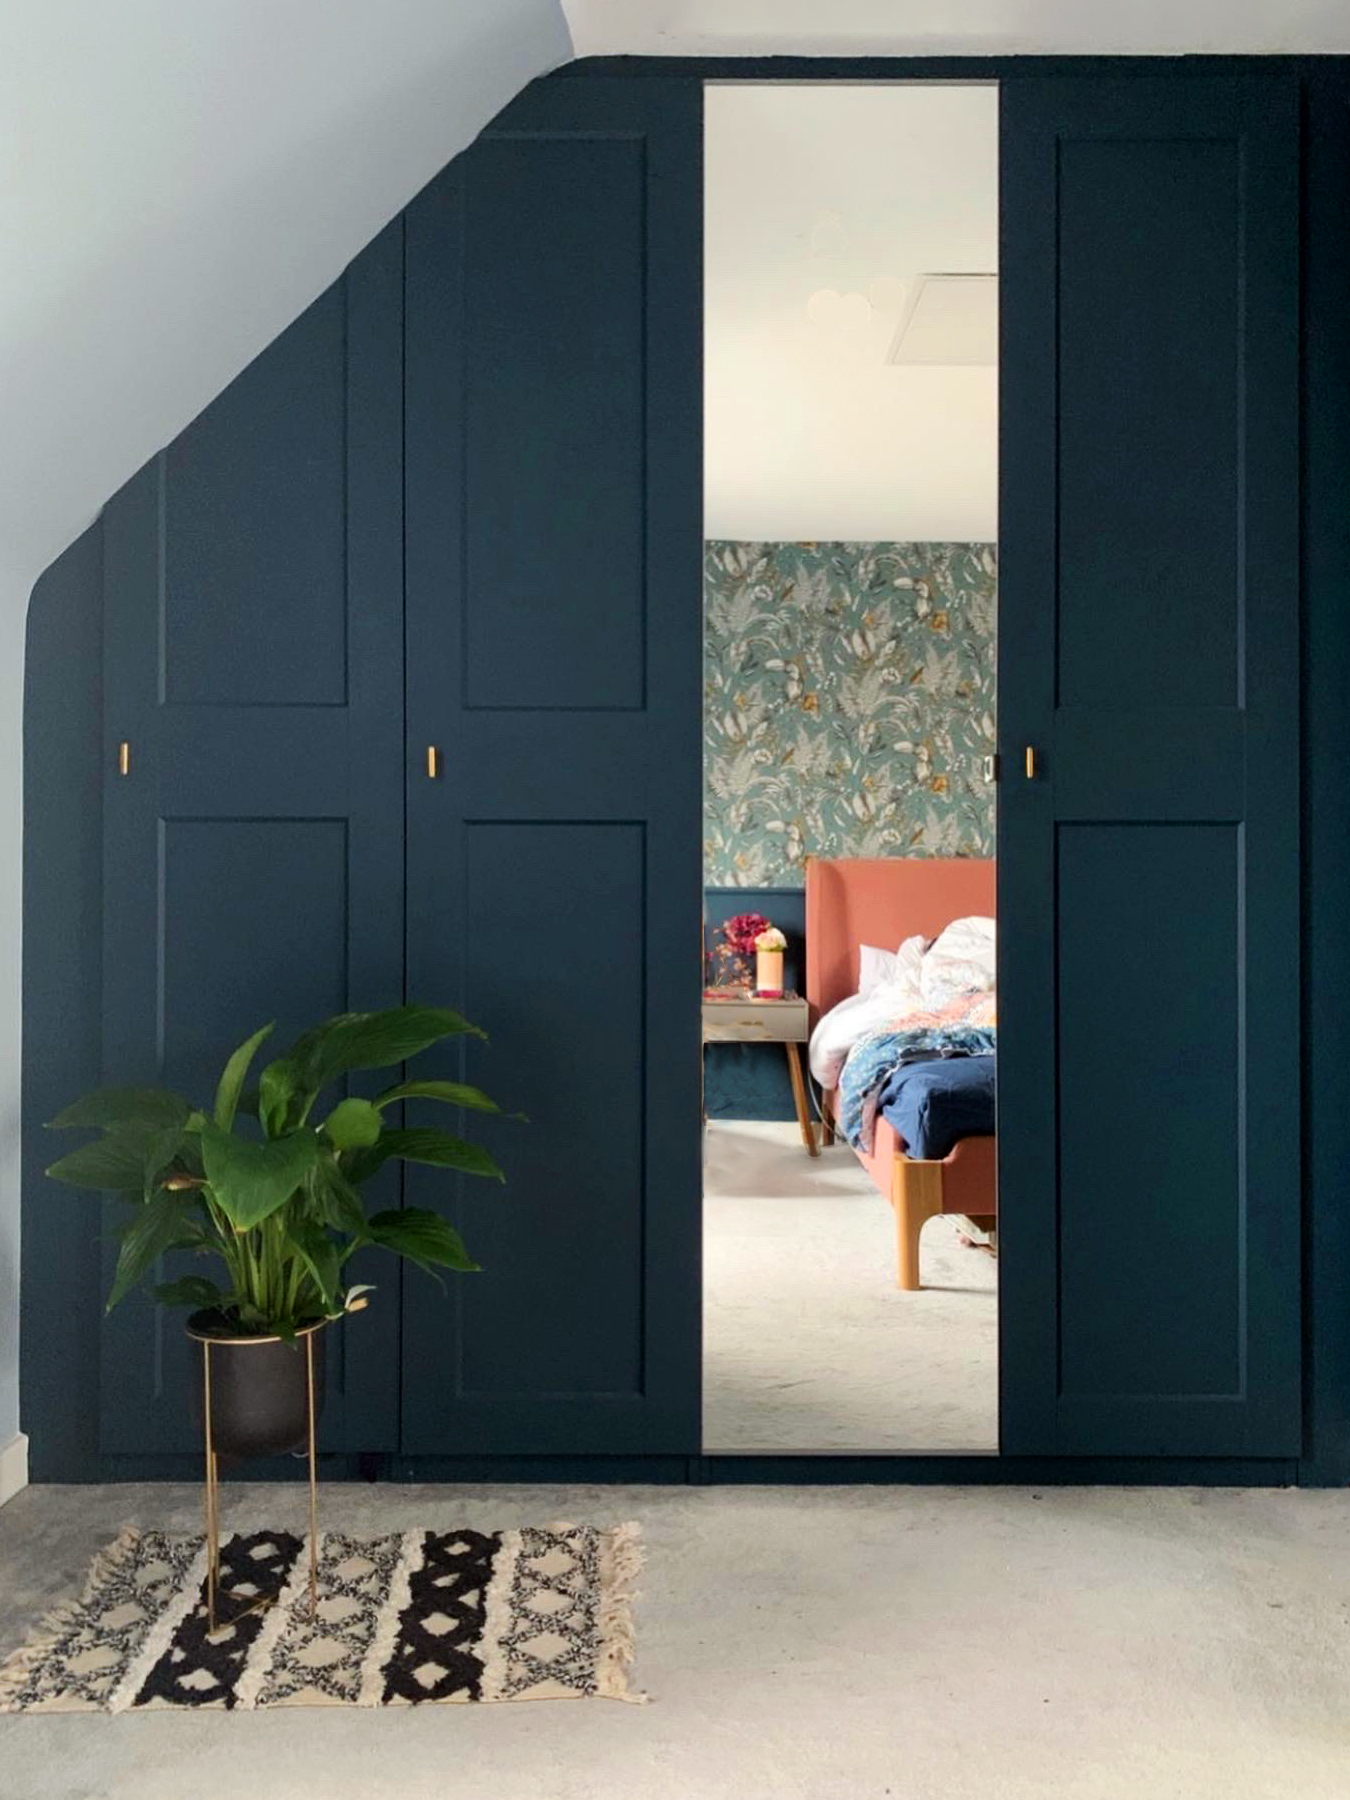
As soon as Farwa Moledina laid eyes on her now-bedroom, she knew one thing for sure: Someday, it would have to include bespoke wardrobes. Over time, she made many updates—blue botanical wallpaper, a pink headboard, a little reading nook typically commandeered by her cat, Luna—but the alcove remained empty, save for a couple of clothing rails she used as a temporary fix. Finally, after five months of living there, she was finally ready to commit to custom—but she hit a budget snafu. The quoted price for the project was just too much.
Moledina and her husband turned to none other than IKEA for a solution and ultimately landed on the Pax System. “We hadn’t done much DIY,” explains Moledina, a contemporary artist, “but it helps that one of us is good with numbers and measurements and the other is good with a brush!”
In the end, the whole thing cost them $858—about six times less than what they would have paid for a handcrafted fixture. The wardrobe, a deep blue with a single mirror panel and minimal brass hardware, is simple, but in the tiny space, it packs a punch. Here’s how Moledina made it happen:
The Supplies
- Pax system
- Timber to size, for the frame
- Jigsaw
- Screwdriver
- Level
- Drill
- Filler
- Primer
- Paint roller
- Paintbrushes
- Cabinet pulls

Step 1: Prep the Area
Measure your nook to determine how many Pax cabinets you’ll need. Make sure you’ll have equal gaps on either side of the wardrobe for the frame; there will also be empty space at the top to cover up. Once you’ve got your numbers down, source wood that’s the right width and height for those areas. “Measure twice (or thrice); cut once!” says Moledina.


Step 2: Build the Wardrobe
Attach the first built Pax cabinets to the edge of the frame closest to the wall using the supplied 90-degree brackets. (Remember to leave space for the frame for the right side wall.) Repeat this until you’ve filled out your empty corner, waiting until everything is in place before pushing the wardrobe fully back against the wall.
If, like Moledina, you’ve got a sloped ceiling, you’ll also have to trim down the closet to size—the top will need to be attached at the highest possible point. She used an angle cutter to measure the slope exactly. “Cut it using a jigsaw, and then use sandpaper to get the angle just right.”

Step 3: Finish the Details
Once your closets are in, affix the wood piece cut for the top gap of the wardrobe so there’s no space between your Pax and the ceiling. Seal the edges using filler or caulk. Do the same for each side.
Step 4: Add the Decorative Touches
Drill holes for your pulls before painting anything. Then, prime the doors and wood using a shellac primer. Once that’s dry, it’s time to paint; though be careful to go in the right order: “If we were to do this again, we would probably paint the doors first to really get into the edges,” says Moledina. She recommends a minimum of two coats to get the perfect opaque look.
If your new closet is in a spot where it might get scuffed, protect from nicks and scratches with an oil-based furniture finish or a coat of varnish. Top it all off with your hardware of choice and get ready to give your clothes the home they deserve.