We may earn revenue from the products available on this page and participate in affiliate programs.
When Esin Prodromou and her family moved into their two-story Edwardian outside of London in 2018, the photographer and blogger immediately began planning the renovations. The living room, bathroom, and hallway were all on track for a makeover—until COVID-19 hit. All construction was put on hold until life normalized. As days at home turned into weeks and eventually months, Prodromou started to realize that waiting around for the “perfect moment” wasn’t realistic. It was time to take matters into her own hands, beginning with the kitchen.
With the pandemic also cutting into the family’s finances, they knew it would take at least two years to renovate the downstairs the way they really wanted to. “Living in the 1980s for another two years while saving up didn’t appeal to me,” says Prodromou. “So my answer to everything was paint, spray, and panel.” That’s how, with limited tools and approximately $400, she created a virtually unrecognizable kitchen defined by sleek lines and warm wood accents. If you’re looking for a temporary, budget-friendly solution to pandemic-ruined home-improvement plans, take a page out of Prodromou’s book and get creative with materials. Here’s how she fell in love with her kitchen again.
Paint the Cabinets…


The cupboards needed a major refresh, but replacing the doors wasn’t financially feasible with a more robust renovation still around the corner. “I painted 32 cabinets with only two tubs of kitchen cabinet paint and primer,” notes Prodromou. Her pro tip? Always remove the doors and clean them thoroughly with sugar soap (equivalent to TSP in the U.S.) to remove any grease stains or marks. Then when it’s time to paint, lay the cabinet doors flat to avoid drip marks. Prodromou used a brush for the first coat, then a roller to smooth out the stroke lines.
…And the Tiles
“Tiles are tough,” Prodromou points out. Originally theirs had a pattern of cattail grass, most likely mirroring the home’s nearby river, and while sweet, the design didn’t fit into Prodromou’s contemporary vision. She used a can of V33 white satin tile paint (it’s waterproof, so it can handle splashes and spills) and a mini paintbrush to cover the grout and corners, and a mini roller brush for the tiles themselves. Don’t forget gloves, Prodromou advises: “Tile paint is extremely hard to remove!”
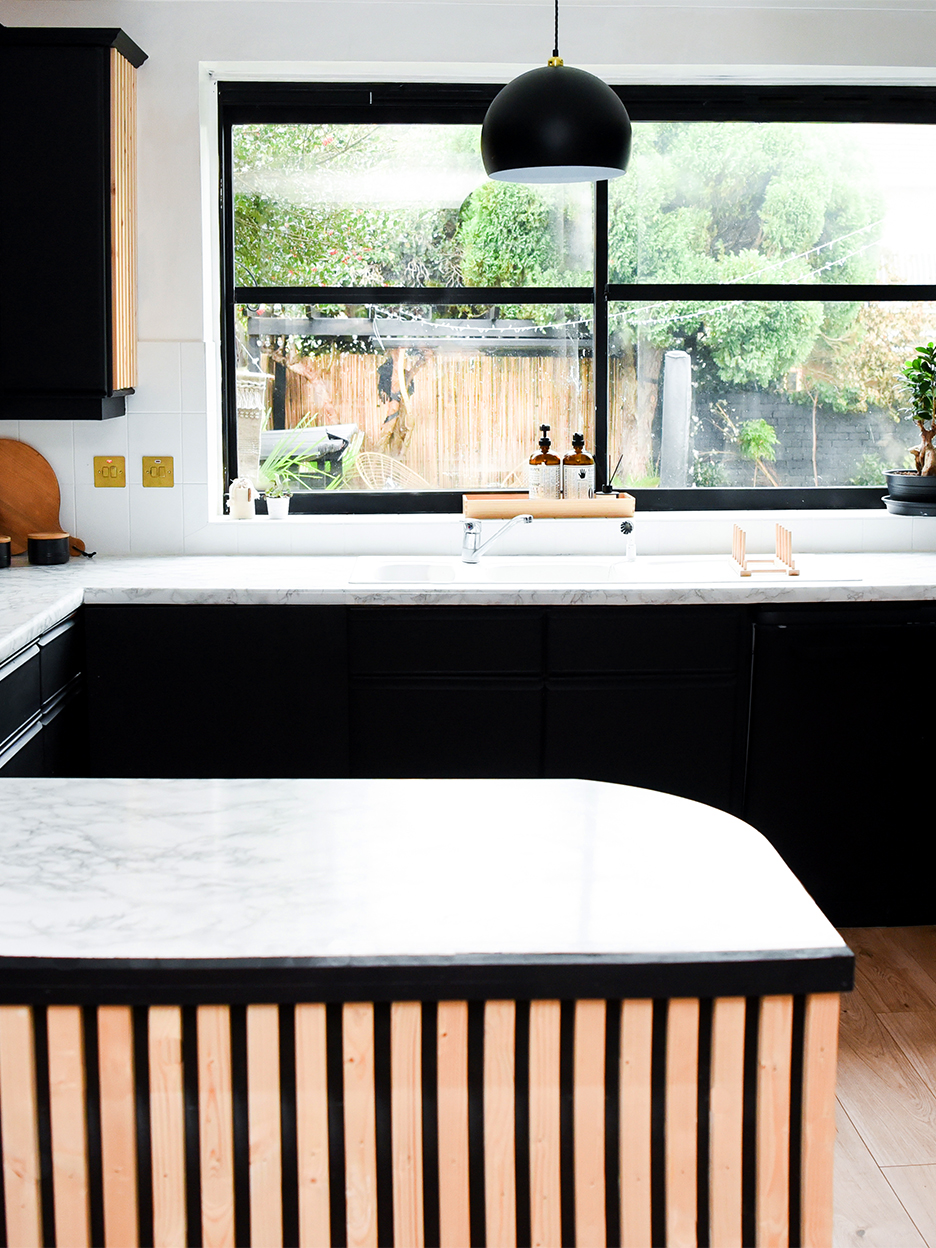
Integrate Your Appliances (Sort Of)


A limited budget made Prodromou’s dream of hidden appliances feel next to impossible. An unlikely tool saved her vision: spray paint. “I was extremely worried at first,” she admits. But despite her apprehension, two cans of black multipurpose spray paint and a bit of faith transformed the worn-out refrigerator and dishwasher into sleek, matte-looking appliances that match the cabinets. Even the stainless steel sink and window frames got the treatment. While Prodromou doesn’t recommend spray-painting the fixture for permanent use, it will certainly do the trick for a short period (as long as you don’t mind touching it up from time to time).
Give Some Love to Overlooked Surfaces
“When I looked around, I needed more. It lacked something,” says Prodromou. There was no singular design statement. As she stared at the kitchen island’s empty base and the wall behind, inspiration hit. With a bit of help from a nail gun and glue, Prodromou installed wood furring strips for natural texture. (She recommends using extra nails even if you think the glue is sufficient to avoid peeling later.)
Add Finishing Touches

When it came to the dark, laminated worktop, Prodromou knew it needed a revamp. She turned to a marble-patterned, adhesive wallpaper that she used to cover the countertop. The original kitchen sported vinyl flooring, which had a penchant for gathering dirt and dust. “I bleached, scrubbed, and mopped that floor several times, but nothing made it look or seem cleaner. It had to go,” says Prodromou. Instead of ripping it up, she simply placed click-lock wood flooring on top. The project sounds simpler than it was: Because she forgot to leave a gap underneath the wood ribbing on the island, the planks were a tight squeeze. Learn from Prodromou’s oversight and think of your project as a whole from the beginning, she says. The family will never forget the many hours spent sawing down the panels through tears of regret—and laughter.
Our Winter Renovation issue is here! Subscribe now to step inside Leanne Ford’s latest project—her own historic Pennsylvania home. Plus discover our new rules of reno.