We may earn revenue from the products available on this page and participate in affiliate programs.
British designer Hannah Drakeford’s South London one-bedroom apartment is full of crafty home projects, from upcycled IKEA storage to a geometric hallway mural, but that wasn’t always the case. When she moved into the new-build Deptford flat in 2017 “it had zero character and everything was beige,” she recalls. While the bathroom was decent, it resembled something you’d find at a Holiday Inn, with a lackluster palette, wood laminate countertops, and no natural light. “It wasn’t me at all,” she adds.


In an effort to pack the same colorful punch showcased in the rest of her space, she looked to a trip to Marrakech for inspiration. “I went a few years ago with a friend, and we stayed in this amazing riad with Moroccan tile everywhere. The bathroom was actually black and white, but the tile had circular motifs,” she says. With many photo references in hand, she set out to uplift the basic and boring bathroom for $400 with essentially just paint.
Start With a Blank Canvas

Before any primer was poured, she carefully laid out a 3D model of the room in SketchUp. “I wanted to make sure I wouldn’t overbuy paint but still had enough to cover all the surfaces, as I was on a tight budget for this project,” she says. Drakeford also did plenty of research and read reviews to find paint that would adhere to a range of surfaces, finally landing on two coats of V33 Renovation Floor and Stair Paint, a durable formula for high-traffic areas, for the floor tile, laminate countertops, shower screen metalwork, and radiator. She then made it waterproof by adding one coat of Zinsser Bullseye 123, a primer she regularly uses for her furniture DIYs, on top. “The room needed lightening up, as it’s in the middle of the apartment and there are no windows,” she says. “The white paint helps light reflect off the walls and makes it feel bigger.”
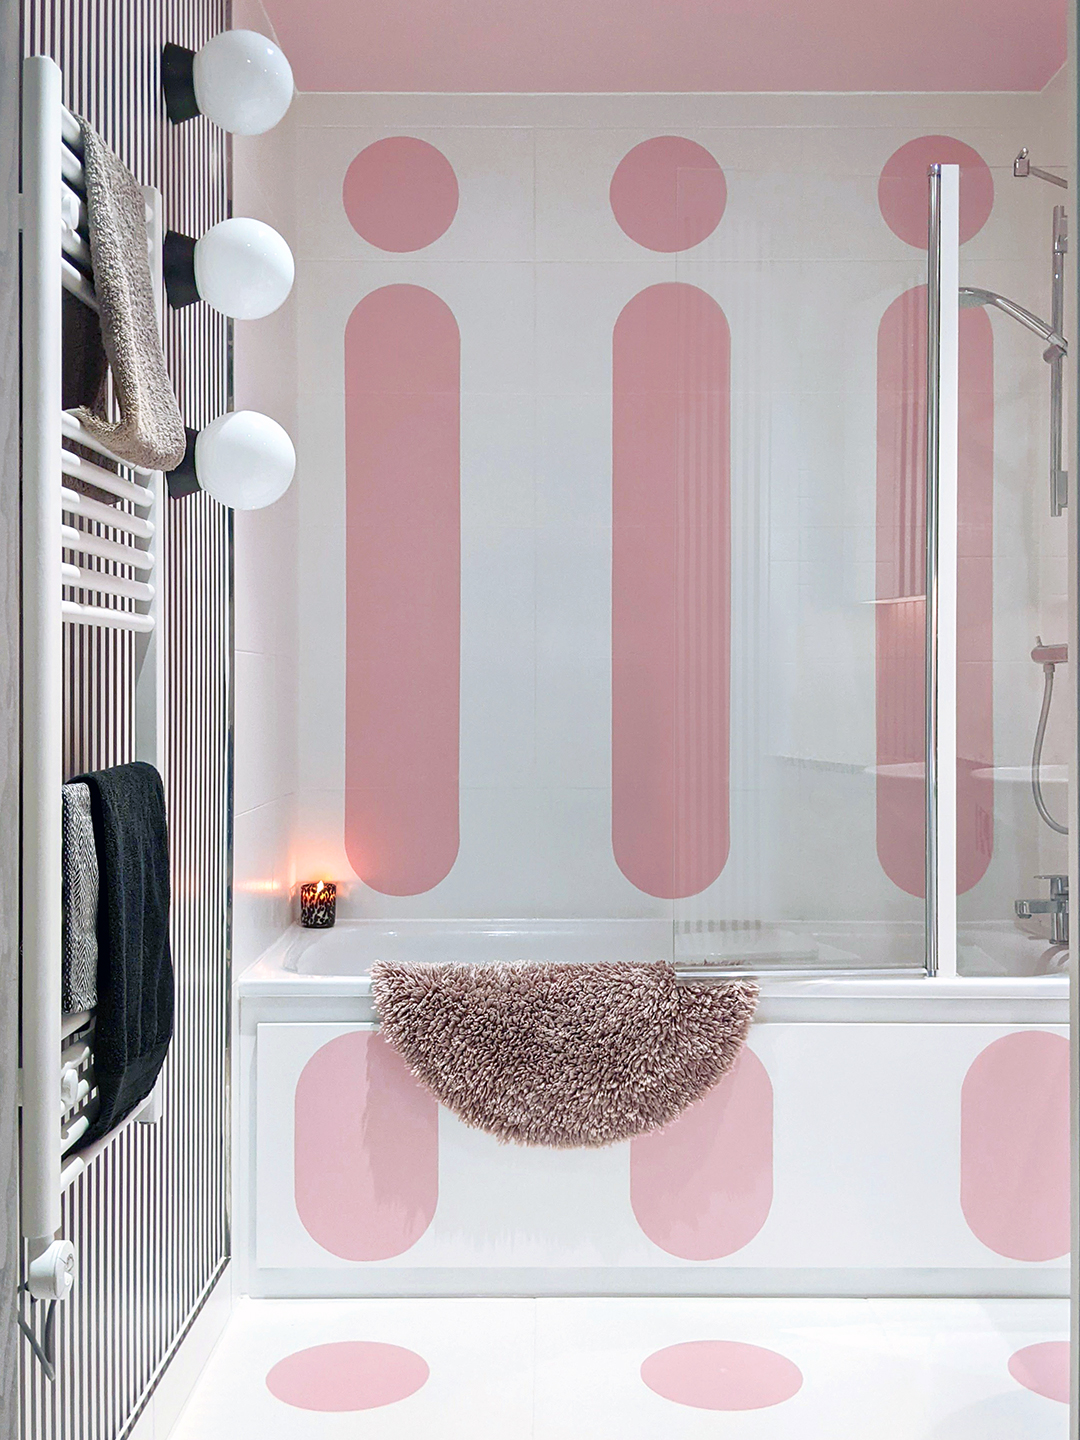
Get Creative With Paint
There are plenty of circles, triangles, and squares painted elsewhere in Drakeford’s apartment, so it’s only fitting that ovals drawn in Lick’s Pink 03, a matte bubblegum hue, come to play in the bathroom, stretching from the shower wall to the floor. “The pink paint was a regular wall paint, but I sealed it with this clear varnish so that it’s waterproof and doesn’t discolor,” she says.
Try Out Faux Terrazzo

Terrazzo is Drakeford’s dream countertop material, but in order to keep things on budget, she decided to upgrade the wood laminate with hand-painted pebbles. “I primed it first, then went in with black wall paint and two coats of watered-down white paint with a little brush to create the stone effect,” she says. While it was free-handed, she used an image saved on Pinterest as a reference. She then sealed it with silicone around the sink. While Drakeford loves how it turned out, it was a project she’d never do again, as it took two full days of detailing. “I’m still a little traumatized from it,” she says.
Add Character With Paneling

Another cost-saving hack: purchasing preprimed wood paneling for the vanity wall from B&Q, the U.K. equivalent to Home Depot. After measuring the height between the counter and ceiling and cutting the boards to size, she first applied them using a removable puttylike material called Blue-Tack so she could get a rough idea of her desired spacing. Then she put them down for real with Diall Grab Adhesive. As with the shapes, she went for the same muted blush tone and covered it in varnish to make it waterproof.
Keep on DIYing

The bathroom was the last room in the home the designer put her mark on. “I was intimidated by the scale of the project, and it was the first full bathroom renovation I’ve done,” she says. It all came down to precise planning and ultimately took four months to complete. With so much paint on an array of surfaces, she’s also impressed with how everything has held up. “I did have an accident where I spilled some acetone and had to repaint a patch, but that’s all,” she says.
Since completing the bathroom, she continues to share design tutorials online. “My aim is to make design accessible,” she says. “I want to empower people to try out things for themselves, because it’s brought so much joy to my life.”