We may earn revenue from the products available on this page and participate in affiliate programs.
Last year, if you had looked at my eBay “watch list” (aka the place I save all my “one day I’ll own that” pieces), you would have found it stocked with marble tables. Saving these pieces was somewhat of a daily ritual for me. Then that “one day” finally rolled around and I bid on, and won, two oval-shaped vintage marble coffee tables. My dreams, however, were quickly (and literally) broken when one of them was delivered shattered into hundreds of pieces and the other was dropped by my husband, who was a little too eager to take a look at the underside of the marble top.
Back to square one. Lucky for me, I had bookmarked another similar but round one, and the seller was located only about a 45-minute drive away from our home in Brighton. I sent my guilt-ridden husband to pick it up for £20 (about $25). The top was in a dire state, but I knew it could be easily removed and fixed. However, the base upon which the slab of stone sat was a lost cause—I knew I needed to replace it with something fresh, something sculptural…something reflective. From Anthropologie’s Sonali table to Kelly Wearstler’s Morro table, three-ball coffee tables are certainly having a moment, though I have yet to find another one with balls that are mirrored. And unlike its luxurious cousins, my DIY came together for under £200 (or roughly $250). Here’s how I did it.
The Supplies

- A vintage coffee table with an easily removable top
- Heat gun
- Scraper
- Orbital sander with sanding pads
- Tile sealant
- Small foam roller
- 3 gazing balls (see similar U.S. product here)
- 3 metal dishes
- UniBond No More Nails Glue
Step 1: Strip Away the Past

Many vintage marble tables are covered with a protective layer of melamine that tends to yellow and crack over time. This was the case for mine. I removed the melamine by holding a heat gun over the surface until the plastic was soft enough to be scraped off.
Step 2: Smooth It Out
Then I used my orbital sander to smooth out any light scratches I made with the scraper. Whether you use a power tool or just some good old-fashioned elbow grease for this step, the key is to start with a low-grit (coarser) sandpaper and work your way up to a higher grit (finer). I started with a 150 and worked my way up to a 300. The finer grit will polish the marble. For some extra sheen and protection, I applied a tile sealant over the stone with a foam roller.
Step 3: Get Your Orbs Table-Ready


Because the marble top won’t be able to properly sit on the rounded base as is, I glued a small metal plate to each gazing ball using construction adhesive with the concave side touching the orb. Make sure that the plate is not too deep so that there is enough surface area connecting to the ball. Repeat for all three.
Step 4: Find Your Prime Position

Once the glue has dried (check for instructions on the bottle; in my case it was 24 hours), you can experiment with the position of the balls by gently resting the marble top on the flat surface of the plate. Mark the underside of the table top with a pencil so you know exactly where to put the glue.
Step 5: Secure Your Spheres


Put your table top on the ground with the underside facing up. Glue the flat surface that you created with the plate onto the bottom of the marble top with the same construction adhesive.

Because the gazing balls are hollow, they are much lighter in weight than the table top. I found that attaching the balls fairly close to the edge keeps the table from tipping over when you lean on it. If you want the table to be extra secure, you might want to consider drilling a hole in the balls and filling them with sand or cement. You could then glue the plate over the hole to hide it and make sure that whatever you put inside will stay there.
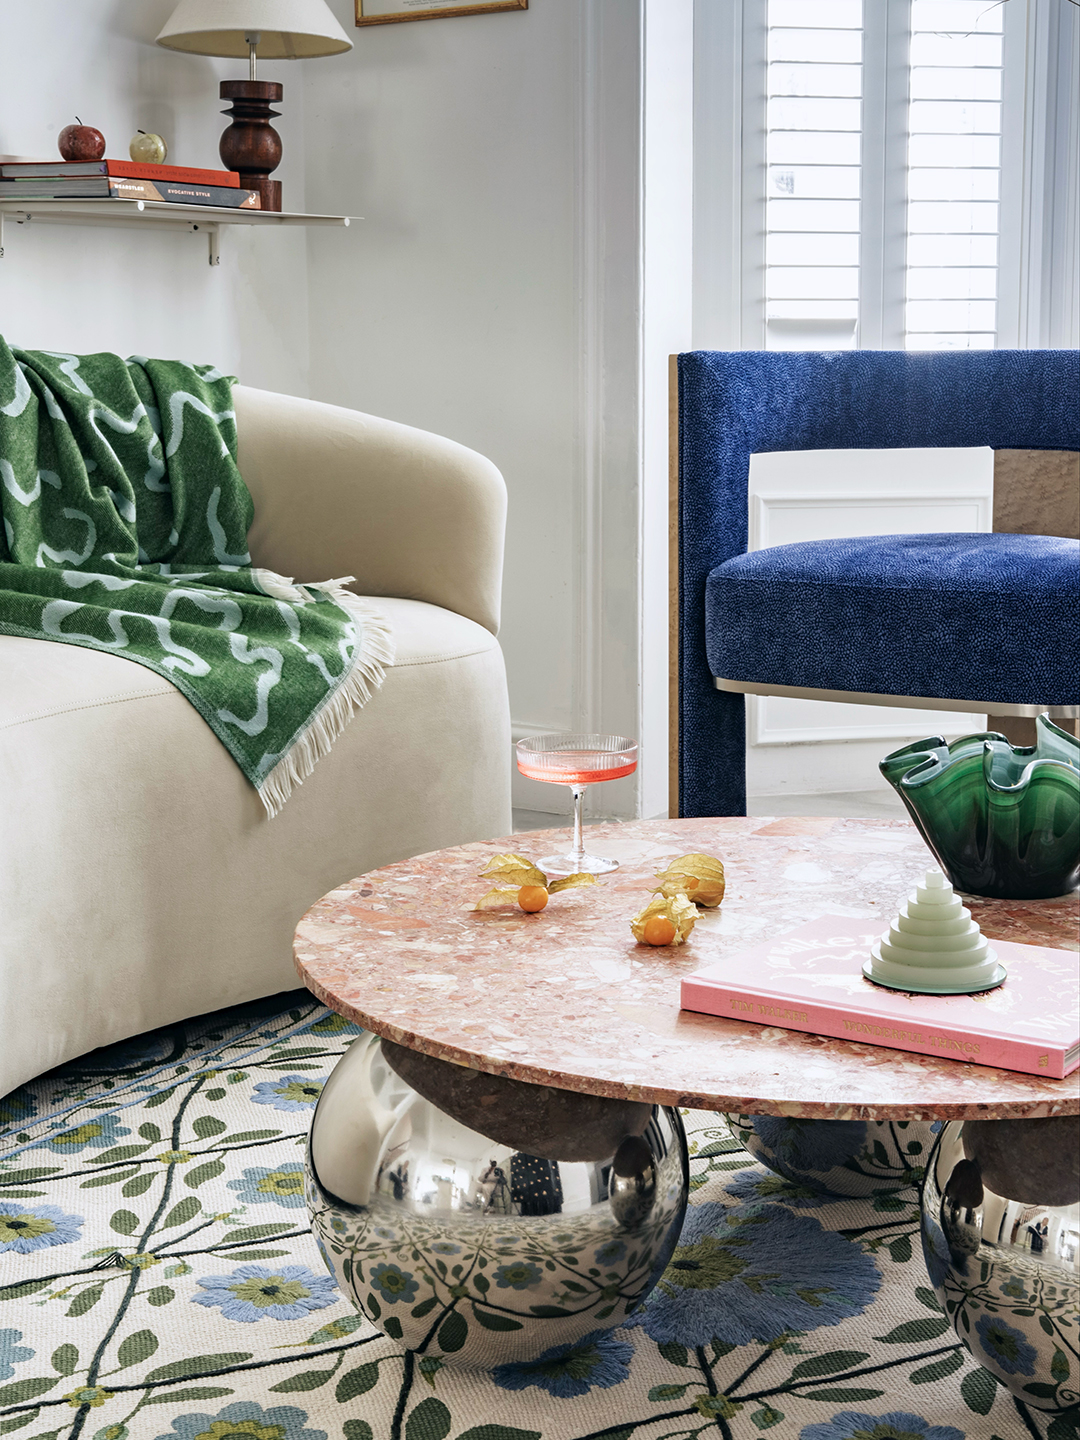
Let the glue bond for one to two hours before turning the table right-side up. The weight of the stone will aid with the bonding. Once in situ, the round table turned out a much better spatial fit than the two previous oval versions. Evidently, it was always meant to be the one.
