We may earn revenue from the products available on this page and participate in affiliate programs.
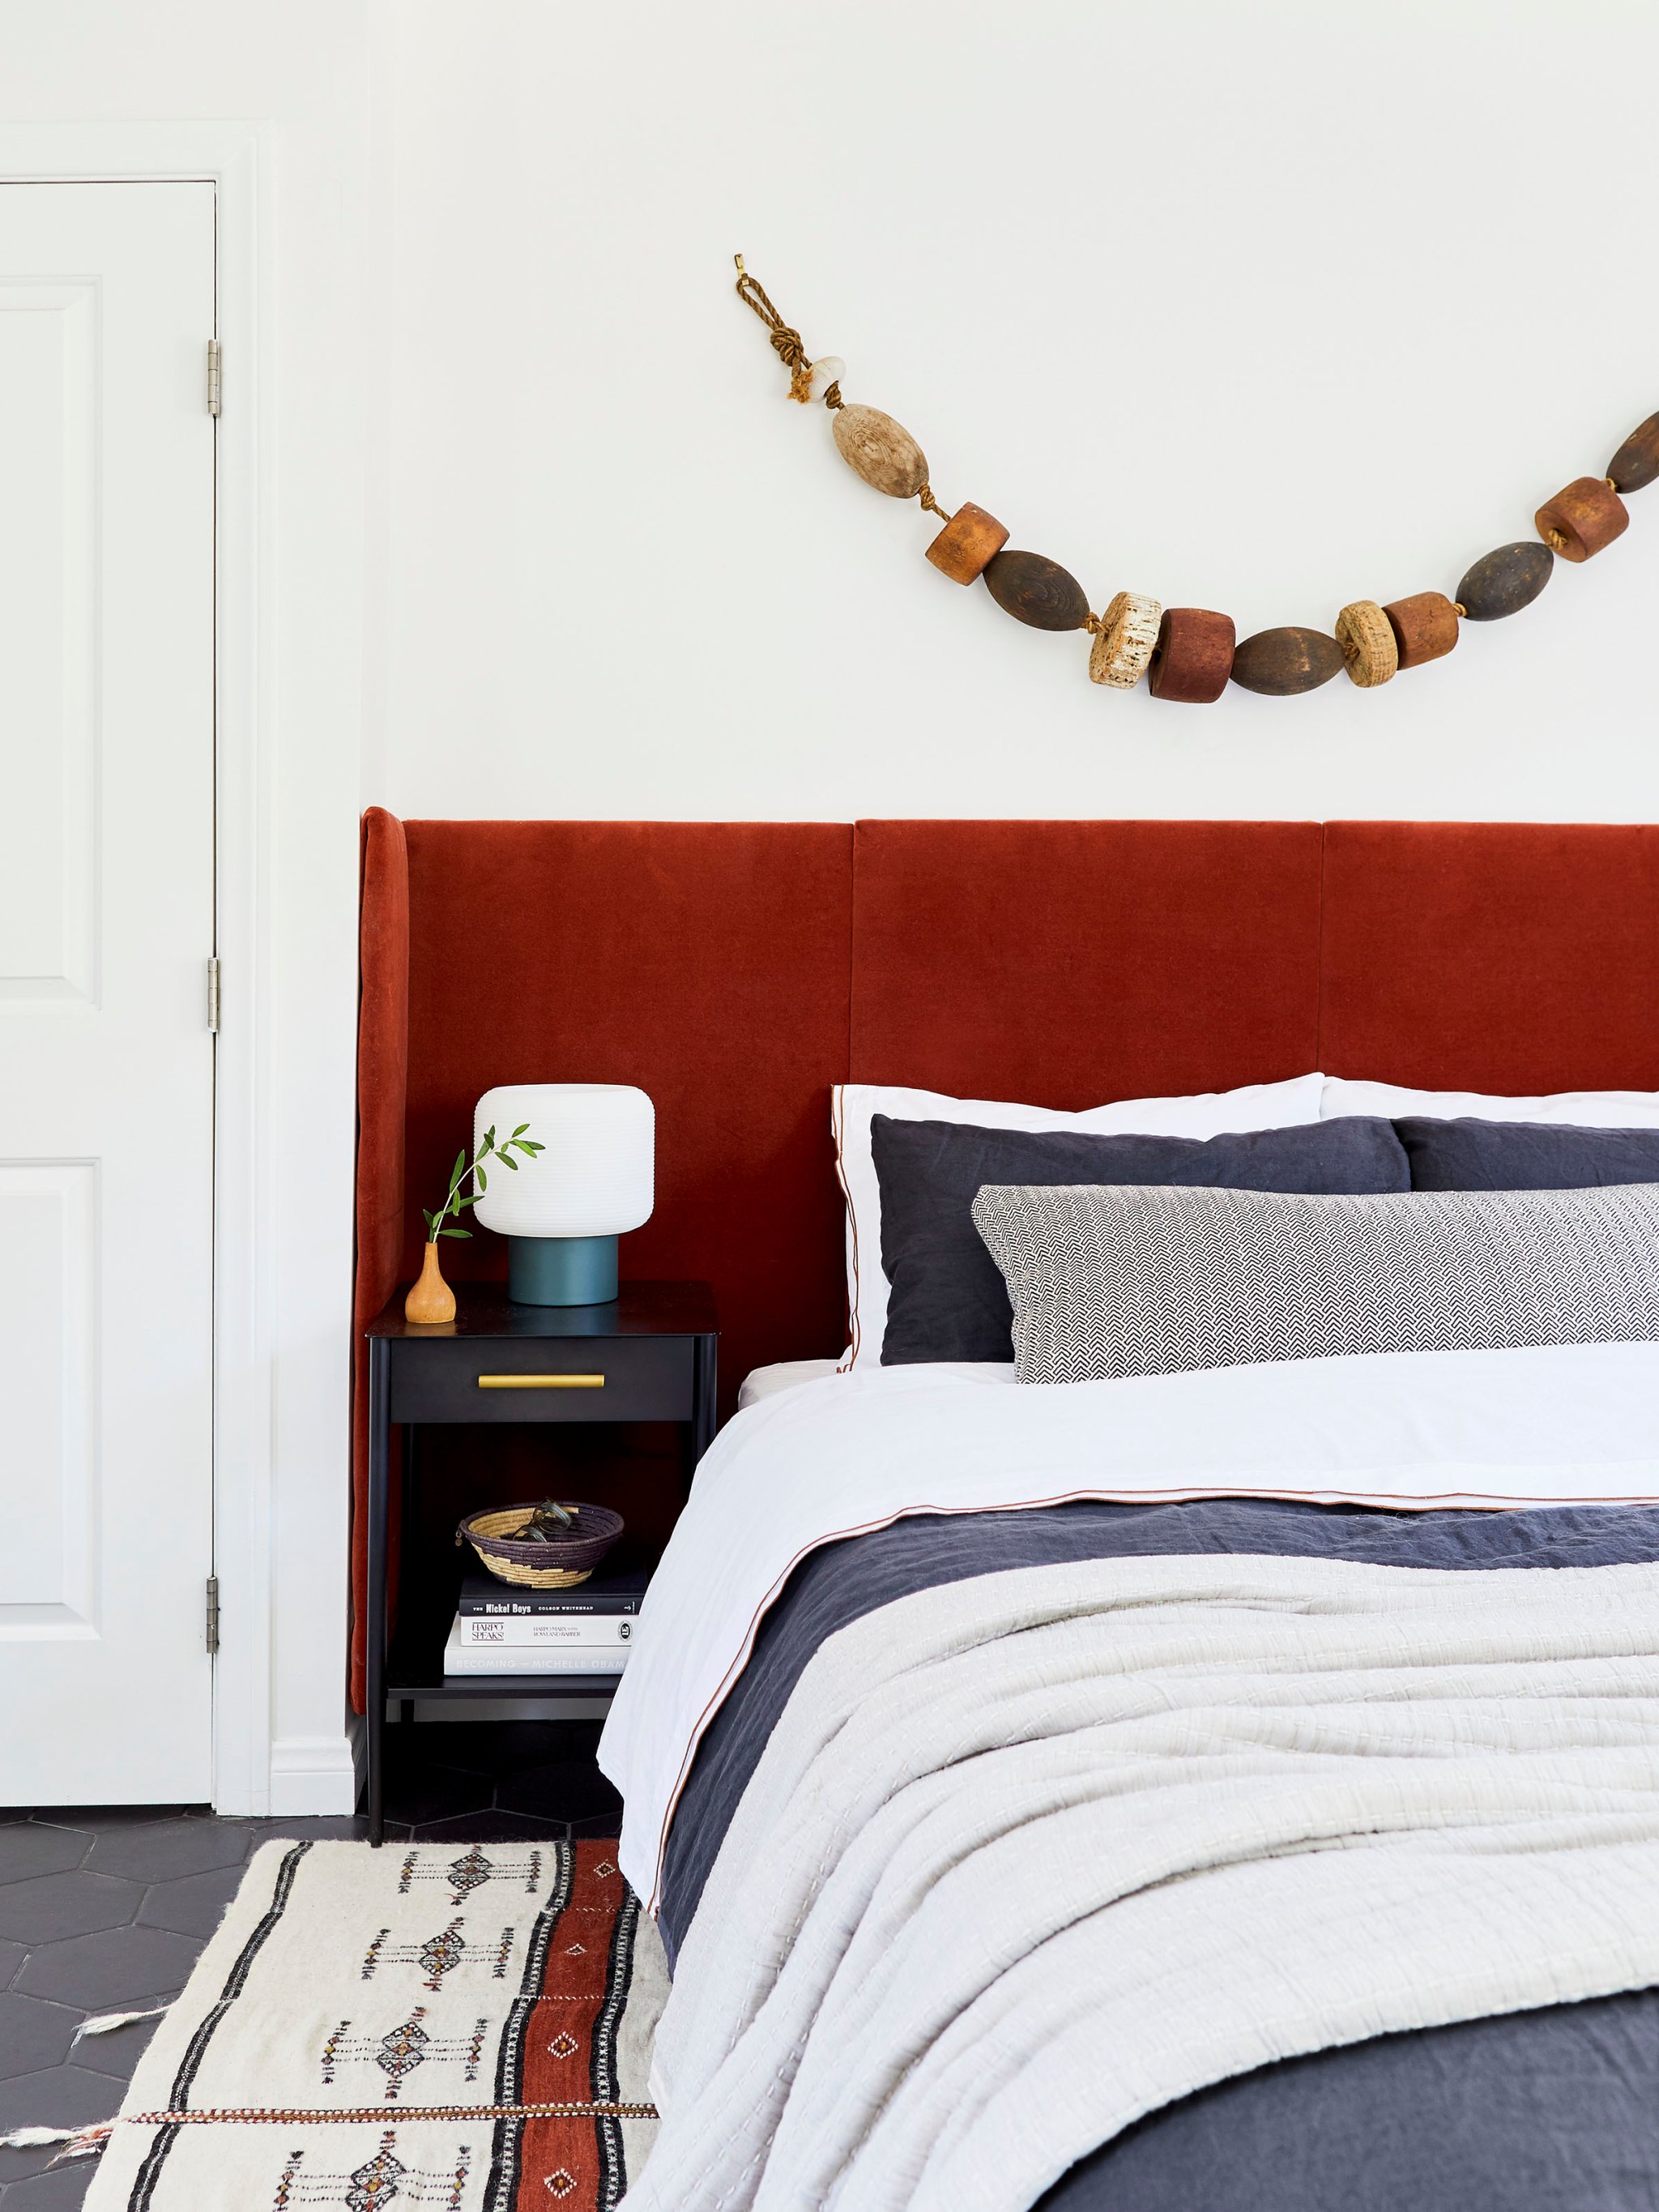
Emily Bowser doesn’t really like to DIY—but you would never guess that by looking at her bedroom, the star of which is undeniably the velvet wraparound headboard she made herself.
“Because I like to make my life harder!” jokes Bowser, whom you may know as Emily Henderson’s lead stylist, about why she went the crafting route. “I’m (sort of) kidding. I like to have at least one thing in the room that feels like you haven’t seen it before—that someone couldn’t easily just go out and buy.” After purchasing a house in Los Angeles, she decided to save some money by making a few of these one-of-a-kind pieces. Lucky for us, this DIY headboard was one of the finished products.


Bowser describes her style as earthy and vintage inspired, so a deep rust–colored fabric was a natural choice. The velvet, however, was a bit trickier: The only spot a bed could fit in her room was in a small alcove, and the stylist toyed around with a few different ideas for making the most of it—including a wood installation—before landing on the fabric in a wraparound style. Then Mandy Moore’s bedroom, which features a velvet bed, was revealed, and Bowser almost scrapped the whole thing because they were too similar. “But I needed to finish something in my own space and put it out into the world,” she says. “Sometimes, done is better than perfect.”
We’re glad she did, because the final result is seriously stunning. If you’re not afraid to get your hands a little dirty and create your own plush piece, here’s how to make your own:

The Supplies
- Measuring tape
- Pencil
- Fabric (for hers, Bowser used about 6 yards)
- Plywood
- Circular saw
- Batting
- Staples
- Staple gun
- Drill
- Straight edge
- Stud finder
- French cleats
Step 1: Map Out Your Space
The amount of fabric and batting you’ll need depends on this. Figure out how many panels you want (Bowser chose four), and determine the width for each based on that and the final width and height you’re aiming for. Bowser pinned the fabric to the wall and lived with it for a while to figure out how tall she wanted hers, settling on 48 inches high.
Step 2: Buy Your Materials
Have the hardware store cut the plywood as thin as possible—Bowser bought ¾-inch pieces—so you can easily transport and handle it. Grab 1-inch-thick batting while you’re at it (you’ll need enough for sections 2 to 3 inches bigger than each panel).
Step 3: Measure the Plywood
The pieces are likely too big, so mark your desired length and width with a pencil and cut each down accordingly. Pro tip: If you don’t have a circular saw, a jigsaw will also work.
Step 4: Lay It Out

Start by placing a swath of batting on the floor and placing a piece of plywood on top. (Remember the batting should hang 2 to 3 inches over on all sides.) Pull it tightly around the wood, stapling it to keep it in place. Repeat with the fabric, stapling both the textile and the batting more securely.
Step 5: Attach to the Wall


Choose where you want your board to sit; Bowser hung hers up 41 inches from the floor. Then use a stud finder to mark where every stud is in the area where the headboard will be. Hang the wall sides of the cleats at the height you marked, one for each panel—don’t worry, cleats come equipped with everything you need to hang them. Then attach the other side of the cleats to the wood pieces. Once they are connected, wall to panel, they should all be at the same height as each other. Continue this process until you’re done.
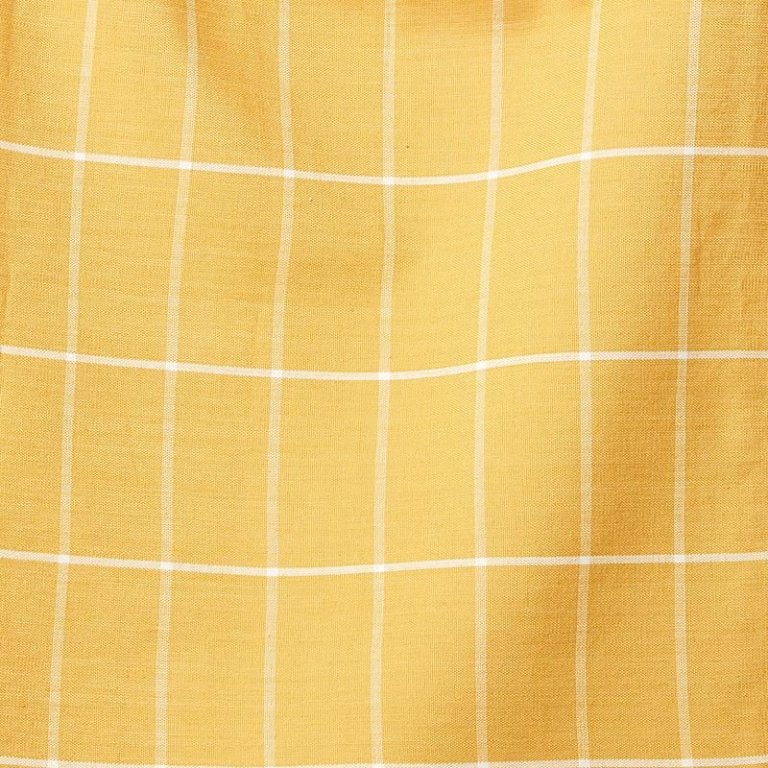
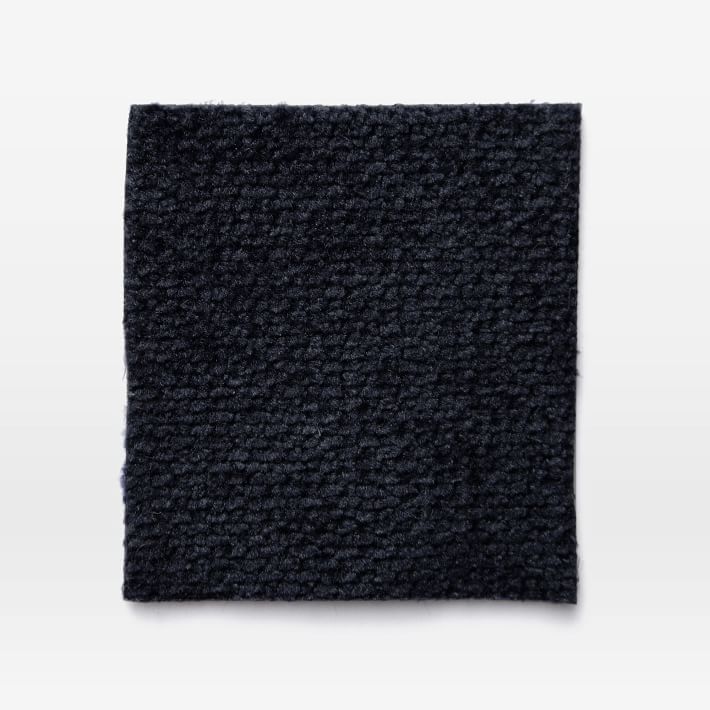
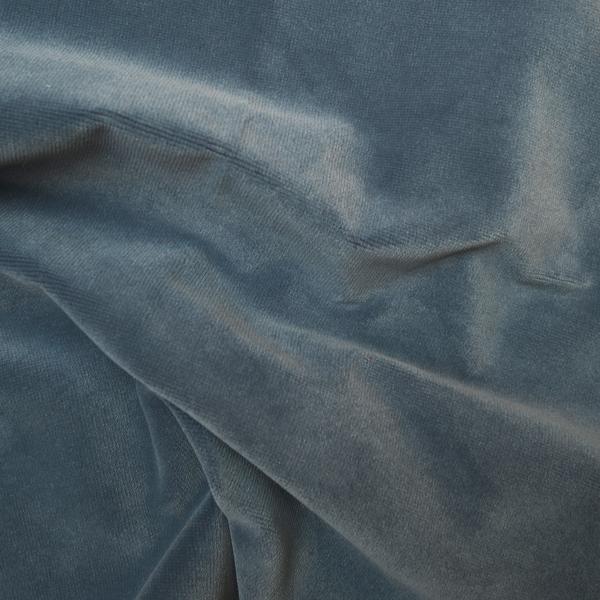
Not sure what you want yours to look like yet? Here are a few fabrics—velvet and beyond—that would steal the show in any bedroom:
See more DIYs: A Surprisingly Simple Bath Mat Project to DIY This Weekend This Wall Decor Hack Is Even Easier Than Peel-and-Stick Paper A Brilliant Use for Leftover Countertop Stone