We may earn revenue from the products available on this page and participate in affiliate programs.
The first time Meghan Lavery and Daniel King, cofounders of Insta-famous vintage store Home Union, walked into their new retail space in East Williamsburg, Brooklyn, they were charmed by the high ceilings, large corner windows, and natural light pouring in. They also immediately noticed the exposed sprinkler pipes, front and center right when you walked through the door. “They were a total eyesore,” remembers Lavery.
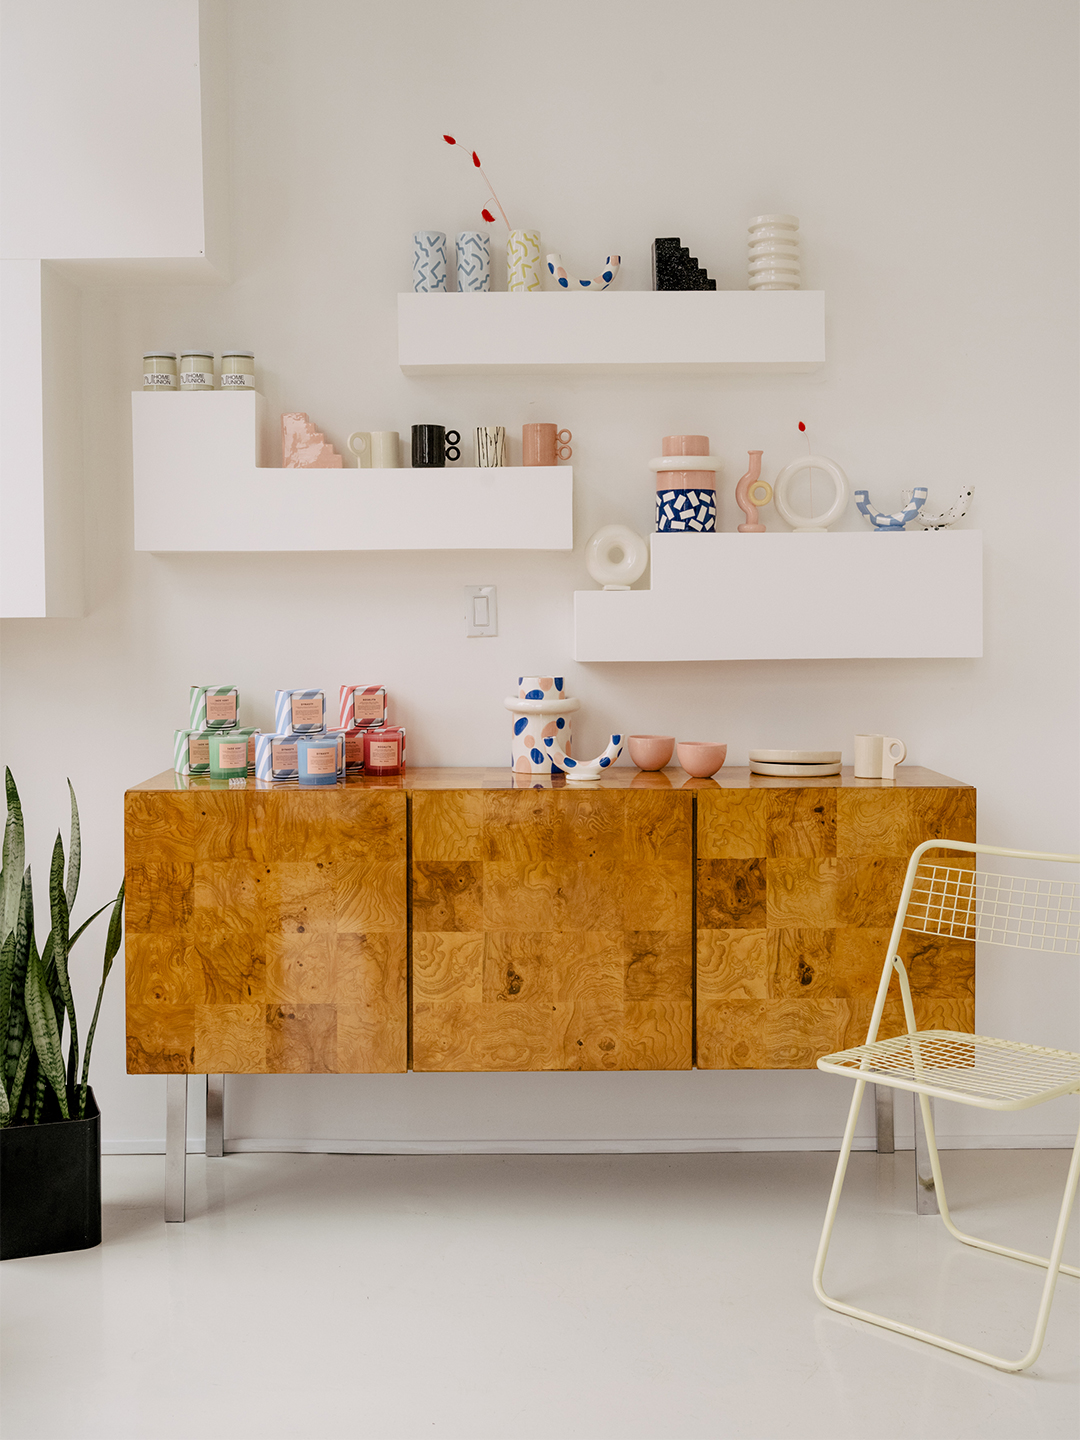
Not afraid of embarking on a challenging DIY project (in their rental apartment, they retiled the kitchen backsplash, built storage out of plywood, and even replaced an unsightly ’80s balustrade), the pair brainstormed a few solutions. “We wanted to play on the theme of what was already in our space,” says King. To mirror the nearby staircase, they settled on playful Tetris-like shelves that hide the awkwardly shaped hardware and serve as pedestals to display ceramics and candles.
“They are some of the most photographed pieces in the store, believe it or not!” says Lavery. Here’s how you can tackle the project with the help of a few power tools and a ton of imagination.
The Supplies
- Table saw
- Sheets of MDF (they used 4-by-8-foot pieces)
- Miter saw
- Face mask
- Nail gun
- Wood glue
- “Pancake” compressor
- Air hose
- Mounting brackets
- Joint compound
- Plaster of Paris
- Spirit level
- Pencil
- Drywall anchors
- Drill
- Router with a flush-cut bit
- Paint and painting supplies
- Painter’s caulk
- Respirator
Step 1: Create Your Shapes
Using a table saw, cut the MDF sheets to your desired depth off the wall (Lavery and King wanted 5 inches). Then trim the same two pieces to the desired length (theirs are about 3 feet long) for the top and bottom. Follow suit with the side pieces, cutting them to the desired height. Lavery and King decided to make funky shapes, which you can do by building shelves in two separate sizes and screwing them together as desired. Be sure to wear a mask anytime you are cutting MDF.
Step 2: Assemble the Frames
Using a nail gun hooked up to a pancake compressor and wood glue, put together the pieces to form boxes, leaving the front open. Fix mounting brackets on the inside panels (you can use 1-inch L brackets). You’ll use these to secure your shelves to the wall before putting the front piece on. Once they are assembled, fill all nail holes with joint compound mixed with plaster of Paris for strength (the same stuff you use on drywall). Once dry, sand the spots for a flat, even surface.
Step 3: Mount Them to the Walls
Using the L brackets as your guide, measure out where you want your boxes to hang, make sure they are level, and mark the holes with a pencil. Install drywall anchors and screw the shelves into the wall with a drill.
Step 4: Cover the Fronts
With your shelves in place, it’s time to make the front cover. Cut a piece of MDF with a table saw to slightly bigger than the outline of the box. Using the nail gun, fix the cover in place. Clean up the edges by running a router with a flush-cutting ball-bearing bit around the perimeter.
Step 5: Hide Any Imperfections
Fill all the nail holes with plaster, let them dry, and sand them down. Use painter’s caulk to mask the seams where the boxes meet the wall. Lastly, paint the exterior with several coats in your color of choice (MDF is pretty absorbent). Let them dry overnight—and then step back and admire your new creations.
See more stories like this: The Couple Behind Brooklyn’s Insta-Famous Vintage Store Never Stops Decorating The Home Union Founders Retiled Their Bland Bathroom in Less Than a Week Renovating Her Rental’s Closet Was the Best Decision Anna Z. Gray Ever Made