We may earn revenue from the products available on this page and participate in affiliate programs.
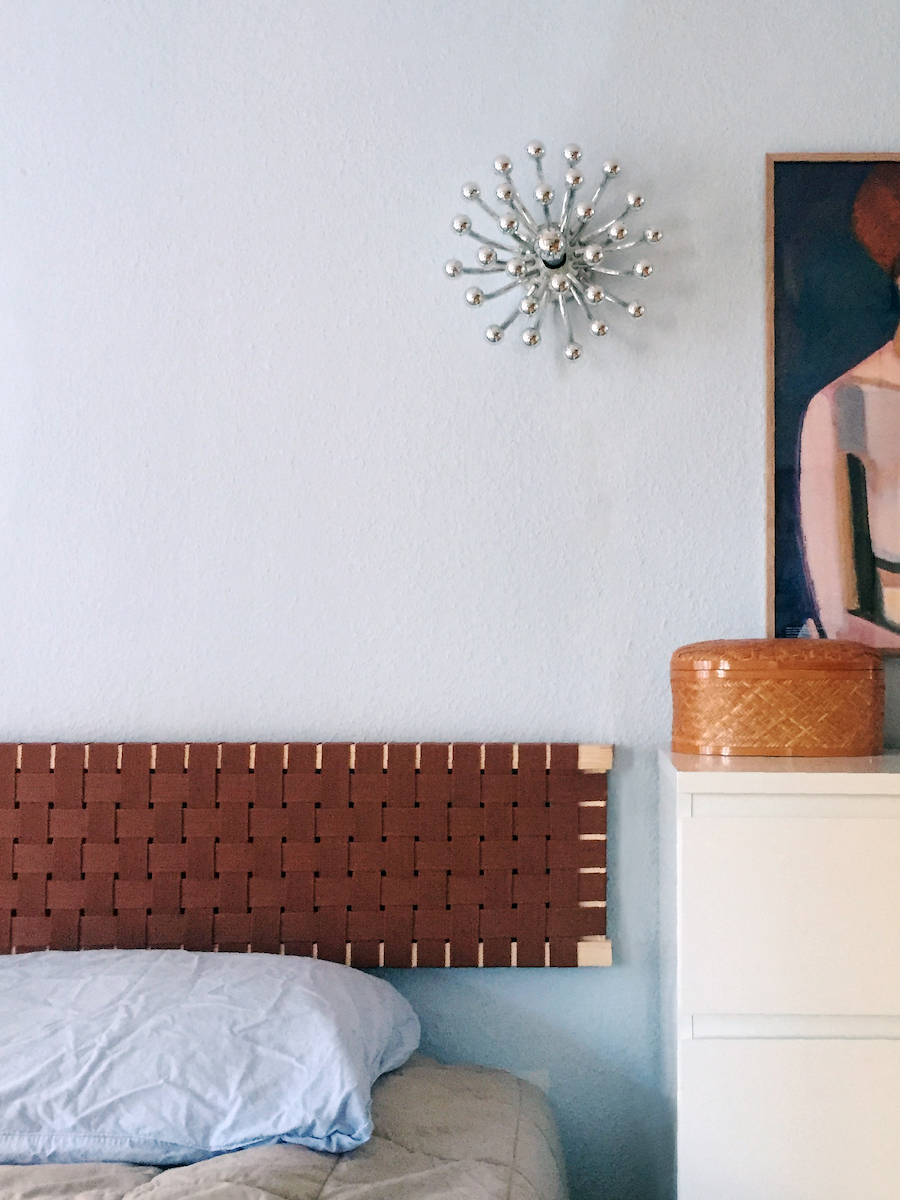
Lumberyards are hard to come by in Julie Katrine Andersen’s home city of Copenhagen. So when the seasoned crafter decided to make a floating headboard for her bedroom, she got creative with a wood frame from IKEA’s Ivar bookcase. Drawing on her Finnish heritage, Andersen took inspiration from Alvar Aalto’s iconic 611 chairs and wove nylon webbing around the structure. “I wonder if Mr. Aalto will turn over in his grave,” she says. “I hope not.”
The Ivar side unit, conveniently sold separately, comes in a bunch of different heights with prices ranging from $10 to $17, so you’re good to go whether you have a twin-, queen-, or king-size bed. As for the $30 pack of tape Andersen scored on eBay, she only ended up using 30 meters of the 50-meter-long roll, which means there’s plenty left over for the next hack (a small bench? a stool?). Andersen takes us through the process:
The Supplies
- One Ivar side unit from IKEA
- Nylon webbing
- Saw
- Scissors
- Drill/screwdriver
- Hanging brackets and screws
- Staple gun
- Lighter
- Pencil for marking
Step 1: Map Out Your Webbing
First thing’s first: Saw off the legs of the Ivar frame so both ends look the same. Measure how far apart you want the spacing between each strap to be (Andersen left ⅕ of an inch). Mark lines on the back of the board accordingly, so you know exactly where to position each strap. “The most important thing is to plan very precisely so it looks totally even,” says Andersen.
Step 2: Trim the Bands
Eye approximately how long the material needs to be for you to fold it around the frame and secure it to the back. Cut the straps accordingly. The goal is to not see any excess fabric once it’s up on the wall.
Step 3: Singe the Borders

While you might not think of it, this part is extra-important, notes Andersen: Burn off all the ends of the nylon webbing so they won’t unravel over time.
Step 4: Fasten the Fabric
Staple the short straps to the back of the longer sides first, ensuring each band is super-tight. Then weave the long straps over and under, securing them to the backs of the shorter ends.
Step 5: Hang It Up
Screw the brackets horizontally into the top and bottom edges of the long sides of the frame. (If you hang it from vertically oriented brackets, all it will take is a little shove upward in your sleep and the piece will come crashing down.) Using a pencil, mark on the wall where you want to screw the interlocking mounts, drill the holes, then attach the hardware. Finally, slide the headboard into place—and rest easy knowing you didn’t spend a small fortune on a fancy bed frame.
See more stories like this: How to DIY a French Tufted Mattress How One Stylist Gave Her Kid’s Sad Bike a Chic Makeover Bubble Glazing Isn’t Just Satisfying to Watch, It’s a Cinch to DIY