We may earn revenue from the products available on this page and participate in affiliate programs.
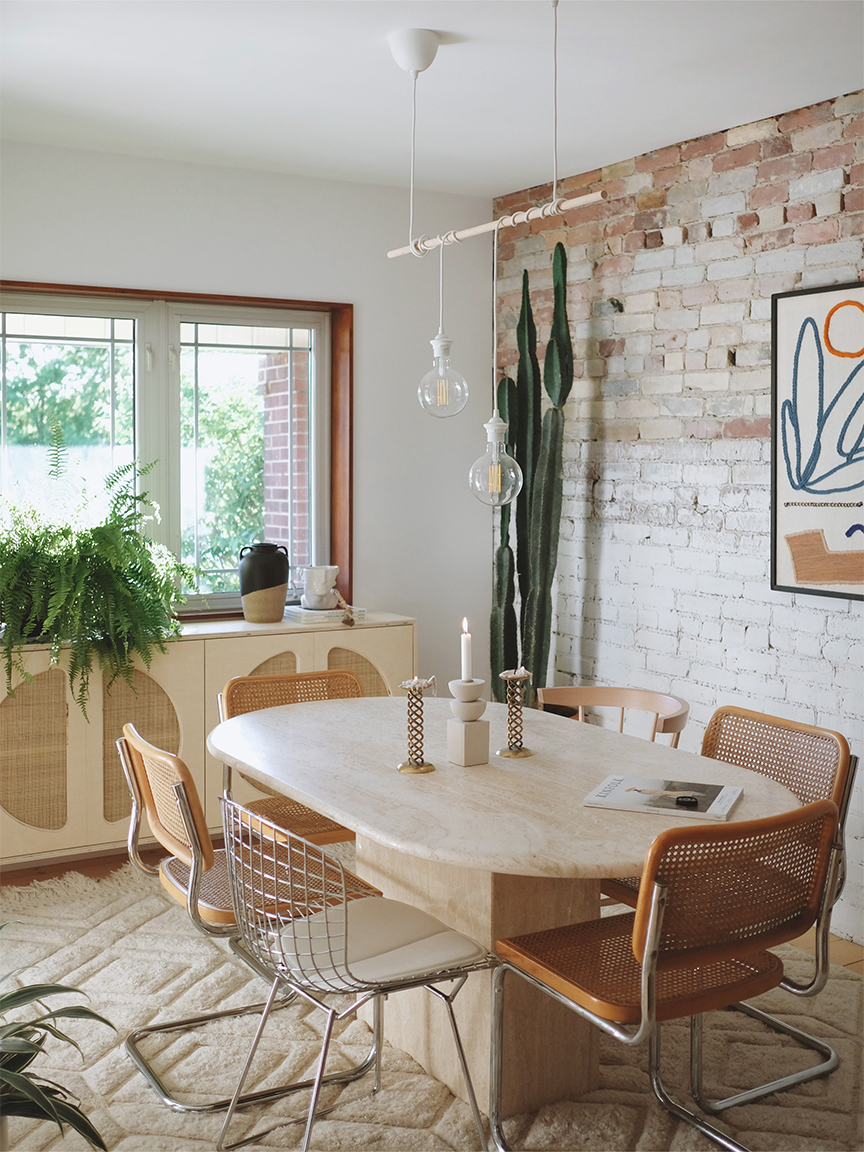
The biggest lesson Elena Lohse and her husband learned when they moved into their 1935 semidetached Toronto home: Don’t buy furniture before you get the keys to the place. The sideboard they had purchased for the dining room fit perfectly underneath the window, but the chunky piece of furniture was way too deep, making it nearly impossible to pull out a chair without bumping into it. After trying out two Ivar cabinets from IKEA that were ultimately too long for the space, the couple resorted to making a floating credenza from scratch. “Our house is tiny,” says Lohse, who has been documenting their renovation journey on her blog, This House 5000. “We had to learn to work within its parameters.”
A deep dive on Pinterest led Lohse to an image of a cupboard with moon-shaped cutouts covered with cane webbing—the starting point for her creation. The couple tweaked the design to better suit their needs, starting with bifold doors that swing out and away from the dining area. Constructing the piece was no quick feat (Lohse estimates the project took a total of 20 hours, with her husband championing the majority of the carpentry). But putting in the time paid off. The custom sideboard now houses everyday tableware, but more important, no one has to scoot out of the way to get in there.
The Supplies

Materials
- Two sheets of high-grade pine plywood
- 66-inch radio weave cane webbing
- Brass piano hinges
- Push release hinges
- Screws (pocket and regular)
- Staples
- Hot glue
- Water-based sealer
- Sandpaper
Tools
- Power drill
- Table saw
- Router and router bits
- Glue gun
- Air-compressed nail gun
- Air-compressed staple gun
- Skill saw
- Jigsaw
- Hole saw
Step 1: Build the Frame

Using a skill saw, cut the plywood board to make the top, bottom, and side pieces (if you’re mounting it directly on the wall as Lohse did, you don’t need a back). Once screwed together, the final dimensions of their cabinet ended up being 68 inches long, 28 inches high, and 12 inches deep, with the two boards for the doors measuring 26 ¼-by-16 9/16 inches each.
Step 2: Cut Out the Doors


Outline four crescent shapes with a pencil. In the corners, make an initial opening with a hole saw. This allows you to cut out the rest of the shape with the jigsaw. Sand down the inner edge until it’s perfectly smooth. If you really want the curved outline to stand out, use a router bit to create a grooved trim along the edge.
Step 3: Open Sesame

Sculpt a small handle groove at the top of each door using a table saw (the best tool for making precise cuts). At this point, you can also drill holes for push-release hinges, that way all you have to do is apply a little pressure to the surface to pop the doors open. Then attach the two boards on either side with a piano hinge and screw the panels in place.
Step 4: Slide in a Shelf
For maximal storage, cut a board that measures the width and depth of the credenza. Slice it in half and nail four small ledges to the interior of the credenza to create a shelf.
Step 5: Seal It
Embrace the breezy, natural tones of the wood by applying a clear, water-based wood finish with a brush. After two coats, the wood should feel as smooth as glass.
Step 6: Assemble the Box

Because the main air-conditioning and heating vent in Lohse’s dining room is situated on the floor where they wanted to display the storage unit, the couple mounted it with screws so it looks like it’s floating. If you’re taking a similar approach, use leftover plywood scraps to prop up the credenza as you drill it into the wall.
Step 7: Weave Together the Final Touches


The number-one rule for applying cane webbing to furniture is that it has to be wet when you do it. “It’ll never be completely taut like a drum if it’s dry,” says Lohse. Think of the webbing like tiny strips of wood that need to swell. Ensure the textile lays flat by pulling the material tightly as you glue it to the back of the door. Then staple a thin wood frame around the outer edges so nothing comes loose once it dries and contracts. It’s an open-and-shut case.

It’s hammer time: Follow @reno_notebook for easy rental updates, clever DIYs, and tips to nail your next project.