We may earn revenue from the products available on this page and participate in affiliate programs.
You’d be hard-pressed to find somebody who doesn’t have a soft spot for IKEA. Some people go for the showroom’s endless opportunities, while others travel far and wide just for its famous Swedish meatballs. And then there are those who love the superstore for its endless DIY possibilities. Anders and Christina Blom Monberg definitely fall in the latter category.
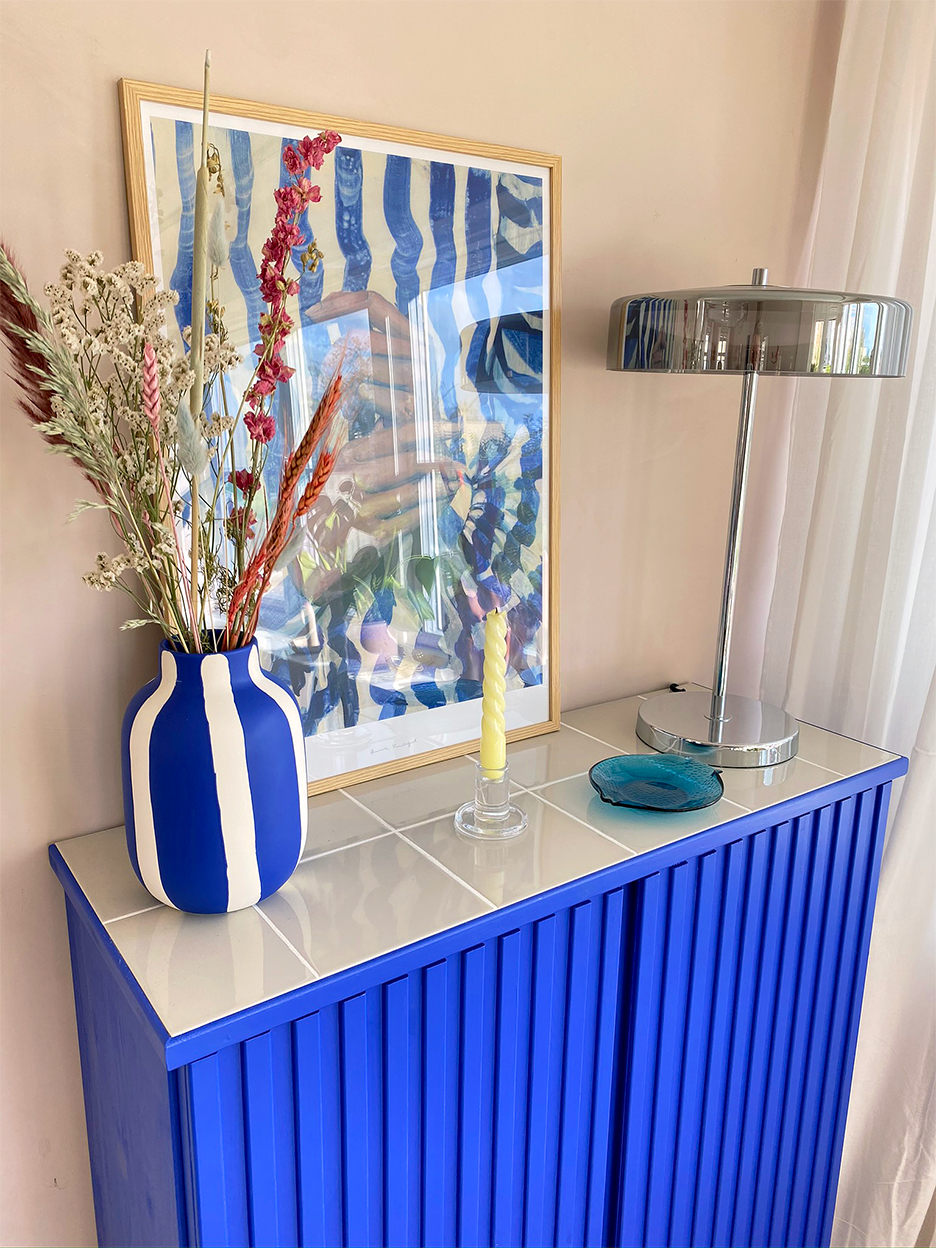
The couple, based in Copenhagen, launched their company and blog, In Bloom, in 2017 after Christina left her job in the insurance industry. They offer everything from interior design services to custom-made Tile Tables, but their most compelling content actually comes in the form of clever, budget-friendly hacks found primarily on their Instagram page. Our favorite? An electric blue Ivar cabinet transformation.
The Monbergs are no strangers to Ivar hacks (their previous projects include a floating cabinet with handwoven paneling and a dreamy blue caning moment), but this time, Christina wanted to go bold. “My best piece of advice is to be brave when it comes to choosing a color,” she says. She did just that with her latest knockout cabinet, which has now become a staple of their living room. Here’s how it happened.
Materials

- 1 Ivar cabinet from IKEA
- 22 wood slats, 21 mm wide with rounded edges
- 12 tiles sized 15-by-15 cm
- 1 tile cutter
- 16 mm MDF (medium-density fiberboard)
- Glue
- White sealant for the joints
- 10 small nails
- Wood painting
- Your choice of paint
Step 1

Cut your wood slats the same length as the cabinet doors. Christina used a miter saw.
Step 2

Measure your preferred distance between slats, or, if you’re like Christina, just eyeball it. Then glue the slats to the cabinet doors. Use clamps to hold the slats in place while the glue dries.
Step 3


Once the glue has dried, paint the entire surface, making sure to get in the slats’ crevices.
Step 4


Now for the top. Measure your piece of MDF to a 31-by-12-inch rectangle, the size of the top of the cabinet. Use a tile cutter to size the tiles to fit your MDF-made cabinet top. Lay the tiles in any pattern you like.
Step 5

Glue your tiles onto the top of your MDF-made cabinet. Use the sealant in between the tiles (the “joints”) to ensure they don’t move around and stick not only to the MDF but also to each other.
Step 6


Use extra wood slats (the ones you used for the cabinet fronts) to line the four edges of the tiled cabinet top. Paint them any color and let dry. Using your saw, cut them down so that they match the size of the edges, angling the ends upward, so they fit together. If there are holes in between the painted edges, cut a small piece of MDF to use as filler, making sure to paint over them with your color choice.
Step 7

Christina chose to put small, thin legs on the bottom of the cabinet, constructed from beechwood (you can buy legs or make them yourself out of spare wood) and painted to match the rest of the cabinet. They should be around 12 inches tall.
Our Fall Style issue has arrived! Subscribe now to get an exclusive first look at Ayesha Curry’s Bay Area home—and discover how design can shape our world.