We may earn revenue from the products available on this page and participate in affiliate programs.
“Oh boy” was Camille Kurtz’s gut reaction when her 5-year-old daughter, Charlotte, said she wanted a Wonder Woman–themed bedroom. Kurtz was stumped: While she wanted to deliver on her child’s request, the seasoned DIYer also wanted to like the finished result, which meant cheesy wall decals and red and gold bedding with big W logos were out of the question. Adding to the pressure? She had just eight weeks to tackle the makeover for the One Room Challenge. So Kurtz took a less literal route. “We went more with where Wonder Woman’s home is: the island of Themyscira,” she says.
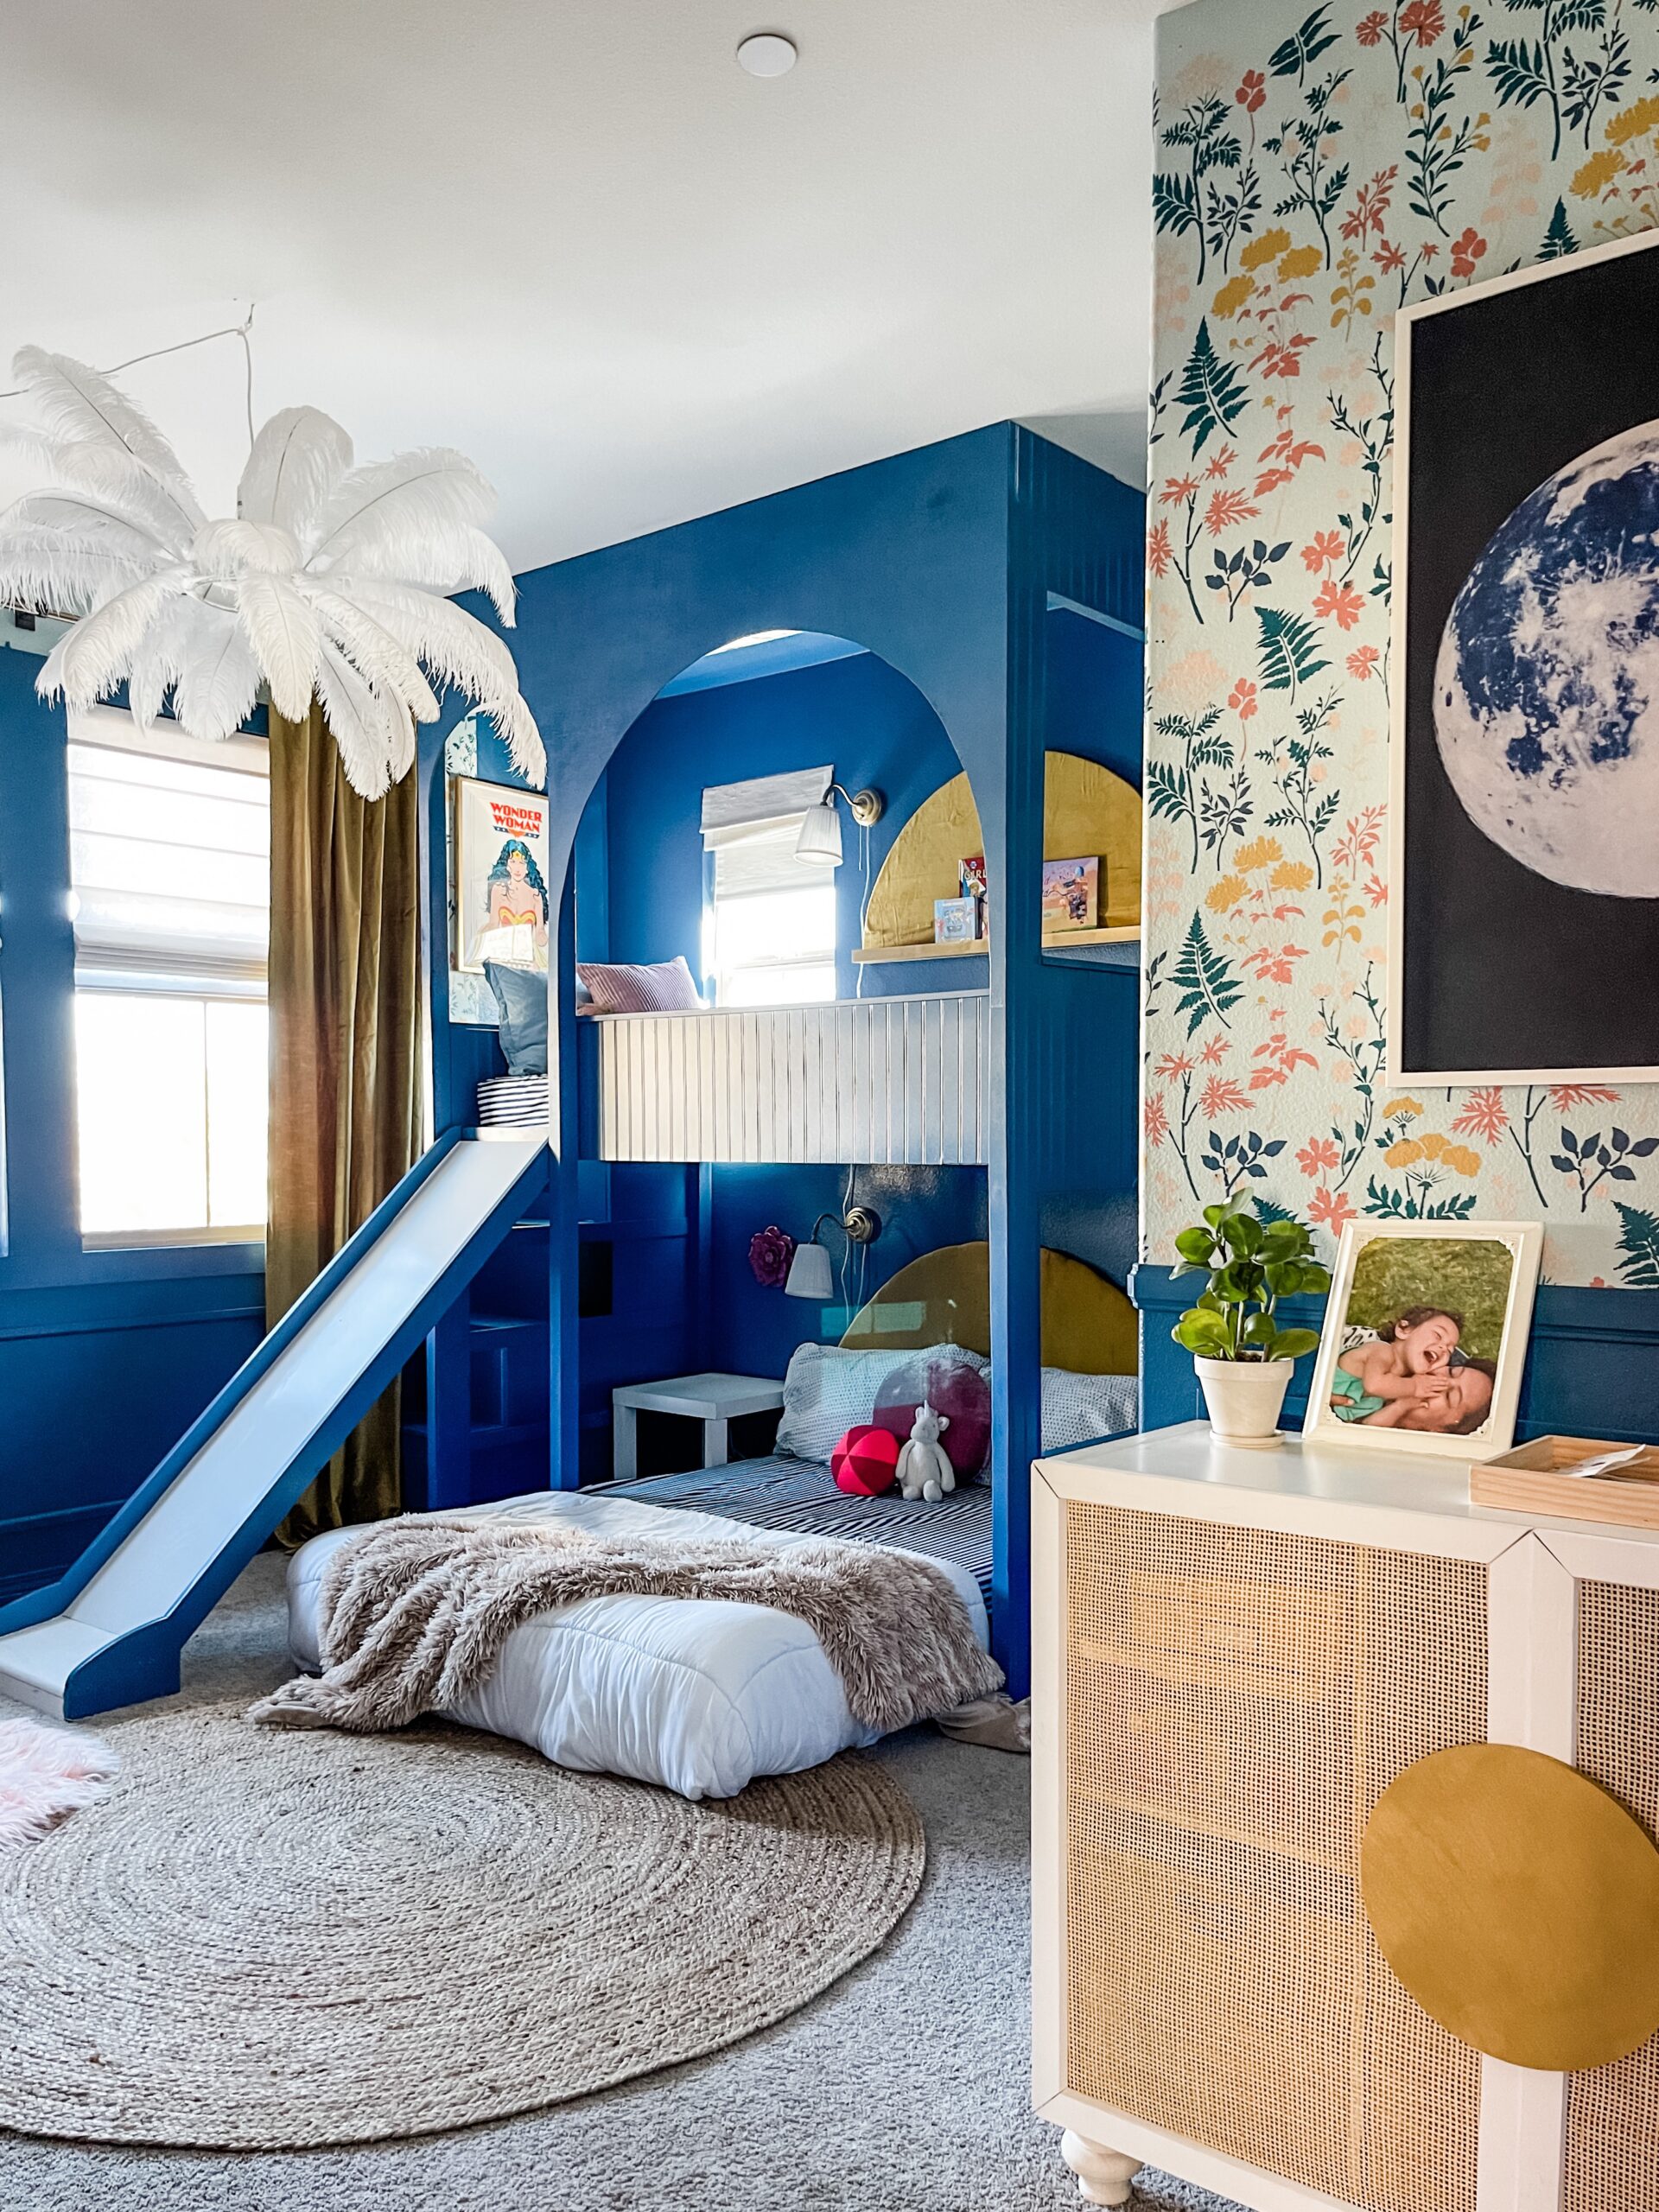
Kurtz set the scene with a giant mural—pink sky, mountains, rippling water, and all. But another major task was the built-in bunk bed setup on the other side of the room (Charlotte specifically requested one with stairs and a slide). “In the newer movies and even some of the older ones, Wonder Woman’s bed has golden arches,” notes Kurtz. So she set out to create a sleep-slash-play zone fit for a Wonder Girl.
The Lair


After buying a prefabricated bunk bed on Amazon, Kurtz turned to Instagram to figure out how to make the structure look built in. She came across a photo designer Sarah Sherman Samuel posted of her own child’s room that involved framing the structure with a giant arch, which she cut from a sheet of plywood using a jigsaw, and knew it was perfect for the Wonder Woman setting. (Psst: You can see Samuel’s original how-to here.) Kurtz continued the curved shape in the form of a golden headboard and shelving. “The top bunk is reserved for reading in the afternoon and playing princess with her younger sister,” notes Kurtz.
Then she painted the whole thing a cool blue, channeling the water surrounding Themyscira. “It’s very calming for kids to have a lot of blue around,” explains Kurtz. In a nearby corner, she carved out a reading nook with tons of floor pillows, which also provides a cushy place to crash when the girls come down the slide.
The Landscape

Painting the tropical mural was surprisingly the easiest part of the whole project. “It was forgiving,” Kurtz says of the design. She freehanded the illustration, but she notes anyone could easily sketch out their drawing on the wall with a pencil and then follow a “color by number” method. Because there was so much organic patterning going on, she added geometric blocks on the side to balance out the space and spotlight the acrylic book ledges.


She stenciled a floral design on the rest of the walls, using the same paint colors in the mural to tie the blue and pink scheme together. “I originally had wallpaper picked out, but it was going to cost around $600,” she says. This hack was practically free and it looks like the real deal. “Charlotte was watching me do the stenciling and was just mesmerized that the pattern was showing up on the wall,” recalls Kurtz.
The Lighting

Incorporating plug-in wall sconces inside the bunk was a must for story time. “Charlotte specifically asked for a light with a pull tab,” says Kurtz with a laugh. She found chrome options on Amazon and spray-painted the bases gold to fit the theme, adding color-changing bulbs for a fun element of surprise. Funny enough, it’s her little one’s favorite thing about her now completed room. “She’s a very functional person,” says Kurtz.

The DIYer also hung a fresh ceiling fixture overhead that she built with a foam wreath core, an 8-inch-wide drum shade, fake ostrich feathers, and hot glue. The light itself is a simple bulb attached to a 15-foot cord from IKEA that she swagged and plugged into the wall outlet, so there was no need to call in an electrician to hardwire anything. Turns out, DIYing is a superpower.