We may earn revenue from the products available on this page and participate in affiliate programs.
The $100 aluminum platform bed frames that you’ll find all over Amazon solve a common problem: They keep your mattress off the floor. That’s the reason Liz Mundle had originally purchased one for her and her boyfriend’s bedroom in their Brooklyn apartment. But the cheap and semi-chunky find also created an issue: It took away precious, potential storage space. “We had a couple of under-the-bed boxes, but you could see stuff poking out on either side,” she says.
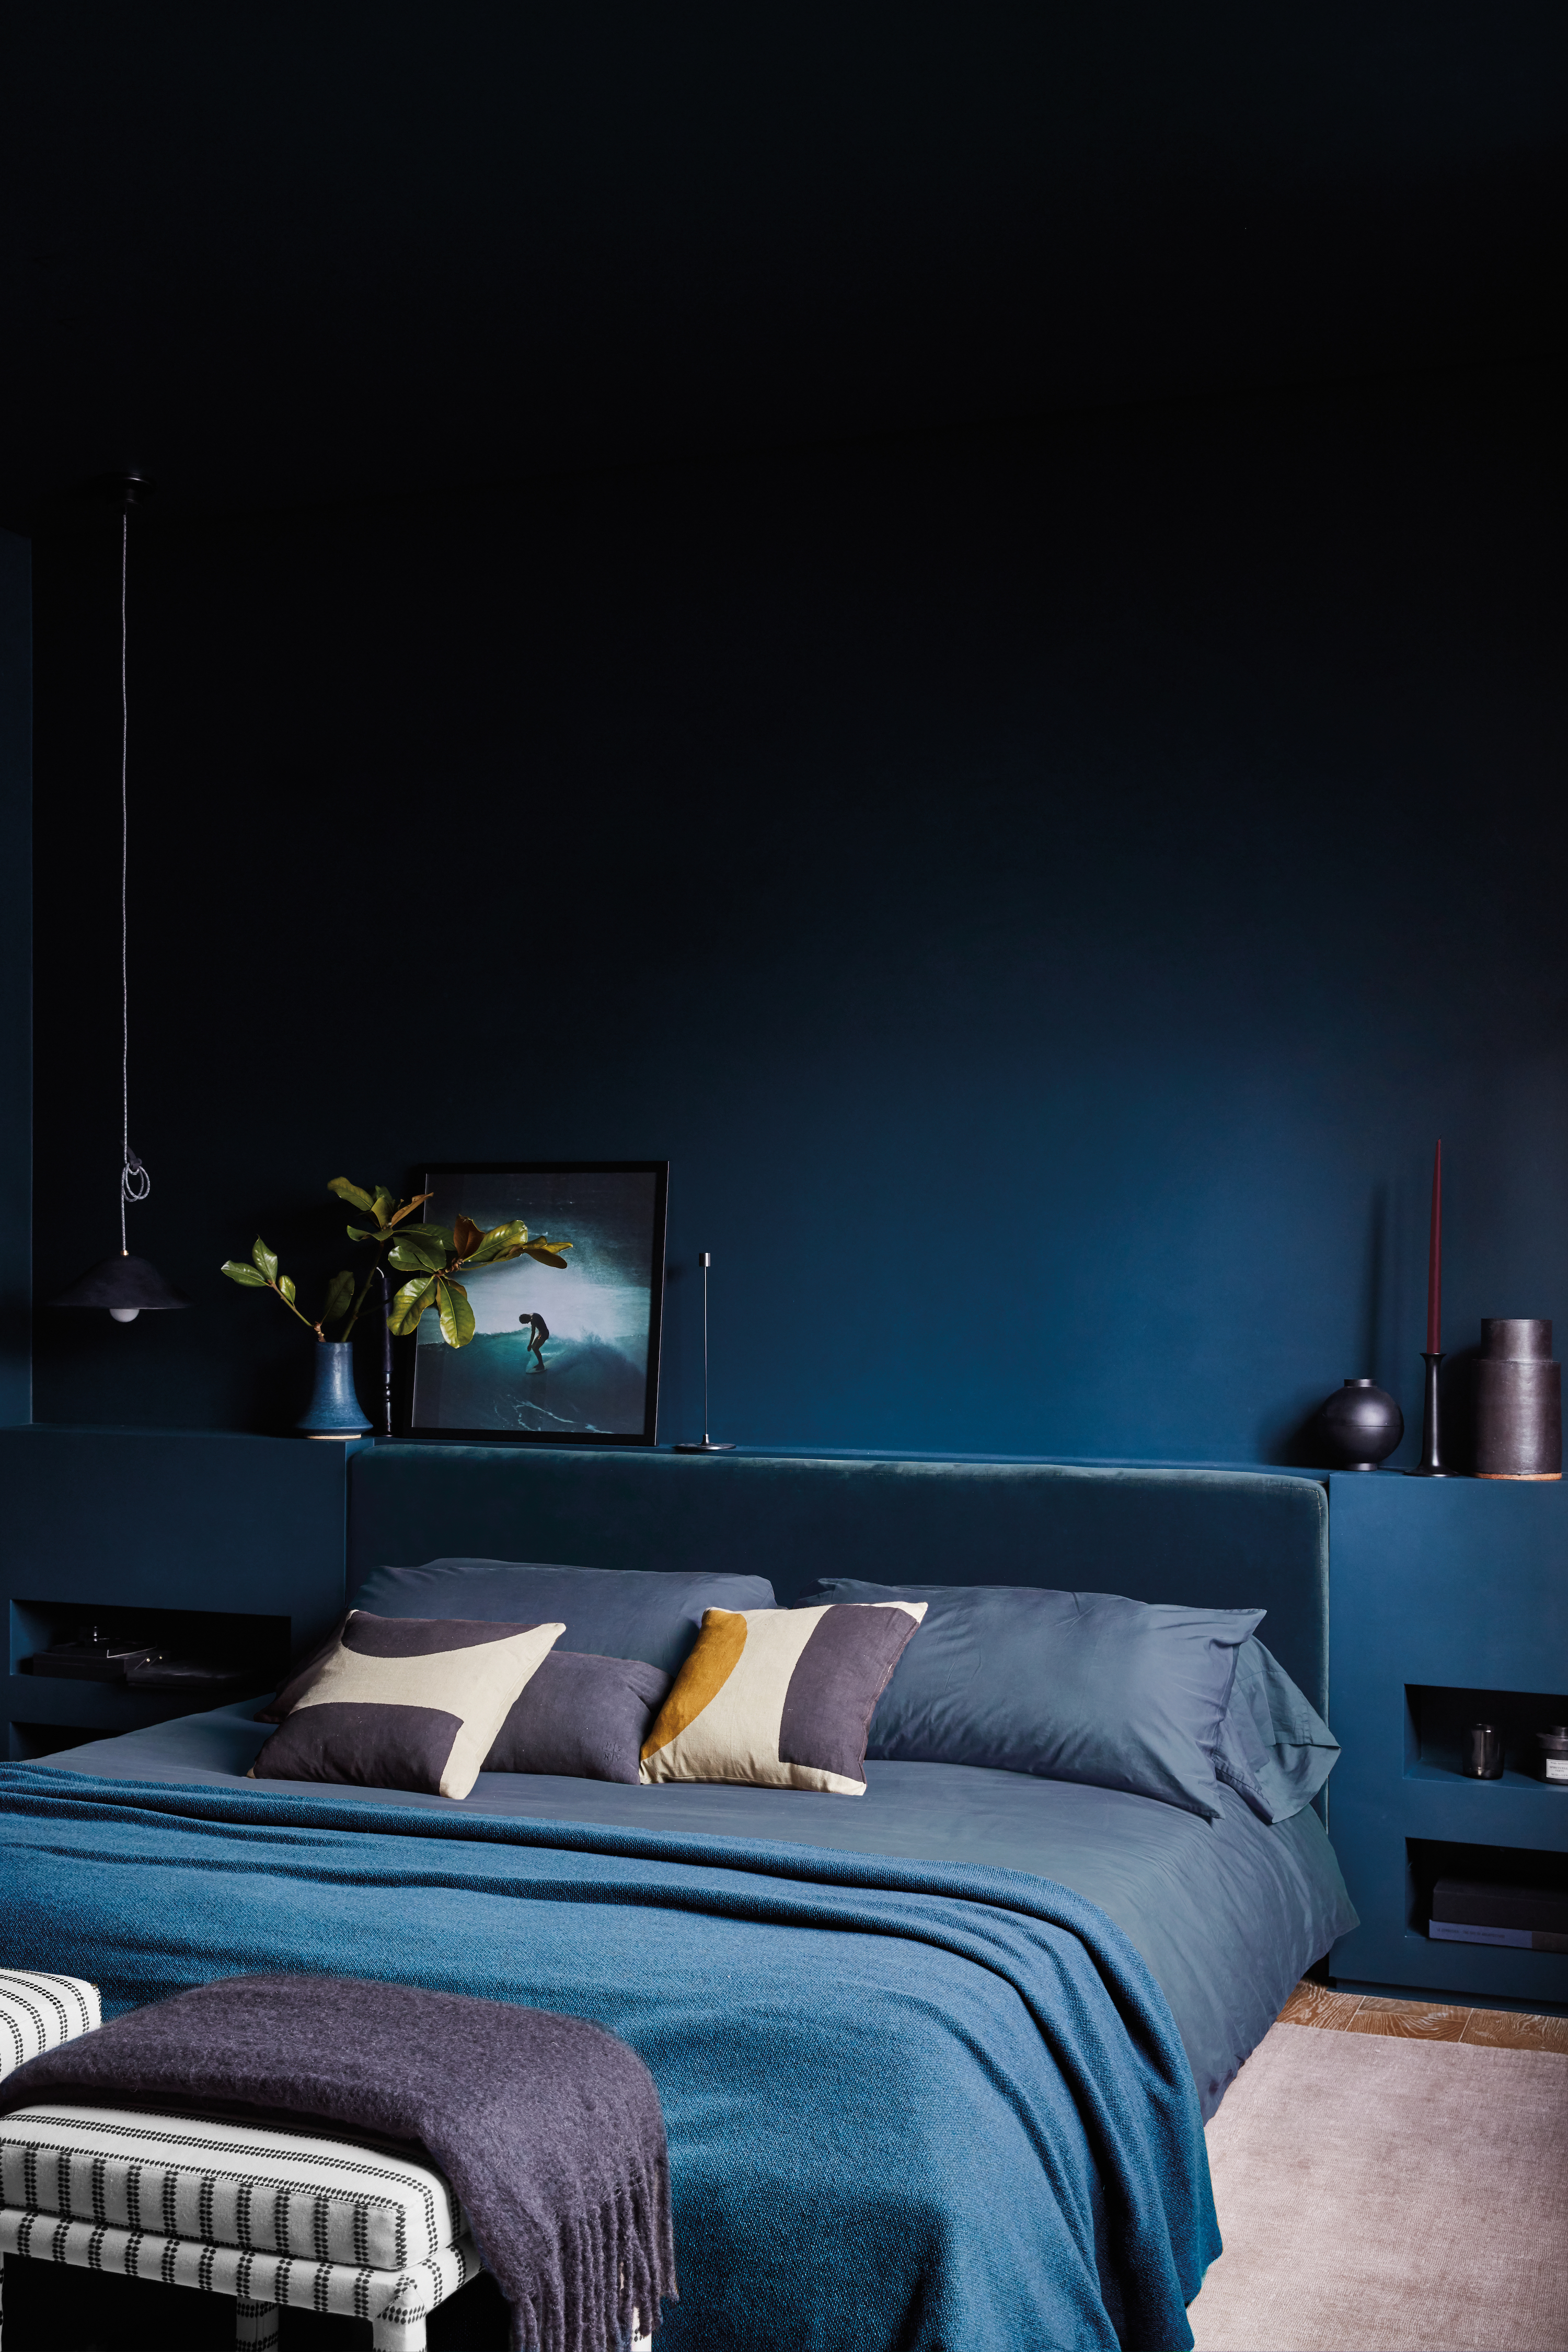
Cue plan B: IKEA’s Malm bed. The $600 version that the couple purchased features a hydraulics system so you can flip up the base and hide all your things inside. “It’s easy and it makes things accessible, then it just disappears,” explains Mundle. Still, the black-brown frame looked like it was from the Swedish retailer, so, feeling inspired by Garance Doré’s superdark, monochromatic bedroom and a whimsical wavy headboard designed by Giancarlo Valle, she set out to upholster the small space–friendly piece. Here’s how she did it for only $120.
The Supplies

- Plywood
- Batting
- Fabric of your choice
- Staples
- Staple gun
- Jigsaw
- Spray adhesive
- Scissors
- Pencil
- Cardboard (optional)
- French cleats
- Wall paint
Step 1: Batter Up


In order to get a sense of the dimensions of the fabric, assemble the base of the bed frame. After measuring each of the two sides and footboard, cut generously sized slivers of batting from the roll, ensuring they’re wide enough to wrap around the edges. Secure one layer of batting to the bed frame with a staple gun.
Step 2: Connect the Dots


Take a similar approach with the upholstery fabric: Cut the textile into three long rectangles, accounting for extra coverage around the edges of the bed frame. But before you adhere the material with staples, sew the pieces together where the two corners will ultimately meet (Mundle used her sewing machine, but notes you can also hand-stitch the seams). This will promise a seamless look all the way around.
Step 3: See the Big Picture
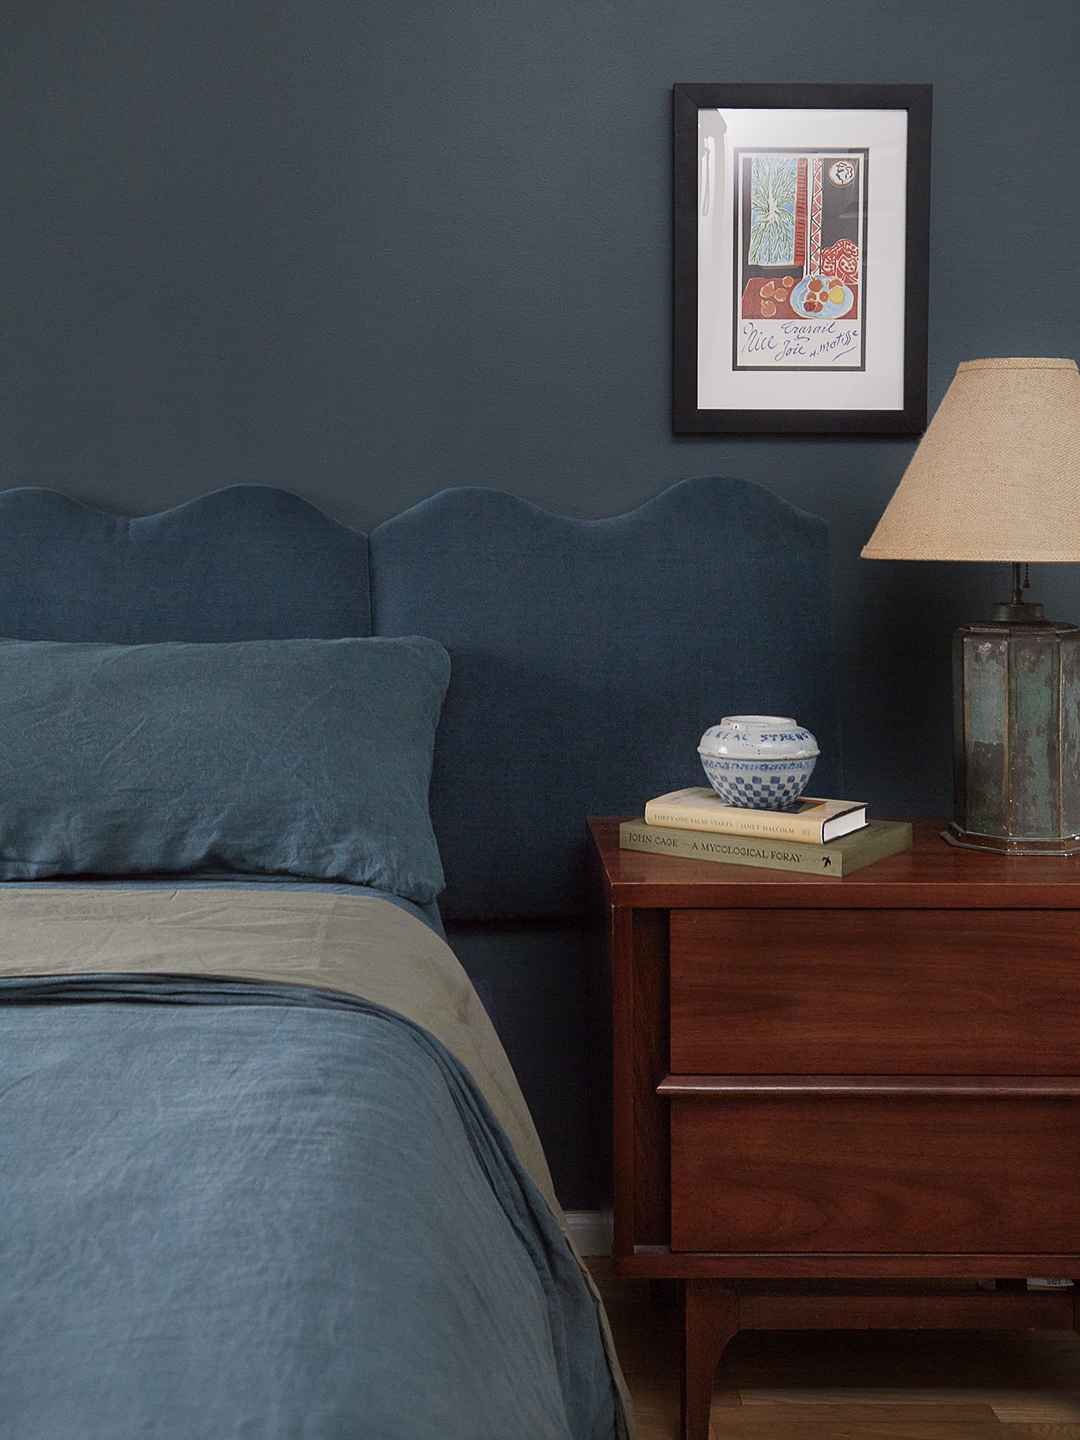
If you’re going for an allover monochromatic look in your bedroom, this is the stage where you’ll want to switch gears and paint your walls. Mundle chose Saturday on Sunday by Backdrop for her space, as it is almost an identical match with the dark blue-green faux performance velvet she used on the bed. “For me, a bedroom is for sleeping. I just want to be in here and curl up in my cozy little cave,” she says.
Step 4: Ride the Wave


While Mundle could have purchased one long plywood plank and made a solid headboard, dividing it into four individual pieces made the sawing part easier. Also, “I figured if I ever want to move, it would be easier to carry,” she notes. To achieve a continuous ripple across the top edges, cut out a curved chunk of cardboard and use it as a guide to draw your shape on each piece of plywood. Then, using a jigsaw, trim off the excess wood to reveal the silhouette. “It should be more of a shallow, sloping wiggle rather than an aggressive ‘up and down,’” Mundle points out.
Step 5: Wrap Up

Prevent the headboard upholstery from sliding around by first spraying adhesive on to the plywood. Then wrap one layer of batting around the forward-facing part of the board. Warning: Steer clear of foam, as it will make the headboard look overstuffed. “It’s plenty squishy and soft with just batting,” explains Mundle. Finally, cut your fabric into large squares and, holding it taut, secure it around the batting with staples.
Step 6: Lean Back

Draw a level line across your wall where you want your headboard to hang. Mount four French cleats along the line, screwing the metal backing part to the uncovered side of each of the four plywood sheets. Hook them on and—voilà!—an IKEA hack dreams are made up.
