We may earn revenue from the products available on this page and participate in affiliate programs.
I’ve been slow to graduate from the familiar comforts of IKEA furniture. Since I moved into my second post-grad apartment, my Hemnes bed frame has remained constant as I’ve toyed with my gallery wall, added some rugs, and switched out my bedding three different times. I started to get tired of it. Very tired.
I thought about swapping it with a Wayfair headboard that was more aligned with my style, but I didn’t want to spend my money on another home buy I’d probably tire of in a few years. I debated splurging on something from CB2, but I couldn’t justify the expense. How I could make the most of what I already had? I realized the best solution might actually be the fastest, easiest, and most affordable of them all.
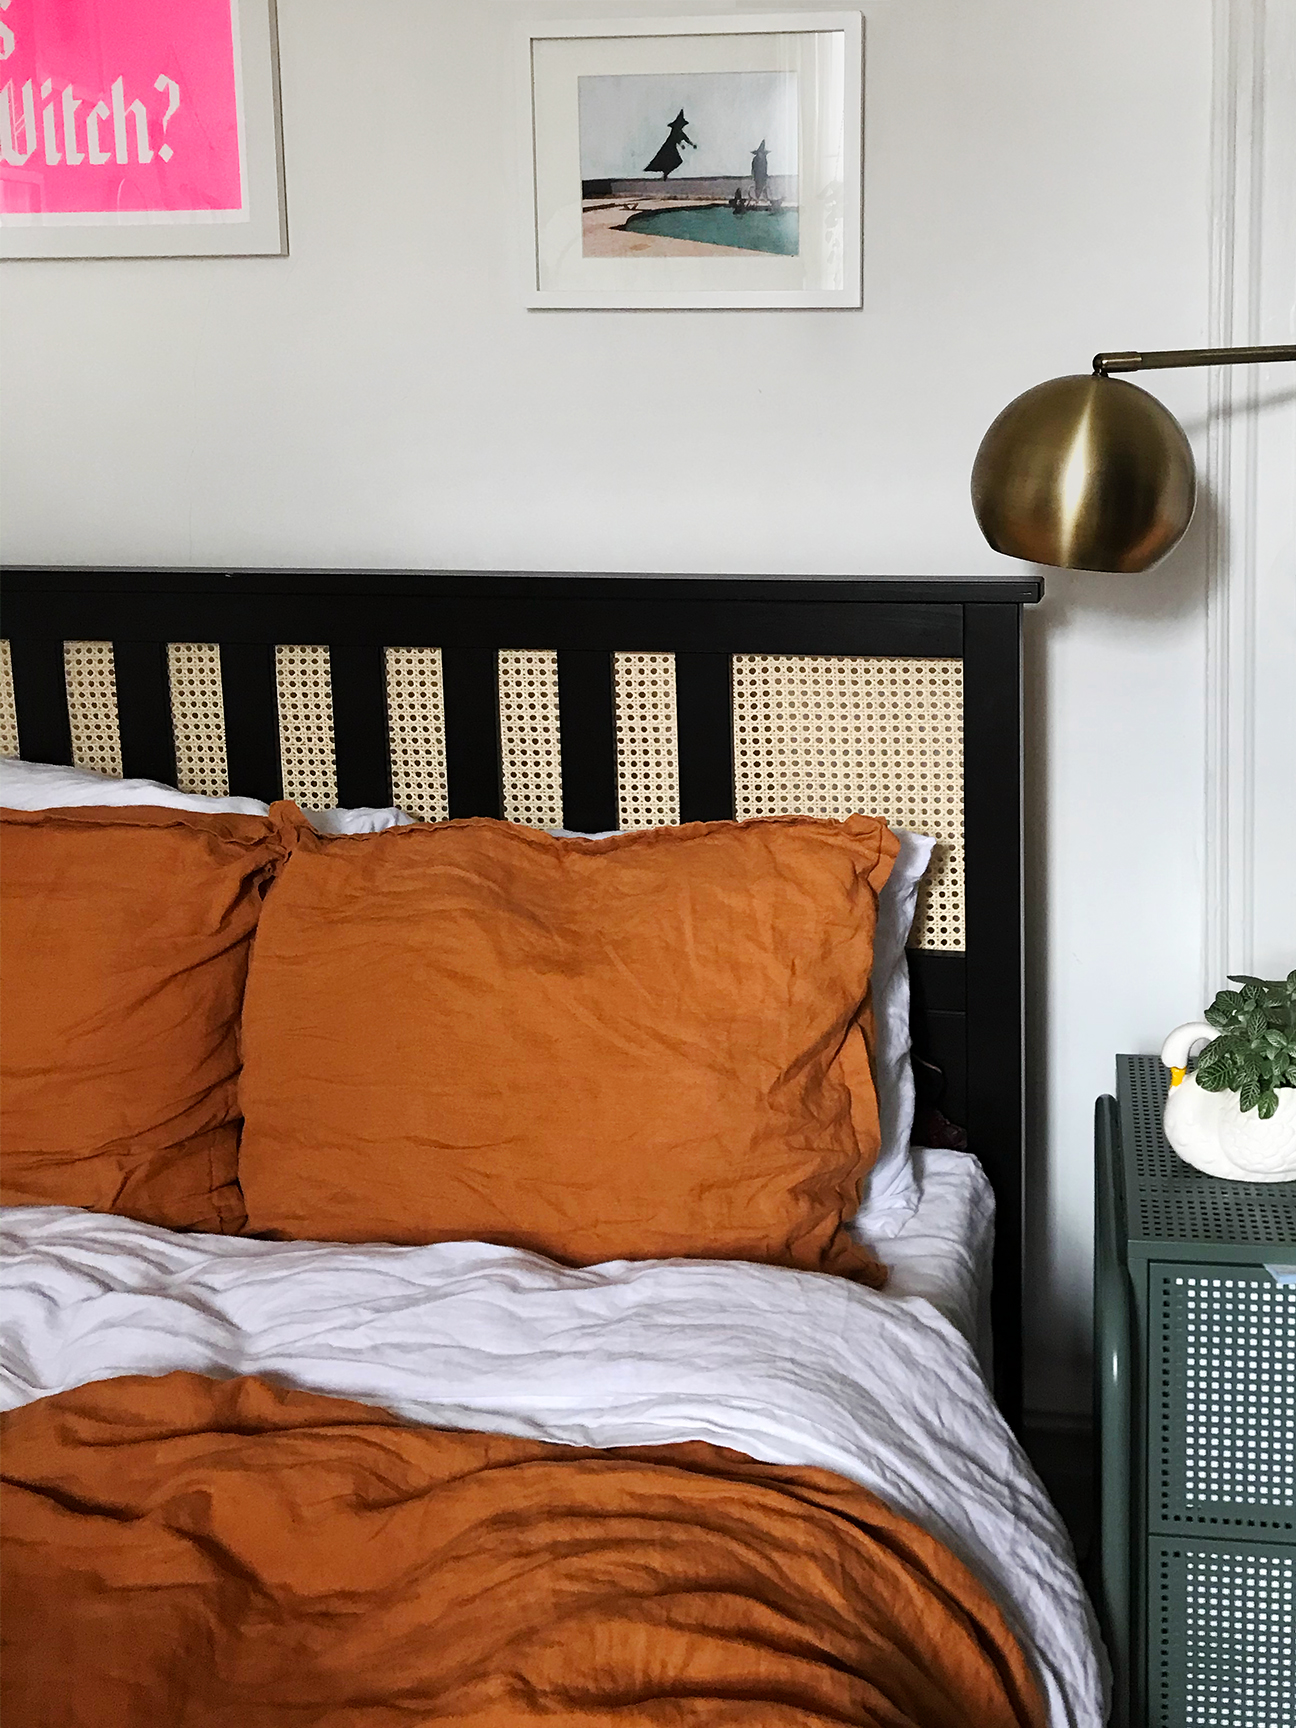
Every time I considered what my ideal bed would look like, the cane trend came to mind, and a quick Google search showed me that I could easily buy the material for about $10 per foot. I put two and two together: Why not just transform my tired Hemnes into the cane-backed headboard of my dreams? After sitting on the idea for months, I pulled it off with way less effort than I imagined.

The Supplies
- Hemnes bed frame
- 5 feet of 1/2-inch open-cane webbing (for a full-size bed; use 6 feet for a queen or 7 feet for a king)
- Staple gun
- 3/8-inch staples
- Painter’s tape (or another person to hold the webbing as you staple)
Step 1: Trim the Caning
Learn from my mistake: Avoid a mess by cutting your caning to size before you try to affix it. You’ll want the webbing to generally match up with the headboard, with enough extra room to staple it. Just make sure the edges stay hidden and you’ll be set. If you’re nervous about overtrimming, you can save this step for last—just be warned you’ll have an annoying cleanup job when all is said and done.
Step 2: Tape It Up
Use painter’s tape to attach the webbing to the back of the headboard, and then take a look at the headboard straight on to make sure it’s aligned to your liking.
Step 3: Staple, Staple, Staple
Be generous with how many staples you use to make sure the webbing is properly secured (there’s no need for perfectionism!). Affix the material around the entire perimeter, and then staple it to each individual headboard spoke. When you’re done, push your bed back against the wall and step back to admire what a change just 10 minutes of effort can make.

T50 Heavy Duty Staple Gun, The Home Depot ($19)
Shop Now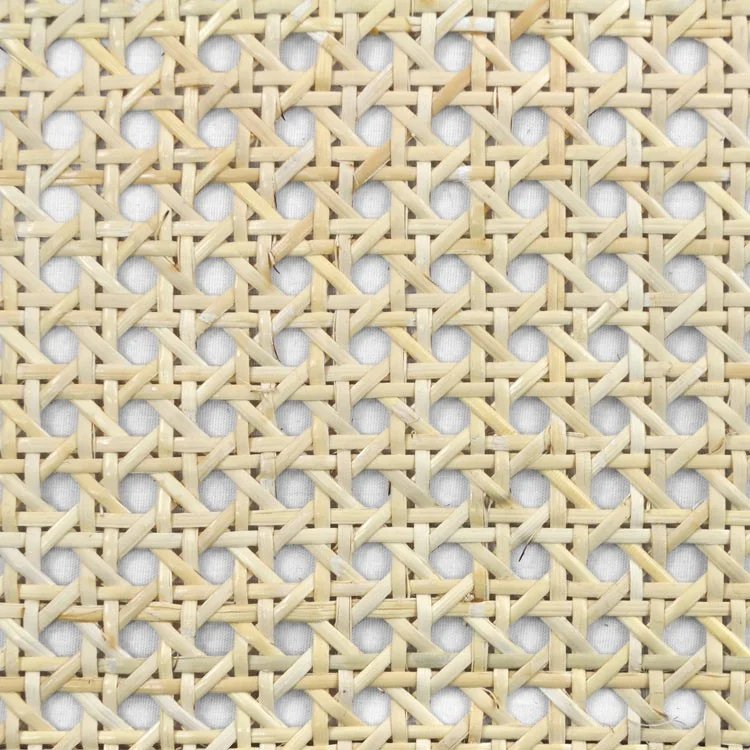
1/2u0022 Open Cane Webbing, Online Fabric Store ($19.65 per foot)
Shop Now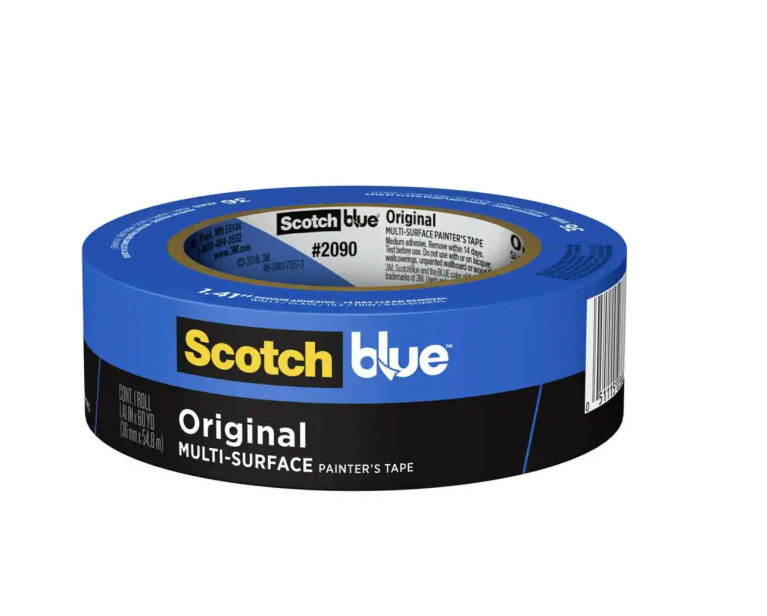
ScotchBlue Original Multi-Surface Painter's Tape, The Home Depot ($8)
Shop Now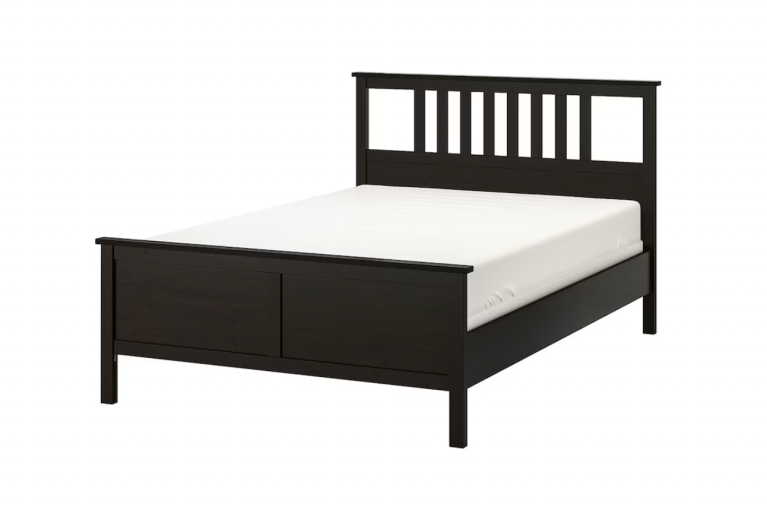
Hemnes Bed, IKEA ($469)
Shop NowThis story was originally published in September 2018. It has since been updated.