We may earn revenue from the products available on this page and participate in affiliate programs.
In Renovator’s Notebook, homeowners open up about the nitty-gritty of their remodels: How long it really took; how much it actually cost; what went horribly wrong; and what went wonderfully, serendipitously, it’s-all-worth-it-in-the-end right.
Square footage: 1,076 sqft
Year built: 1954
Total renovation cost: $70,000
Top priority: Turning a tired bungalow into a multitasking live and work space.
When interior stylist and author Emily Henson moved out of London to the Kent coast during Covid, she pictured herself living in a centuries-old, four-story townhouse with lots of rooms. So she surprised herself when she walked inside this three-bedroom bungalow and had that “This is it!” reaction.
The corner plot meant it had a generous, wraparound garden and lots of natural light pouring into the home. That’s where a lot of the pros stopped though. She inherited the most polarizing of mid-century design trends, including patterned carpets, polystyrene ceilings, and plasticky wallpaper. Wanting to use the house as a bonus income stream through Airbnb rentals and a location hire for shoots, Henson opted for raw finishes that wouldn’t feel too precious. “Walls and floors get scratched with so many people passing through,” she explains.

This marked her first proper renovation and naivety helped mask the reality of what was in store. “I went in thinking: ‘We’ll just punch through a few doors here and there,” she says. Hiring a builder to tackle the big jobs (“As a stylist, I’m very much a finisher,” she admits), she rolled her sleeves up to tackle some time-intensive tasks to stretch her budget. Here, she talks through the transformative touches that make for a modern interior with all the charm still intact. “What I love is that from the outside, you can’t tell [there was a renovation],” shares Henson. “I like that it still looks a bit of a granny cottage, and so every time people come inside, it’s a total surprise.”
The Perfectly Imperfect Flooring

The first thing I did was pull up some carpet hoping to find treasure underneath. But all we found were Asbestos-ridden tiles. I looked into laying wooden floors but even for the most basic boards it would have been upwards of $10,000 for the whole place and I couldn’t afford that. I love polished concrete, and that would have created a modern contrast against the floral fabrics that I’m into, but that was even more expensive. We needed to move in and I honestly didn’t know what to do.


Screed is cheap: it’s what you’d use before putting wooden flooring down. My ex-partner and I poured the self-leveling stuff ourselves. It comes in bags of powder which you have to mix with water using a drill part, so the builder helped with that. We started in the back bedroom and laid battens between the rooms to stop it spreading out. I’ve left it exposed and while it looks lumpy in some areas I actually don’t mind that—I’m not a perfectionist. In total it cost around $700 for the materials.
The High-Up Hideaway

It was a friend with a sharp eye for spatial planning who suggested I knock the kitchen through to the dining room and take off the ceilings. She was so right. The beams had to stay because they are structural and so we had the builder sand them. I’d seen pictures of cute mezzanines and it sparked the idea for a half-level above the kitchen. For not much extra cost we were able to carve out this extra space as it’s essentially a steel beam and some flooring. It’s part den, part library where I keep all of my books.


Hot tip: I re-used the joists from above the living room ceiling to create the fake beams in the kitchen. It adds interest and breaks up the expanse of the ceiling.
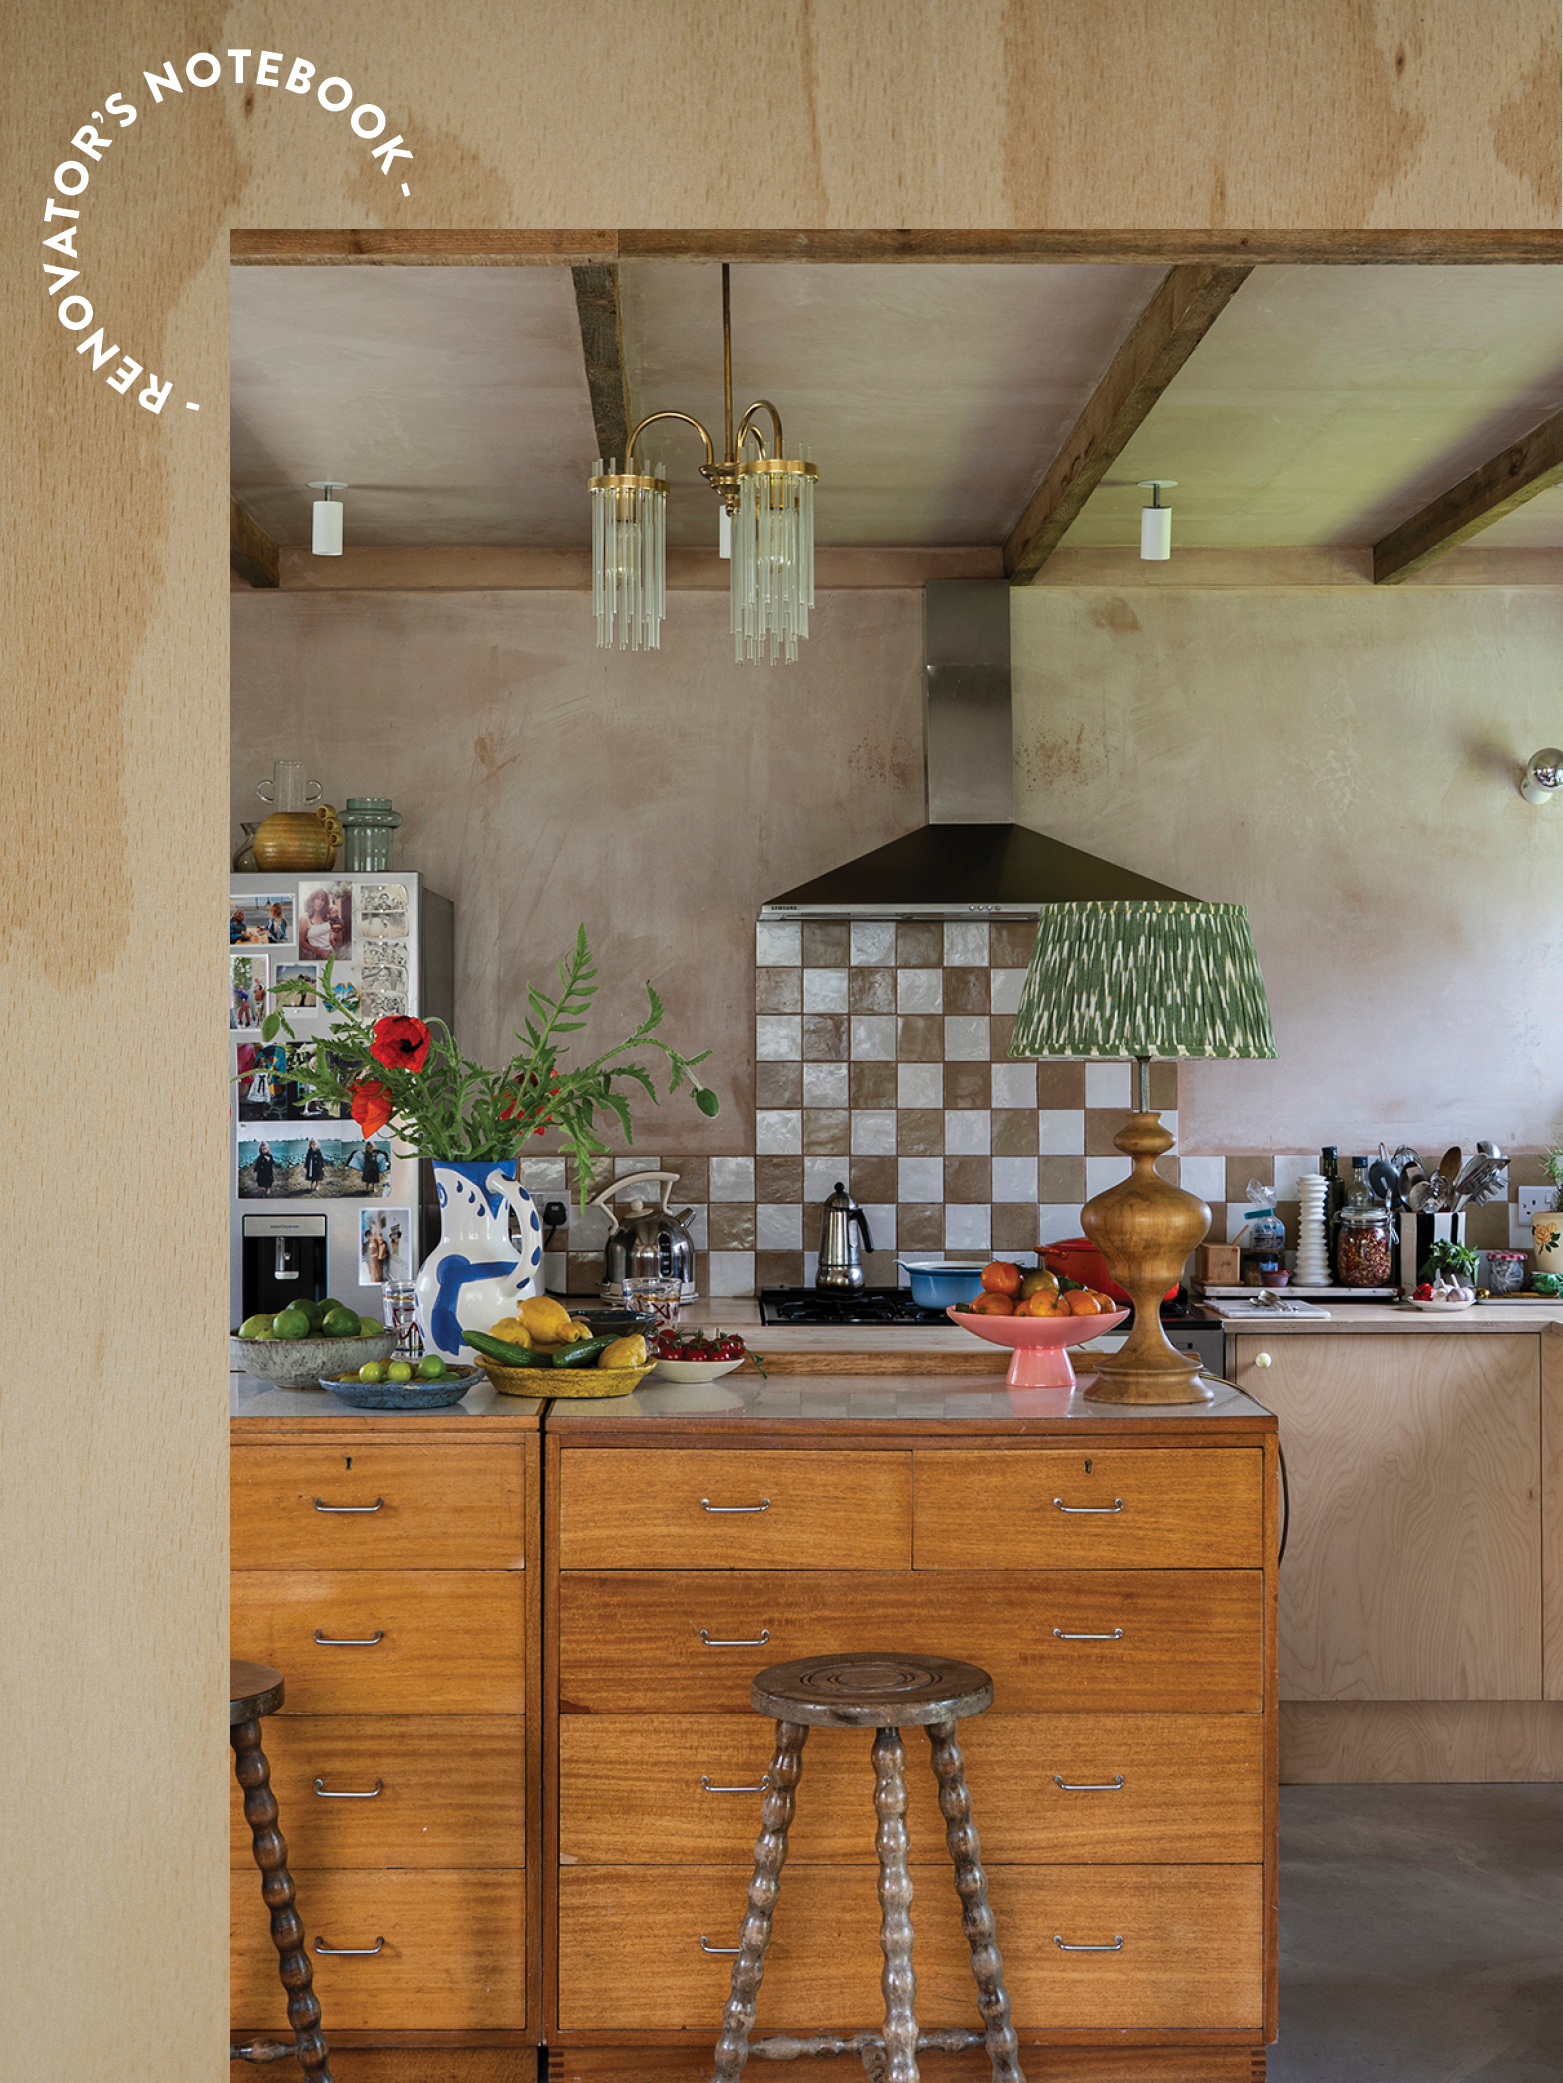
The Floating Island

I wanted some of the furniture to be flexible in order to be able to maximize space for shoots so a mobile kitchen island was the answer. I had something more antique-looking in mind, but my ex found these in a local vintage shop and there happened to be four of them. They’re drawers from a 1960s military base and cost about $130 each. I asked the builder to put them on a slab of birch plywood and he fixed industrial castor wheels to them. They provide so much storage that I didn’t need to install any wall cabinets.
The Perfect Patina

We stripped back the primary bedroom’s walls and it revealed this lovely mix of gray and yellow (a combination of concrete board and the backing of the wallpaper that was there). I sanded it a lot so that it’s not rough to the touch. It adds interest and creates another backdrop to shoot against. The white section where the border is just a quick paint job—I made it crisp so that it looks intentional.

Hot tip: I made all the curtains myself using a super-cheap roll of fabric from a local haberdashery. It’s not linen but I had the feeling that if I washed it, the weave would tighten up. I tried it on a sample and that’s exactly what happened, so I went back and got a dozen yards of it.
The Standout Grout

I really wanted to re-use some of the original yellow tiles but the builder said they were too brittle to reapply. I replaced them with a super-cheap white square tile which I elevated by using a light-brown grout. It’s something which people seem to really notice. The sink is from a reclamation yard and the blue tub ended up being free from Facebook Marketplace.


Hot tip: Using decorator’s varnish, I sealed the plaster all around the kitchen and bathroom to protect it from steam and oil marks.
The Elevated Exterior


Once I’d finished renovating inside, it made the exterior look almost derelict. I’d split up with my partner and I needed a project, so over a month I spent the whole time outside sanding and painting the siding. The windows definitely need replacing some day but I’ve remedied them for now with putty (in fact, I’d say they’re 50 percent wood filler at this point!) It’s such a transformation and it only cost me about $400 in materials. This is probably my favorite project of all.