We may earn revenue from the products available on this page and participate in affiliate programs.
When we ask renovators about what inspired them, they often reference an Instagram post they saved or a cool hotel they visited. But Leah Hodson’s bathroom makeover began much closer to home. Er, technically, it began at her old home.
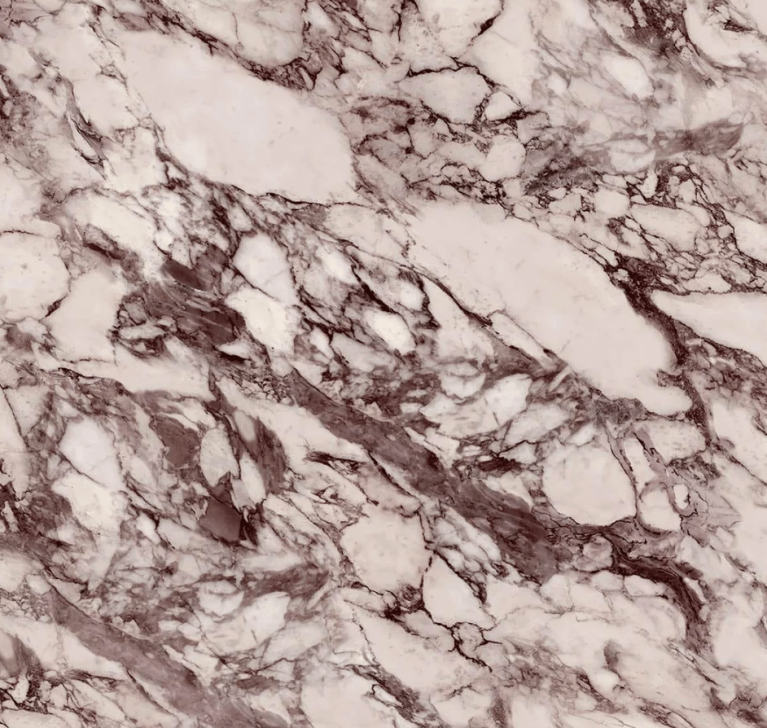
When the U.K.-based DIYer behind @thestanleydiary moved in December, she was especially sad to leave behind her “perfect bathroom,” which was almost entirely covered in marble tile. The best spot in her new house to re-create the look was the powder bathroom: It was a blank canvas—albeit one with lots of quirky ceiling and wall bump-outs.

The only difference this time was Hodson didn’t want to use actual marble. “I’m not quite ready to take on tiling just yet with two toddlers running circles around me,” she says. Hodson also wasn’t interested in spending thousands of dollars on a bathroom upgrade, so instead of browsing the stone yard, she found herself Googling Calacatta Viola marble–inspired mural wallpapers. Belarte Studio proved to have the most realistic option. “Everyone who has seen it in real life can’t believe it is wallpaper,” says Hodson.
The Supplies

- Wallpaper
- Wallpaper adhesive (Hodson used a U.K.-sold product by Anaglypta)
- Wallpaper smoothing tool
- Scissors
- Box cutter
- Wood molding of your choosing
- A level
- Liquid nails
- Clear acrylic backsplash
- Brass screw caps
Calacatta Marble, Belarte Studio ($6 per square foot)
Shop Now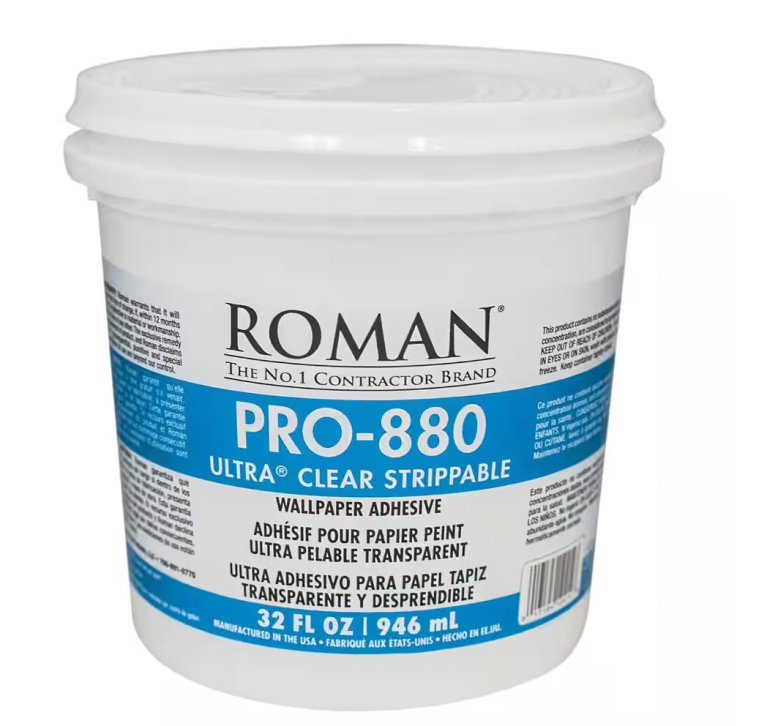
Ultra Clear Strippable Wallcovering Adhesive, The Home Depot ($9)
Shop NowStep 1: Find the Start Line


Because Hodson’s mural wallpaper is so bold and the powder room is so small, she felt swathing every inch in the faux marble design would make the space feel minuscule. So as a compromise, she decided to only cover three half-walls and one full wall. Because the back toilet wall was getting the full treatment, she decided to begin there. First, she drew a line down the middle of the wall, so she would know where to align the two seams of the separate wallpaper panels. (Over time, wallpaper can slide and reveal the gaps between sections, and if said gap is situated in the middle of the room, it will actually be less noticeable than if it were off center.)
Step 2: Paste and Stick
While peel-and-stick treatments are popular among DIYers, the design Hodson fell in love with requires you to coat the wall first. Using a paint roller, she dipped it into a tray of paste and then rolled the adhesive onto the wall. “I found this gave more even coverage than a brush, which I’ve previously used,” she says.
Step 3: Patiently Work Around Bump-Outs
The tricky part came when matching the panels on the full wall with those on the half-walls. This is when the sharp box cutter and time-tested rule of “measure twice, cut once” came into play. Hodson made sure to line up the sheets on the pipe box perfectly so the veins in the faux stone looked like they were all one piece.
The area around the vanity unit gave her the biggest headache. Hodson accidentally cut the wallpaper too short, forcing her to cut a small sliver piece to hide the gap. “Which took far longer than I’d have liked to get right, but I’m glad I did, as it is barely noticeable,” she says.
Step 4: Give Yourself a Seamless Border


For the surfaces only covered partially in wallpaper, Hodson installed wood molding around the top edge, first using a laser level to make sure the border would be a straight line. Then she applied the wallpaper from the top of the baseboards to the bottom of the wood molding. The trim piece gives your eye a natural end point.
Step 5: Protect the Splash Zone

Even after refreshing the tired-looking vanity with a no demo hack involving precut fluted MDF and liquid nails, Hodson was left with a problem: preventing the wallpaper behind the sink from becoming damaged by moisture.
Cue CutMy. She took the brand’s 6mm acrylic sheet (it came precut and predrilled) and made a backsplash, complete with brass screw caps that cover the drill holes. The invisible barrier allows the faux stone to still shine through.
