The One Thing I Wish I Knew Before I Moved Into My Rental
Don’t make this mistake.
Updated Sep 6, 2019 6:59 PM
We may earn revenue from the products available on this page and participate in affiliate programs.
You know the expression, “good things come to those who wait”? Growing up, it always seemed like a blanket lie, created by the powers that be to scare children into cultivating patience. I lost many a maybe-they’ll-go-on-sale pair of jeans and sold-out plane tickets to that adage. So when it came time to outfit my new apartment last July, I was keen to dive headfirst into decorating. The idea of living on an air mattress stressed me out so much that I impulse-bought a bed frame within the first two weeks.
It’s now February, and I hate that bed frame. I hated it the moment it turned up on my doorstep in a sea of styrofoam and torn cardboard, but the nightmare of returning something so bulky and my need for a bed won, and I ended up keeping it. But I learned quickly from my mistake: Rushing into decorating a space, even if it’s a rental, is never a good idea.
Over the course of the last seven months, I incrementally added to my space through forays to vintage shops, trips to Europe, and the odd visit to my parents’ attic to see what I could pilfer. I drove my roommate crazy with hundreds of texts containing photos of linen pillowcases and bookshelves, asking for her opinion.
While I’m just getting to finishing touches like hanging photography or finding a doormat, I’m so glad I paced myself with the rest of my apartment. Not only did this save me a ton of money because I was able to find better deals through extensive searches, but it also helped me figure out my design style.
Here are the things that worked for me when gradually decorating my rental.
Step 1: Research Your Style
This doesn’t necessarily mean you have to define your style—especially since so many people subscribe to a multihyphenate aesthetic—but it does mean figuring out what you like. For me, my Instagram “saved” folder was a perfect way to decode my personal style. It was especially helpful when it came to finding cool color pairings, which guided the palette for my purchases. My “saved” folder is responsible for the fact that I now have a tonal pink bedroom, despite previously thinking I was averse to the hue. After bookmarking countless photos showing gradient pinks and burgundies paired together, I couldn’t get the palette out of my head.
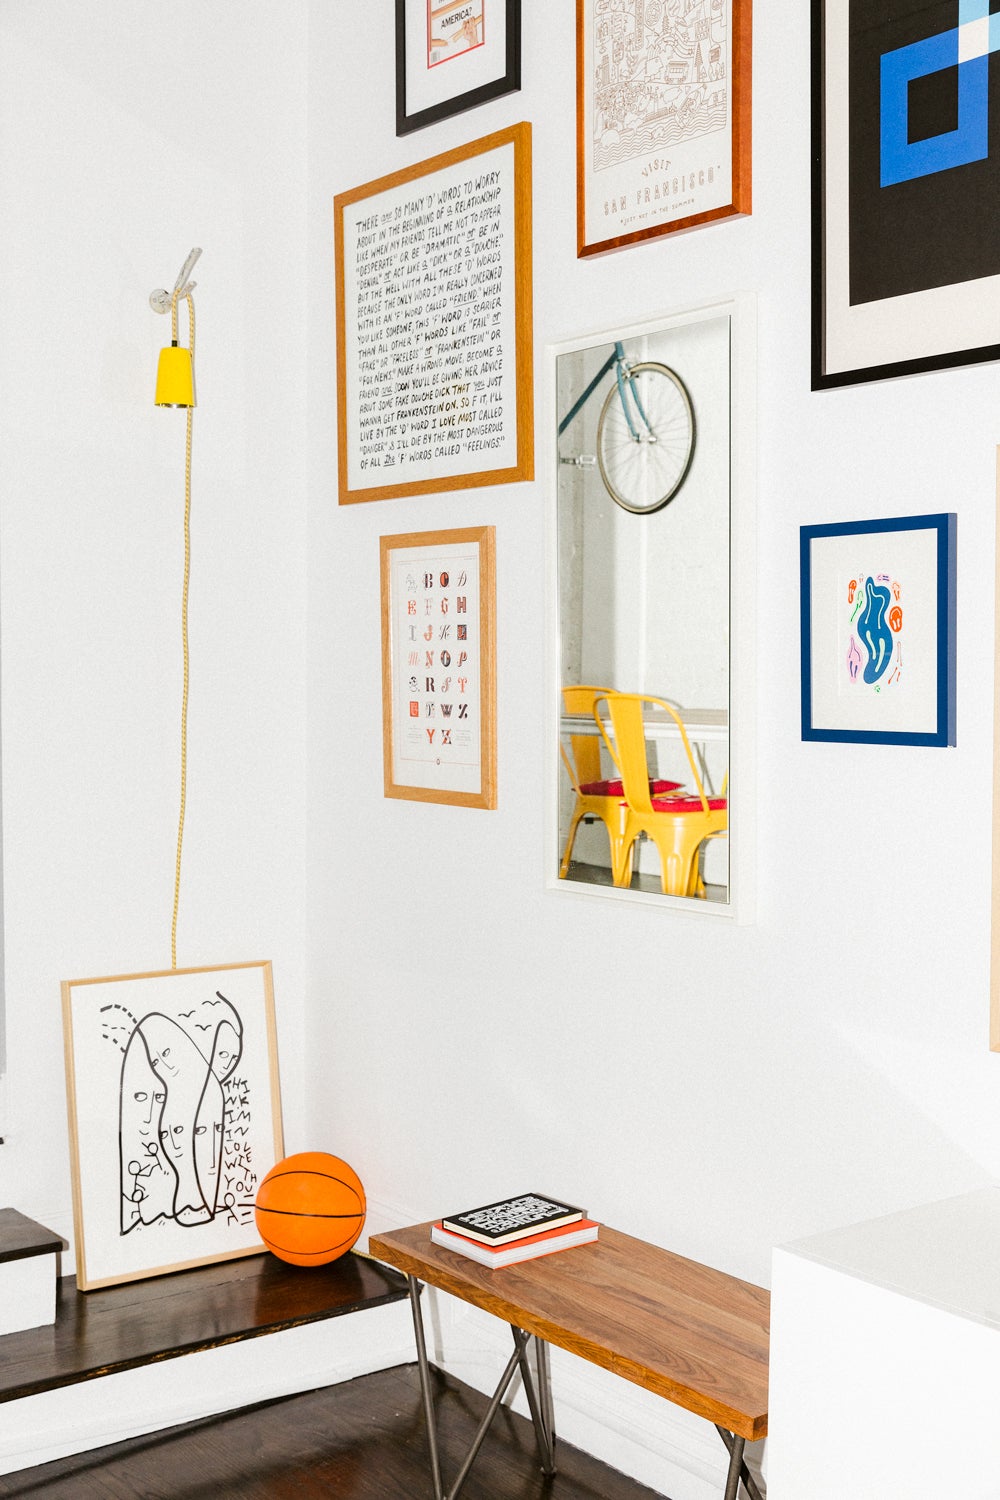
Spend some time earmarking your favorite design magazines and seek out interior designers or bloggers who have similar tastes to you. Not only will you get tons of design inspiration, but you may just find a fun DIY project in the process. I used A Pair and a Spare’s imperfectly laid-out gallery wall DIY to inform my own. I love her idea of filling frames with unconventional things like wrapping paper or cards instead of traditional artwork.
Step 2: Make a List…
I’m a visual learner. I stay organized by writing everything down in the three different to-do list notebooks I own (what hoarding problem?), so it only made sense that a list would help me figure out my furniture and decor needs. Make categories of what you already have, what you want to replace, and what you need to buy to help focus your decorating.
Then donate the things you no longer want or sell via a secondhand store. There are so many great online resources for getting rid of unwanted furniture. Sites like AptDeco (if you’re NYC-based) and Craigslist became bookmarks on my laptop because I used them so frequently. That way, you’re not throwing anything away and you might make some money to go toward the new items you want.
Prioritize your list by “want” and “need.” This is something I found personally useful, as I have a tendency for the dramatic and immediately slate everything I want as a “need,” so taking a step back and reevaluating was helpful.
Step 3: … Then Dissect It
Antique or contemporary? Secondhand or new? It might be an aesthetic or budget choice, but figuring out what you want each piece to look like will help you source it.
For example, I’m personally into antiques. I coerced my friends (who own a car with a sizable trunk, a commodity whose worth you do not realize until you live in a city where most people don’t own cars) into making a trip to the Brimfield antique show, holding off on big-ticket purchases like a coffee table until then. I found it also helps if you know a retailer has a penchant for a certain style or product, as CB2 does with contemporary minimalism and H&M Home does with inexpensive linen textiles, because that way, you won’t spend hours combing the internet for the exact piece you want.
Finally, divide your list into “splurge” items versus “save” items. Setting realistic expectations and keeping cost top of mind makes you less likely to both feel overwhelmed about decorating an apartment from scratch and accidentally splurging on a piece you probably shouldn’t have.
Step 4: Get the Basics First
When you’re finally ready to start decorating, begin with the basics. If you need a sofa to inform the design direction of your living room, make that your first buy, and then build around it over time. If you want to paint your apartment, you should probably do so before nailing in 102 frames and hanging shelves—a lesson I learned the hard way, as I put off painting until now and will have to reinstall a number of wall accoutrements.
Step 5: Overthink Things (Yes, Really)
Your home should bring you joy. So take your time filling it with pieces you love. This is not to suggest you have to spend hours debating the merits of a ceramic vase but just be 100 percent sure whatever item (big or small) you buy is something that speaks to your personal style or holds sentimental value. Especially if you’re just beginning your decor collection, this ensures you won’t have to toss everything the next time you move.