We may earn revenue from the products available on this page and participate in affiliate programs.
Heena Gardner’s motto: “If you can’t find it, DIY it.” As a postgraduate student working part-time on her design blog and a first-time homeowner, she knows a thing or two about crafting things with her own two hands. Just over 1,100 square feet, with three bedrooms and one bathroom, Gardner and her husband’s 1930s Tudor-style house’s original features (like the arched doors and old-fashioned fireplaces) offered historic charm. But they found it difficult to find furniture and decorative details to match (and that were within their budget). “I started having way too much fun renovating and decorating our home,” explains Gardner. “I’ve been motivated to get creative by repurposing thrifted items or building them from scratch.” Below, we break down six of Gardner’s DIY projects.
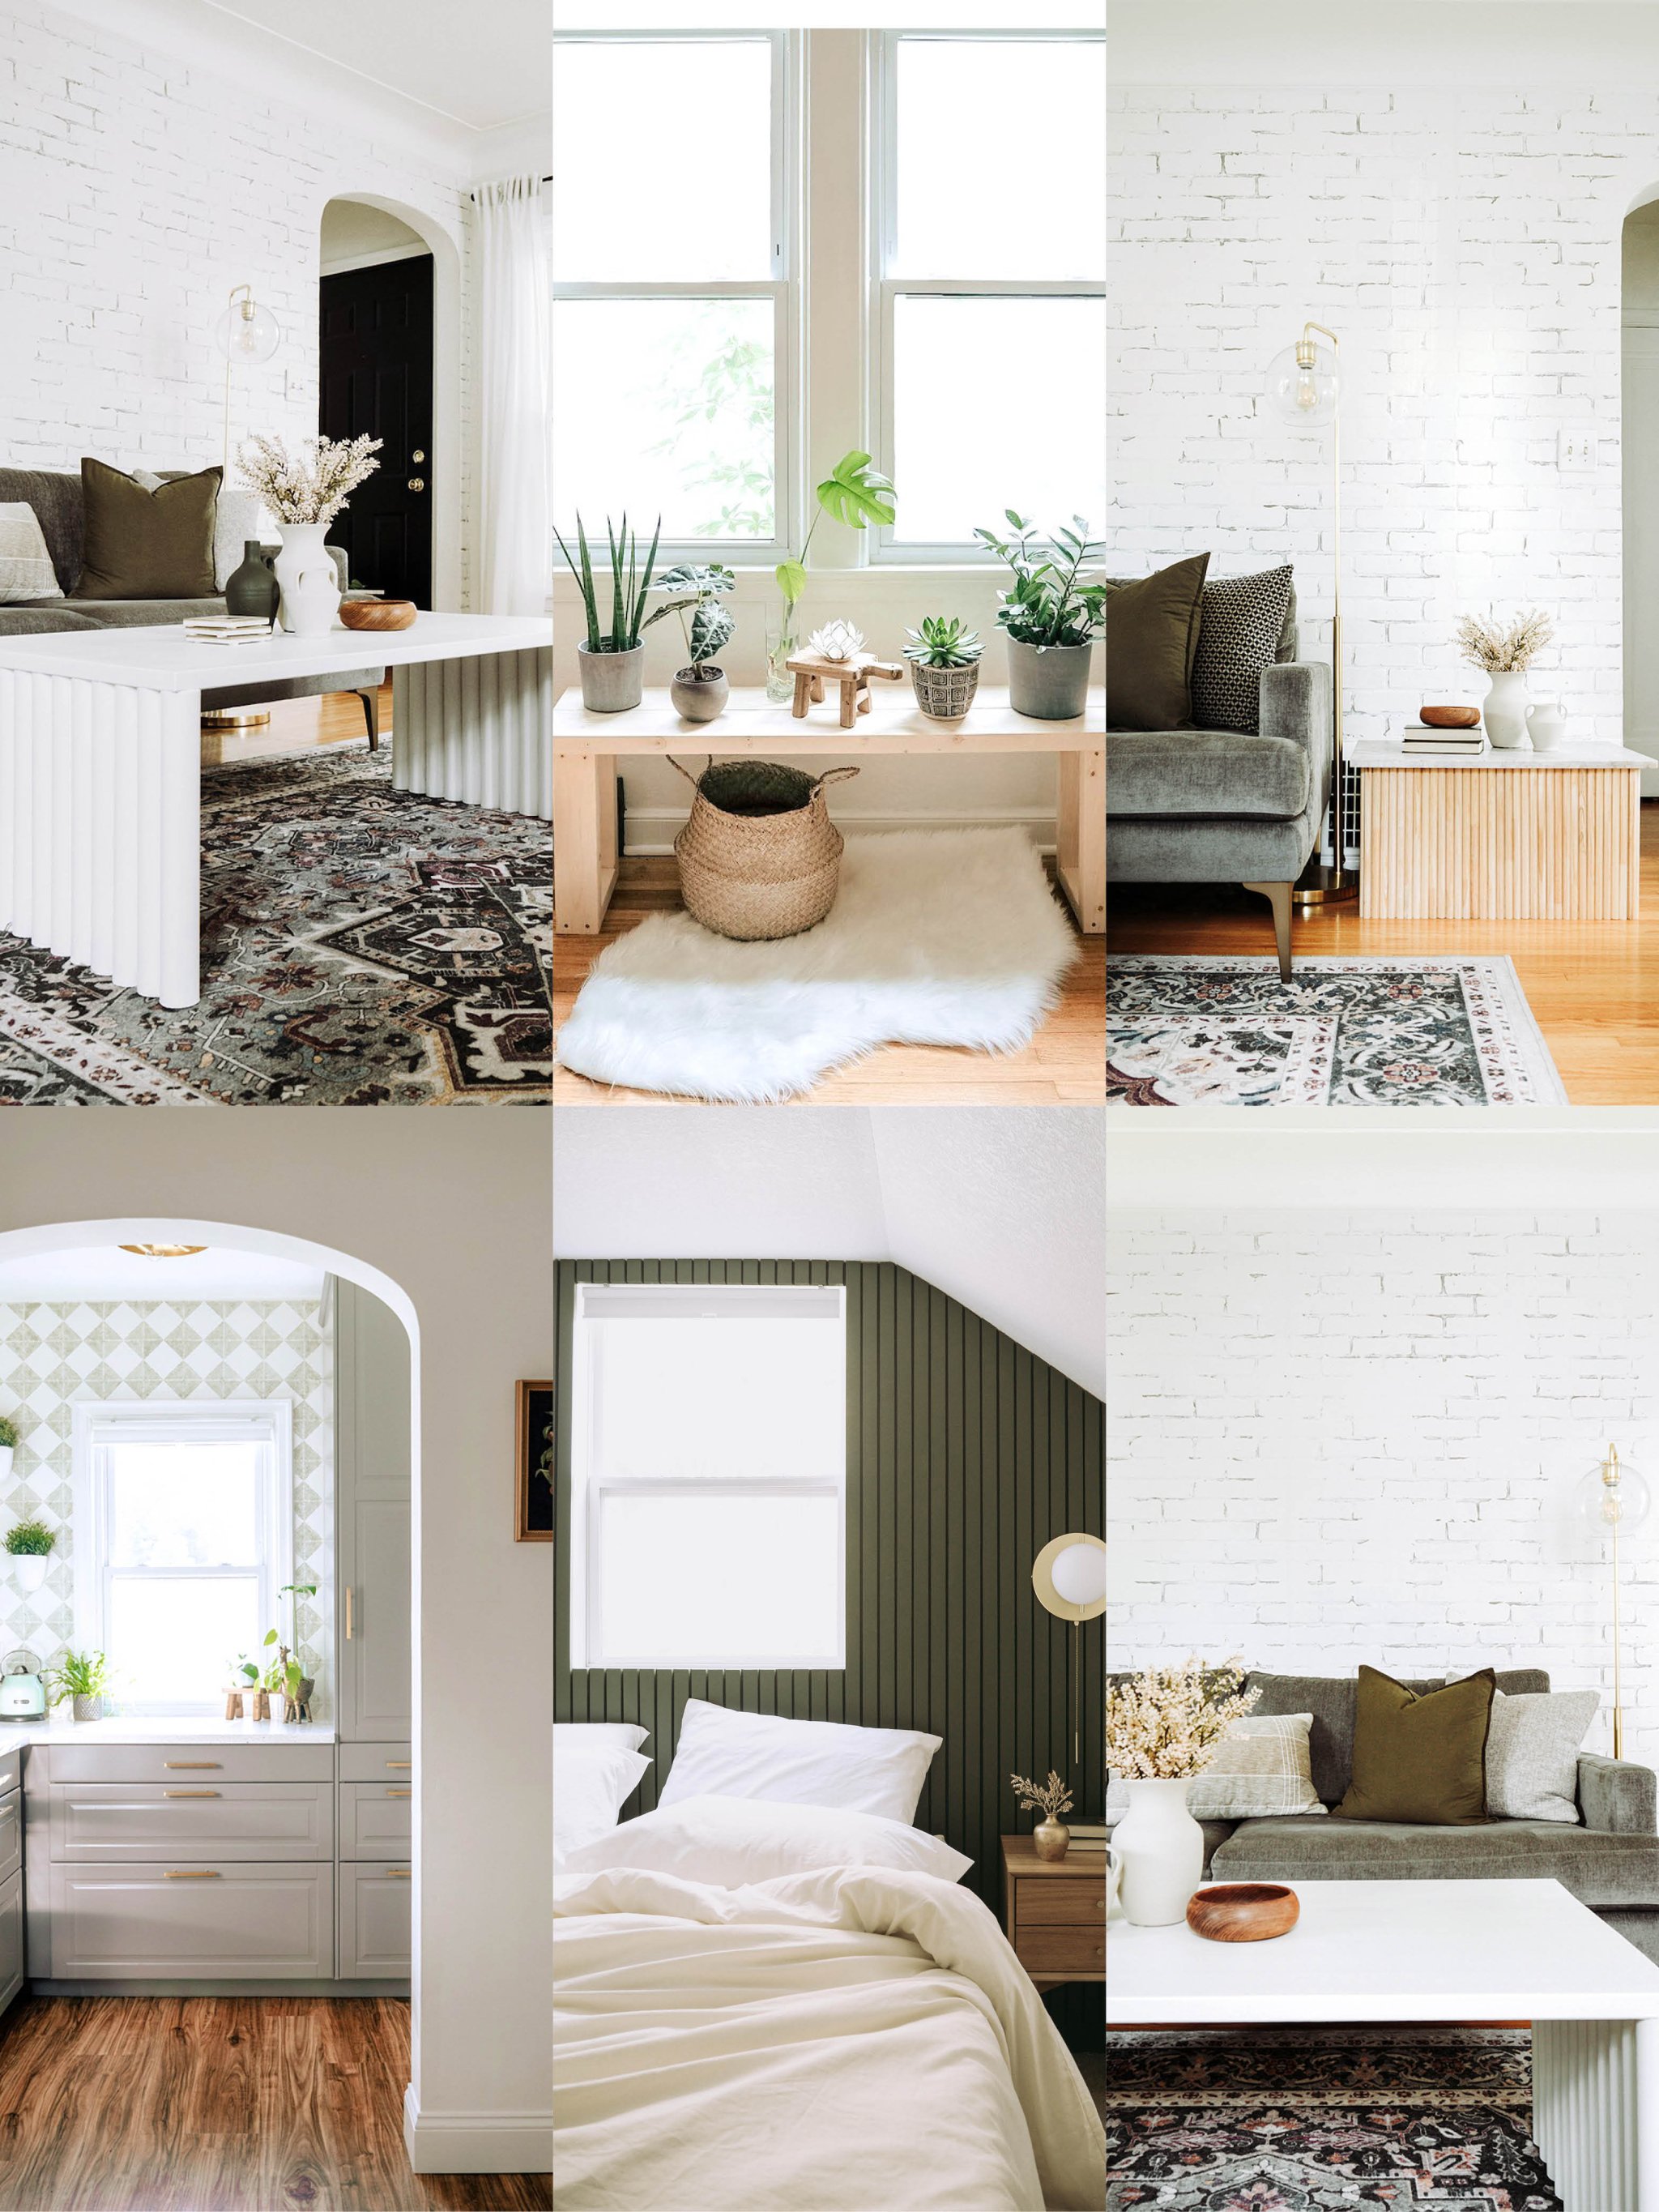
The Dowel Coffee Table
View this post on Instagram
Inspired by the waterfall styles frequenting her Instagram feed, Gardner set out to add some curves to an old IKEA tabletop she had sitting around. All she needed to supplement her go-to tools (a miter saw and sheet sander) were Liquid Nails construction adhesive, eight 2-by-48-inch pine dowels, and Behr’s Swiss Coffee paint.
She sanded down the tabletop to ensure prime painting conditions, before cutting each of the eight dowels into three 16-inch pieces using the miter saw. She attached the pieces to each end of the tabletop in equal parts (12 dowels per side) using the adhesive and waited for them to dry, before flipping the table over and painting the entire thing a crisp white.
The One-Hour Plant Bench


As any procrastinator knows, an hour can fly by if you’re not careful, so Gardner’s goal of completing this entire project in such a short window was particularly ambitious. In addition to her saw and sander, she used two common boards (one 2-by-6-inches x 8 feet and the other 2-by-4-inches x 8 feet), 2 1/2-inch construction screws, and teak oil to build a window plant bench. (Her plant collection was in need of a sunny home.)
After cutting the boards to their appropriate lengths, she drilled holes into the shorter pieces to create the legs and attached them to the two longer pieces to form the bench’s seat. After a little sanding, staining, and sealing using the teak oil, in came the potted plants. If you don’t have a green thumb, consider using the bench as entryway storage.
The Fluted Side Table
View this post on Instagram
A fan of postmodern design, Gardner couldn’t stop at just one fluted piece. Next up? A side table. When looking for workable materials, she kept an eye out for a beautiful tabletop, not caring much what the base looked like. She finally chose an otherwise overlooked option (perhaps due to the less-than-desirable wood legs) from Facebook Marketplace for its removable marble surface.
Using medium-density fiberboards cut to size at Home Depot (she measured her table base first), she created a box out of the boards using corner braces. She glued on the columns of half-round molding (meaning one side is flat, while the other is curved), using construction adhesive, to all four sides. From there, she simply placed the marble top onto the ribbed box.
The Stencil Backsplash


Gardner was debating a full tile backsplash before stumbling upon a stencil on Etsy that would do the trick for a fraction of the cost. Using Benjamin Moore’s Saybrook Sage, she simply lined up the stencil using a level and bent it where need be (like around the windowpane). Just make sure you have a podcast on hand to keep you busy—this project took Gardner a few days to complete.
The Faux Brick Wall
View this post on Instagram
Dreaming of loft vibes, Gardner found an easy way to bring the exposed brick walls to her Midwest home. She cut faux brick paneling with a utility knife to fit, before using her trusty adhesive and a nail gun to attach the pieces to one of her living room walls. Caulk on the edges of the walls, spackling paste across the entire panels (she specifically didn’t cover them completely for an unfinished look), and a coat of Benjamin Moore’s Simply White paint were the final touches.
The Slat Wall


Gardner’s most difficult (but most rewarding!) DIY? Her slatted bedroom wall—after a few material mishaps (she began by using furring strips, which ended up being more difficult than high-quality alternatives). She recommends painting your chosen surface first (she chose Benjamin Moore’s Windsor Green paint) to ensure no white spots peek through. Opting for 1-by-2-by-8 primed common boards instead of raw slats, she then measured the pieces to fit and used adhesive and a nail gun to secure them. Another coat of crocodile green at the end, and her bedroom had the textured, headboard-esque wall she always wanted.
Our Fall Style issue has arrived! Subscribe now to get an exclusive first look at Ayesha Curry’s Bay Area home—and discover how design can shape our world.