We may earn revenue from the products available on this page and participate in affiliate programs.
When Overice founder Meijun Li spotted a vintage blue and white nightstand at Bi-Rite Studio in Brooklyn, she thought she had found the perfect piece to reinvigorate her bedroom corner—her least favorite part of her downtown Manhattan apartment. But it turned out it was too wide for her space. However, Li wasn’t disappointed for very long. “One day I came home and thought, Why not just make over the one I already have?” she recalls.
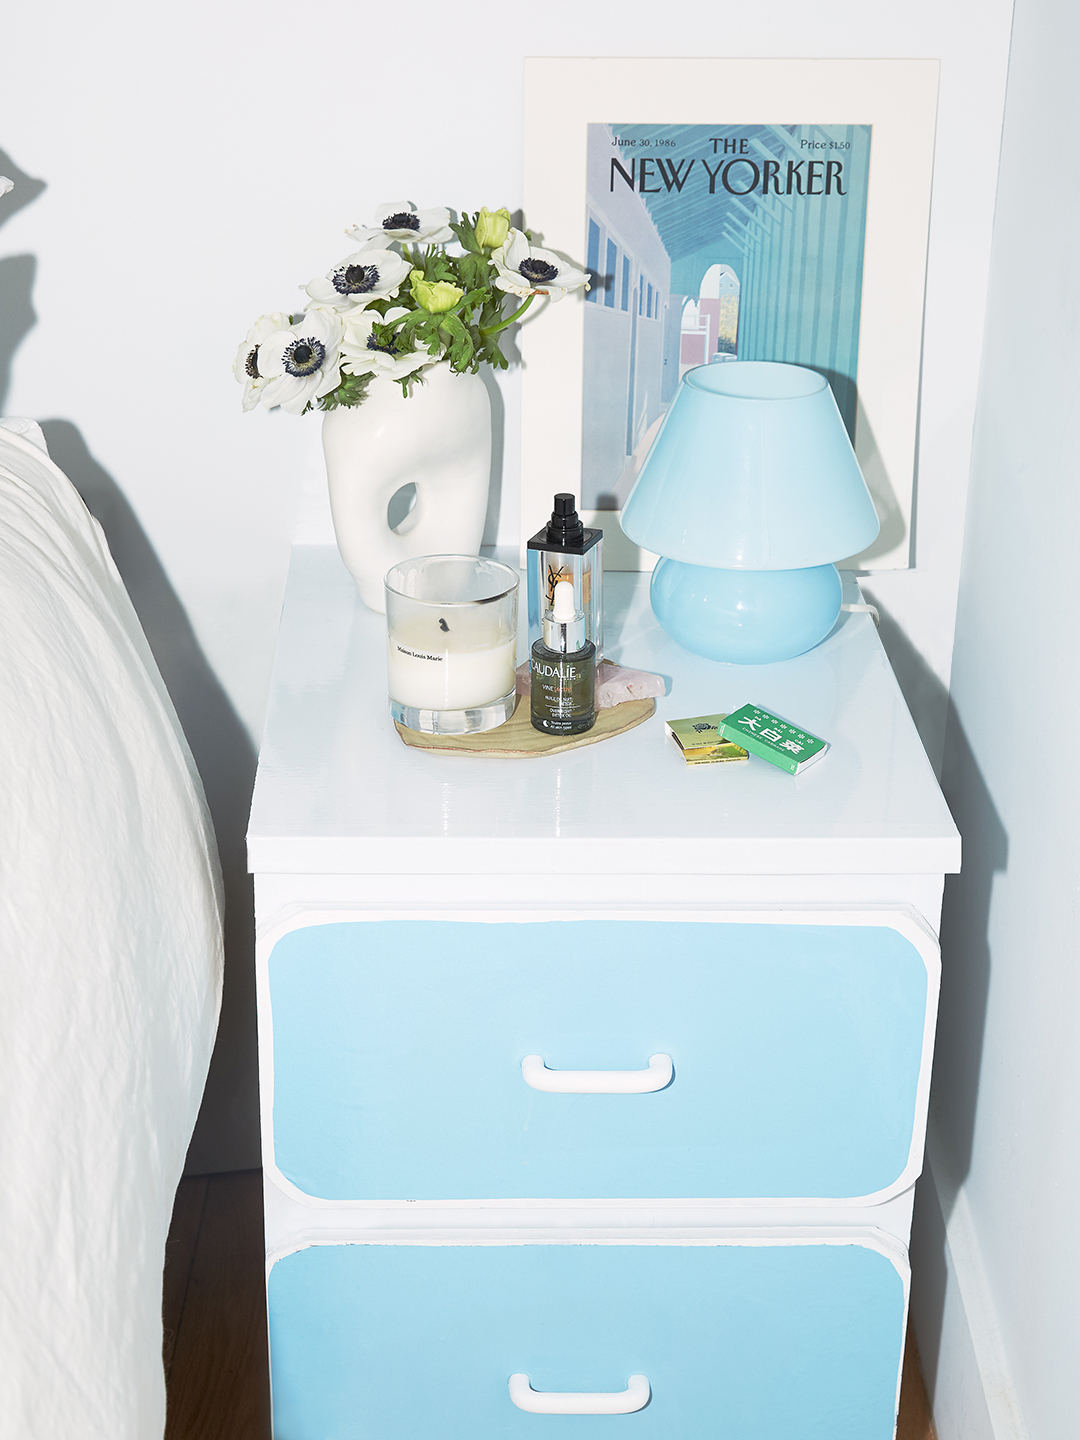
Inspired by rental-friendly countertop renovations that make smart use of contact paper, she realized that the material’s glossy finish would be the perfect tool to help her turn her brown-black Malm nightstand into a bright, whimsical bedside table that would match her cherished Murano mushroom lamp. The process took five hours and cost her about $50 (she already had the nightstand, after all), and she admits that it was easier than she expected. It’s a straightforward project you can do right at home, and all you need is patience—well, and a few other things, too. Here’s how she did it.
What You’ll Need:
- Malm nightstand
- Hacksaw
- Sandpaper or sanding sponge
- One roll of contact paper in light blue and three in white
- Good scissors
- 2 cabinet pulls
- White acrylic paint and paintbrush
- Krazy Glue
Step 1: Shape the Edges

Using a hacksaw, Li cut the corners of each drawer and then rounded them with sandpaper—this was the most time-intensive part of the process, taking about 10 to 15 minutes per corner, with a total of eight corners. If you’re hesitant about your sawing capabilities and open to outsourcing part of this DIY, Li recommends getting some help from a carpenter, since stiffness of the wood in the nightstand can make it tricky to make the corners perfectly curved. If you’re all right with tiny imperfections, though, turn on Netflix (not a show that’s too distracting, however!) and get sanding.
Step 2: Cut and Apply Contact Paper

If you happen to own a white Malm, you can skip covering the whole thing in white contact paper, but if not, you’ll want to be extra-careful configuring the sheets. Align the paper before you apply it to make sure the entire surface is covered, and apply it carefully to prevent bumps or creases—but if you do create them, no worries: It’s easy to peel it off and try again.
Once the entire dresser is covered in the contact paper, carefully cut out two blue ovals for the drawers (you might want to use your first to trace out the second, to ensure they’re the same size). Apply them so that you can see a small white outline around their perimeters.
Step 3: Paint and Attach Handles

With just one to two coats of white acrylic paint, unfinished cabinet pulls look totally fresh. Once they’ve dried, stick them on to the drawers using Krazy Glue—you might want to prop the drawers upright for easy application as you do so. Once they feel secure, pop them back into the nightstand and look back to admire your handiwork. Accessorizing with a matching Murano lamp isn’t necessary, but it will shine a light on your impressive DIY skills.
See more stories like this: This Artistic Shoe Display Uses $10 Brackets From Amazon A Textured Paint Hack That’ll Transform Any Vase—The Good, the Bad, and the Ugly Try This DIY Aromatherapy to Turn Your Home Into a Calming Retreat