We may earn revenue from the products available on this page and participate in affiliate programs.

Turning the Godmorgon cabinet into a stylish side table is as easy pie, and debatably just as tasty. Plus, it’s so much easier than it seems! We may just be adding this personalized Mid-Century catch-all to our list of best Ikea hacks of all time.
Materials
– Godmorgon cabinet – Legs – Paint – Spray paint – Painter’s tape – Drill + screwdriver

Instructions
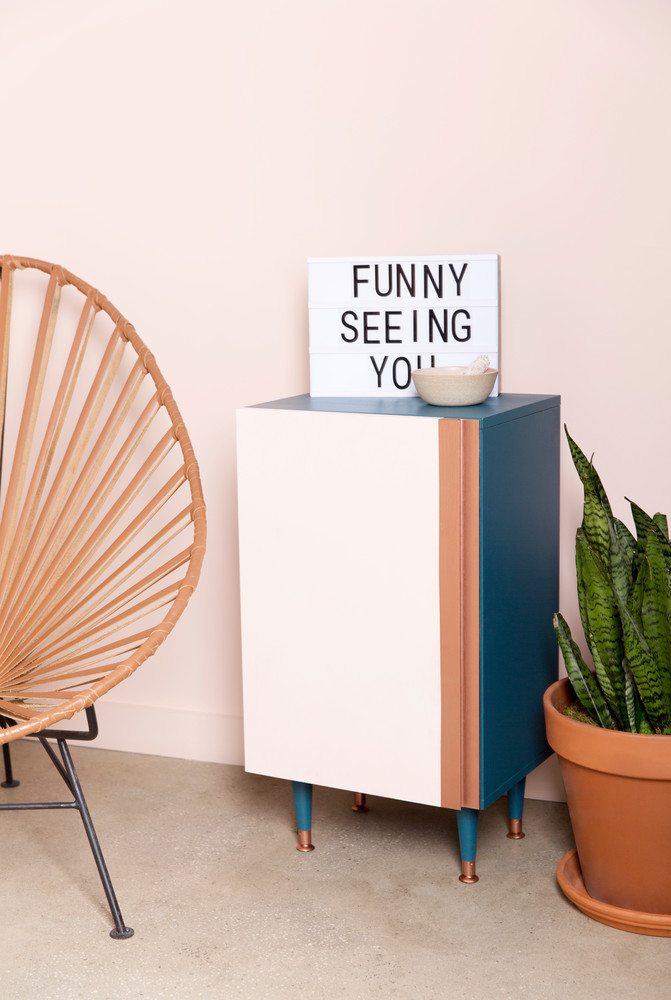
First, you should paint each piece of the cabinet in colors you love. We decided to create a two-toned effect on the cabinet door using painter’s tape, with a pale peach paint over most of the surface contrasted by metallic copper spray paint.

We painted the body of the cabinet and each leg a dark blue, offset by contrasting metal feet in the same copper color we used on the door. When painting, make sure that any surface you do not want painted is fully covered in tape.

Once everything has been coated multiple times and looks flawless, measure and mark the underside of the cabinet where each leg should be placed. Using a drill, create holes for each leg—just be careful not to pierce through the bottom. Screw in the legs, and use wood glue in each hole to ensure a tight finish.
Lastly, we assembled the cabinet per IKEA’s instructions. The resulting piece of furniture is a great storage piece with a wonderful retro vibe.