We may earn revenue from the products available on this page and participate in affiliate programs.
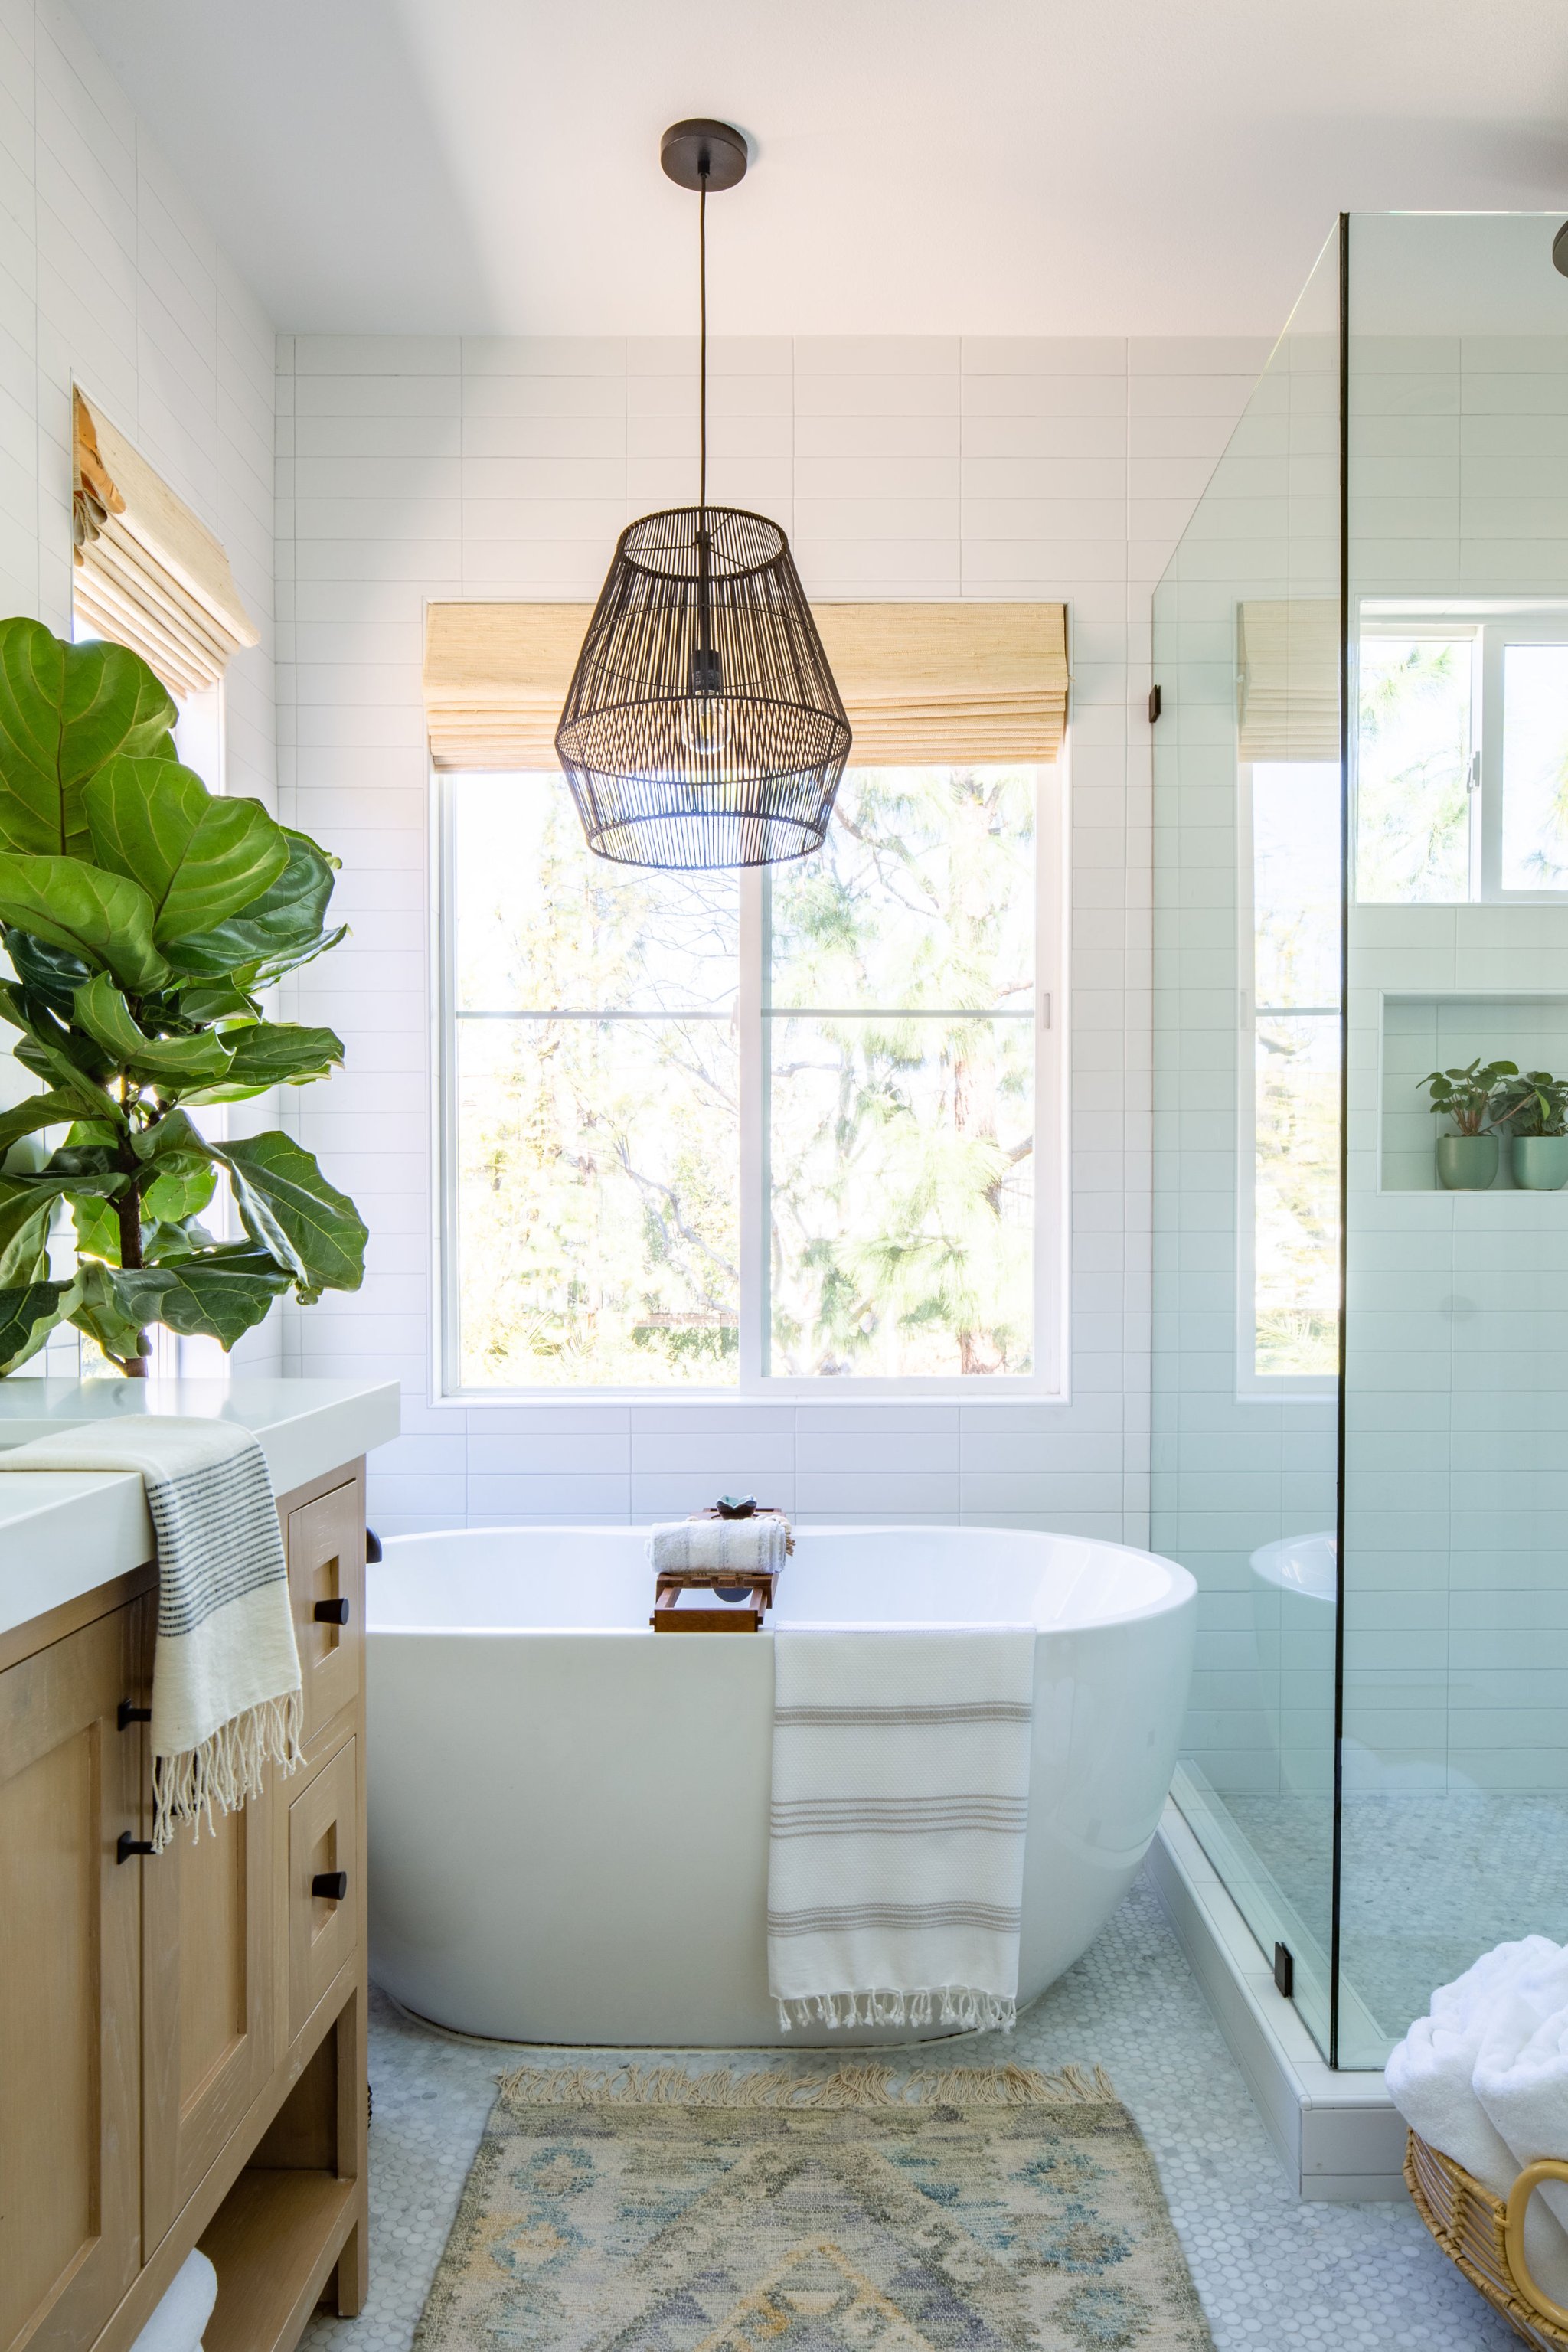
“It was quintessential 1997; 12×12 yellow ceramic tiles,” says Anita Yokota of the nightmarish state of her original primary bathroom. Fast forward 10 years and the bright, breezy space is completely unrecognizable. When Yokota and her family moved into the home a decade ago, she immediately wanted to update the bathroom. But with two little kids and a budget to stick to, the kind of in-depth renovation the space demanded was unequivocally out of the question. “We waited to save up and have time with our little kids,” says the designer and blogger. “Now, every time I walk in, I feel like I’m in a dream. I can’t believe it came to fruition. I had all the details in my brain for so long, and to see it in real life is very exciting.”


First things first: Installing a freestandtub tub. Yokota confesses to being a bathtub fiend—a licensed therapist for many years before diving into decorating, she’s all about self-care. “When I was a therapist and my clients would come in so stressed, I used to tell them to take a hot bath. Your body temperature spikes when you’re in the tub and drops when you get out, which increases endorphins and relaxes your body.”

Yokota also employed wellness-savvy techniques in the rest of the design. The aesthetic, which she calls California-inspired but decidedly not boho, is ethereal, light, and cheerful. A skylight allows light to stream through freely; a simple white palette helps her and her husband feel calm. “Visually, white is a symbol of renewal and freshness,” explains Yokota. “I wanted white walls because I wanted to wake up and feel refreshed but also wind down in a bathroom that wasn’t dark.”

Over the course of seven weeks, Yokota and a team of contractors led by her friend and construction designer Lisa Rosman transformed the dated space. The project is essentially Renovation 101, so we asked Yokota to share her tips on all things remodeling.

Study Up
The one thing Yokota would change if she could go back and do the whole thing over again? Prepping to ensure she was equipped to answer any and all contracting questions. “Educate yourself on every part of the process,” she advises, from construction to tiling. “If you’ve never done a renovation before, it’s very overwhelming. Watch a few YouTube videos.”
Hide Your Personal Items
Here’s something you may not anticipate: The dust. And not just the dust in the room you are updating, but the dust that filters into the rest of your house. “It’s this micro-fine drywall dust that can seep through walls and get into your clothes and furniture—we emptied the closets in the adjoining bedroom and tarped up the nightstands, and then moved everything else out,” says the designer. Plan to avoid the headache of having to deep-clean your favorite antiques or winter coats later.

Allow for Wiggle Room in Your Budget
“Whatever budget you have in mind, give yourself 10 percent to 15 percent more room,” says Yokota. Things come up. Maybe it’s plumbing issues, maybe it’s structural complications, or maybe you fall in love with a specific light fixture that happens to be way more than you planned for—these surprises will feel less stressful if you’ve built in some flexibility.
Preserve the Floor Plan
The best budget-saver says Yokota, is keeping the footprint as is. “Don’t move anything around,” she says. Instead, focus on cosmetic updates with big impact, like a fresh tile backsplash or new mirrors.

Renters, Think Temporary
In the decade before Yokota was able to do this renovation, she turned to a renter-friendly solution to tide her over: peel-and-stick laminate wood flooring. “You peel these off like a sticker and stagger them as if it’s a wood floor, and it looks amazing,” says Yokota, who posted the full tutorial on her blog. “It was a really easy changeup, and I felt so much better about going into that room.”