We may earn revenue from the products available on this page and participate in affiliate programs.
Chris and Julia Marcum’s playroom started off as a temporary solution. When the couple behind the blog Chris Loves Julia moved into their Idaho Falls home in June 2019, the number-one priority was to create a cozy space for their daughters, Greta (10), Faye (6), and Polly (3), to play while the ground floor was getting a gut renovation.
Upstairs, a 7-by-10-foot nook that jutted out of a secondary hallway between the girls’ bedrooms already had floor-to-ceiling storage (it was used as a sewing space by the previous owners), so it seemed like the perfect place to stow all their toys while they worked on a proper playroom. A year in, the Marcums realized they didn’t need another zone. “They played so well there,” says Julia. “It’s like the fishbowl analogy: If we gave them a bigger space, they would fill that, but they’re so happy there.” Instead, the parents just needed to get this temporary space finished (and do it all under $3,000).
Work From the Ground Up

The first phase of the renovation happened a year ago when the couple ripped up the floors throughout the house to install new wide-plank engineered flooring. “They were very mismatched everywhere before, but the worst was in the playroom, where there was this crazy red and white carpet I can only describe as circus herringbone,” remembers Julia. “It was dizzying.” To soften the hard surface, they laid down an area rug and moved the toys back in. “We are definitely people who do projects in phases,” she notes.
Pick the Softest Palette

A few months later, the Marcums decided to finally make the room a permanent fixture on the second floor. “I wanted our house to feel like going to Grandma’s, but in a modern way,” says Julia of the British-inspired vibe she carried over to the playroom. “I have four sisters, and it brings back a lot of memories from when I was little.”
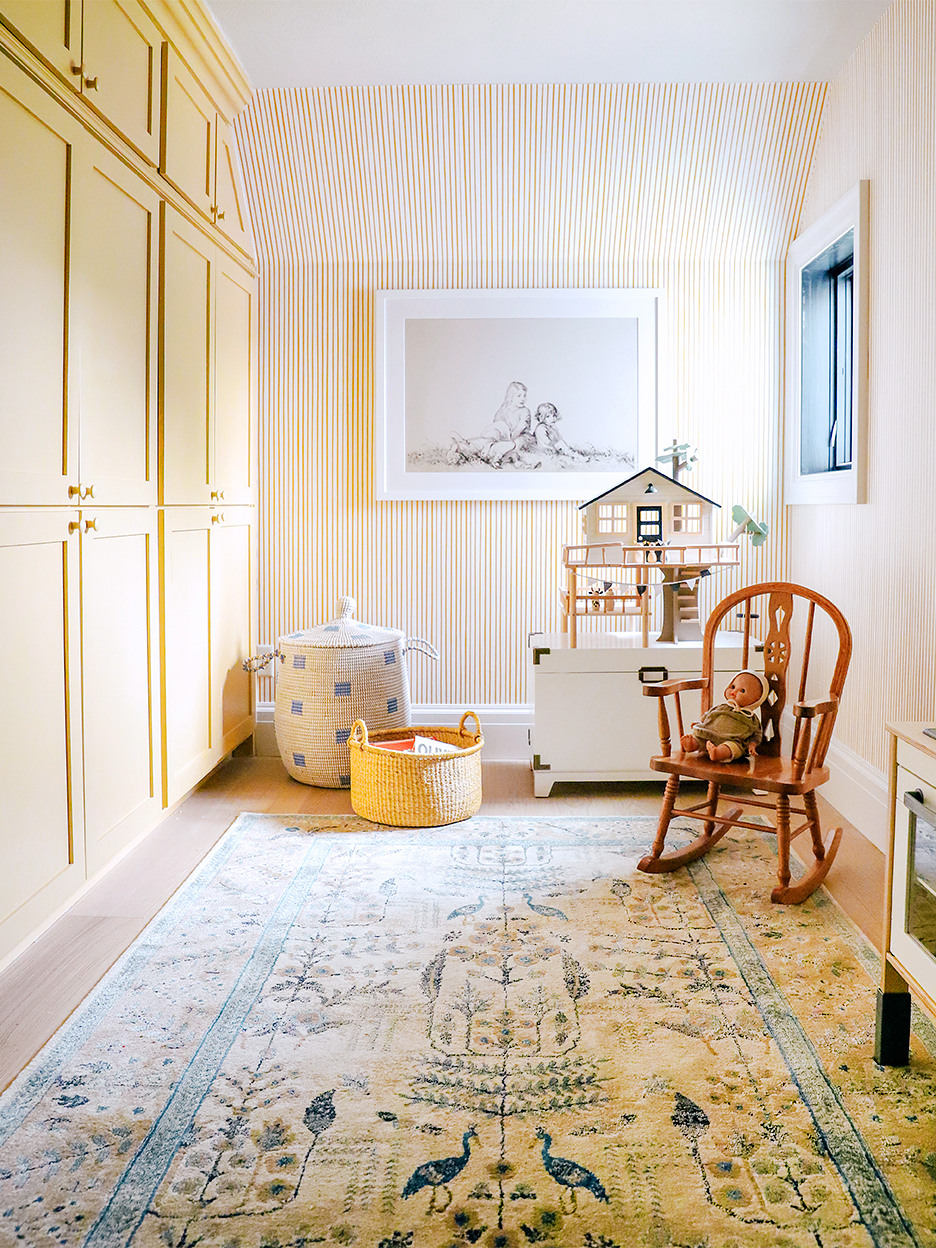
This inspired a soft palette anchored around a buttery shade, which Julia applied over the cabinets. “I didn’t want to go bright yellow, so I actually did a very warm tan,” she says—a technique she applied throughout the house. “The colors in our house are really just neutral versions of bright hues.” She also replaced the metal hardware with wood knobs painted to match, to give the doors an old English feel—the wicker lamp bases, framed cameos of the kids, and that fairy tale–esque etching all add to the look.
Commit to Wallpaper

Julia fell in love with a golden stripe wall covering from Chasing Paper for the walls around the built-in storage. “It felt traditional, like it could be anywhere in the house, but it was also really playful,” she says. She ordered peel-and-stick and hung it in a day.

The next morning, she woke up to the paper peeling off the walls: “The directions online clearly say it’s not for textured walls, but I thought ours weren’t that uneven. I was wrong.” After a few days of feeling discouraged, Julia ordered the same pattern in an adhesive and offloaded the removable rolls to a friend. “The blessing in disguise was that it made me realize how much I loved the pattern when I got to see it up close, so I didn’t need it to be temporary,” she says.
Make the Most of an L-Shaped Layout

The narrow square footage meant that very few pieces would work in the space without feeling cramped, but luckily the toys were already stored away. “I felt very stumped at the beginning,” says Julia. Because her daughters love to sit on the floor and play, she kept bulky furniture to a minimum. “They love to dress up, so I knew I needed a chest for costumes,” she adds. She gave it a double-duty function by propping up the girls’ play treehouse on top.

In the under-utilized hallway, Julia added a dresser to house the kids’ bedding. “It’s central to all three rooms, so it’s perfect,” she explains. She topped it with books and added a tiny chair next to it to form a reading area: “I wanted to create a place that felt like home to inspire warm memories.”
Our Fall Style issue has arrived! Subscribe now to get an exclusive first look at Ayesha Curry’s Bay Area home—and discover how design can shape our world.