We may earn revenue from the products available on this page and participate in affiliate programs.
Given enough time, most passé trends tend to cycle back into popularity. Popcorn ceilings might be an exception. This textured finish, which had its heyday in the ‘60s and ‘70s, gives basement rec room vibes—and if it was installed prior to the 1990s, may contain asbestos, a carcinogenic element that, if disturbed, can lead to serious health issues.
Even if your popcorn ceiling doesn’t contain asbestos, scraping it smooth is an undertaking. Professional removal can be expensive, and going the DIY route, at the very least, is extremely messy. Enter a safer, easier fix: Cover it up with antique-look tiles that add character to the space, simply click or are glued into place, and are almost certainly more cost effective than tearing everything out and starting anew.
This solution can also work wonders for other aggravating ceiling situations, like interlocking gypsum tiles or gridded paneling, and there are different installation methods as well as materials for getting it done. Below, three creatives explain how they covered up their popcorn ceilings, and share advice and supplies for others thinking about a similar solution.
Faux Tin Vinyl Tiles
The Old New York glam style of Hattie Kolp’s apartment led her to select a “faux tin” vinyl tile for the ceiling of the diminutive butler’s pantry. Her number one tip before tackling a project like this is to paint the outer edge of the ceiling the same color as the walls before you start on the tiling. This helps to disguise any uneven edges or imperfect seams. The vinyl tiles she used come in two-by-four-foot panels, and Kolp says to measure the width of the work surface area and center the tiles in the middle before installing them. Sharp scissors are key here, Kolp told Domino, as is a construction-grade glue like Loctite—though it takes 24 hours to fully cure, the tiles will adhere to the ceiling in about 15 seconds.
Get the Look


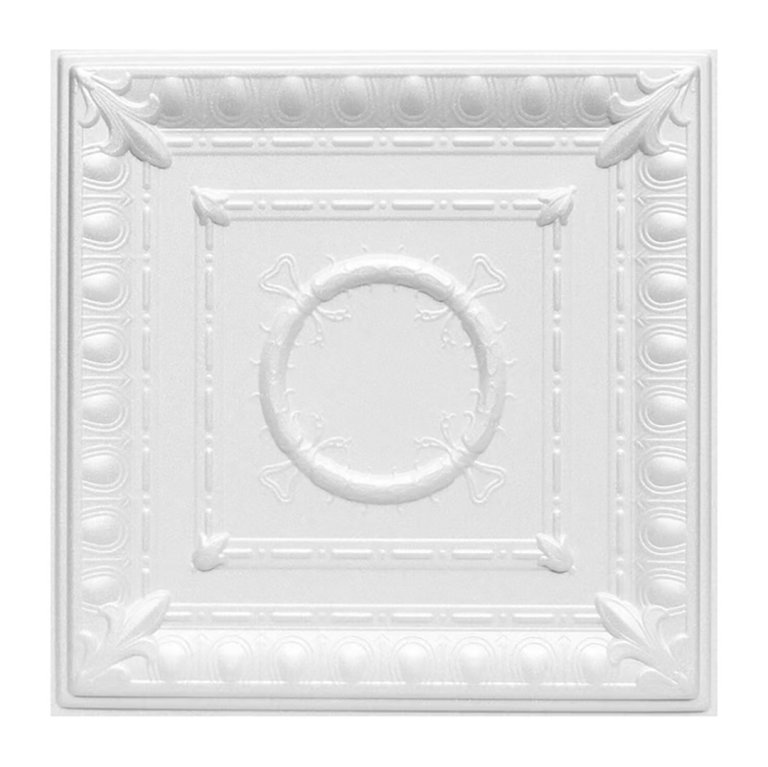
Romanesque Wreath Styrofoam Tiles
When At Home With Ashley blogger Ashley Wilson fitted her son’s pastel-perfect bedroom with antique-style molding, the textured ceiling somewhat undercut the effect. Cue this glue-up tile project: She mapped out a pattern by temporarily sticking unpainted tiles to the ceiling using painter’s tape. Once she figured out the layout, she made her cuts, painted the tiles, and began the install.
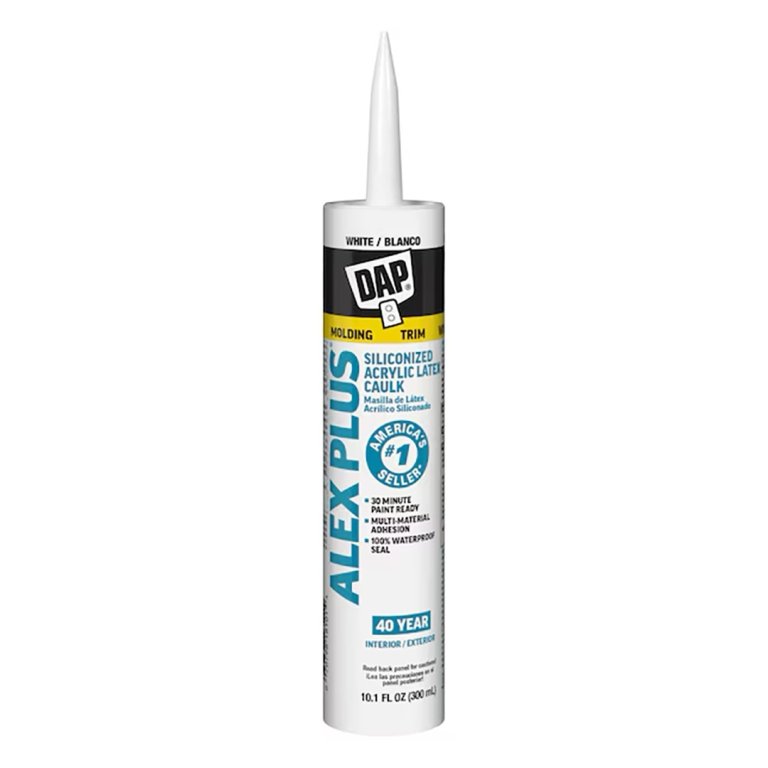
Like Kolp, Wilson used Loctite to secure the tiles to the ceiling. The most time-consuming element of the project was painting the tiles before installation, which required two coats; because they were made from styrofoam they couldn’t be spray-painted. While styrofoam is easy to hang and lightweight, Wilson advises readers to consider that it’s also flammable, presenting a safety consideration. (Wilson adds that PVC tiles are another DIY-friendly option that doesn’t carry the same risk.) She caulked the seams between tiles as a finishing touch.
Get the Look

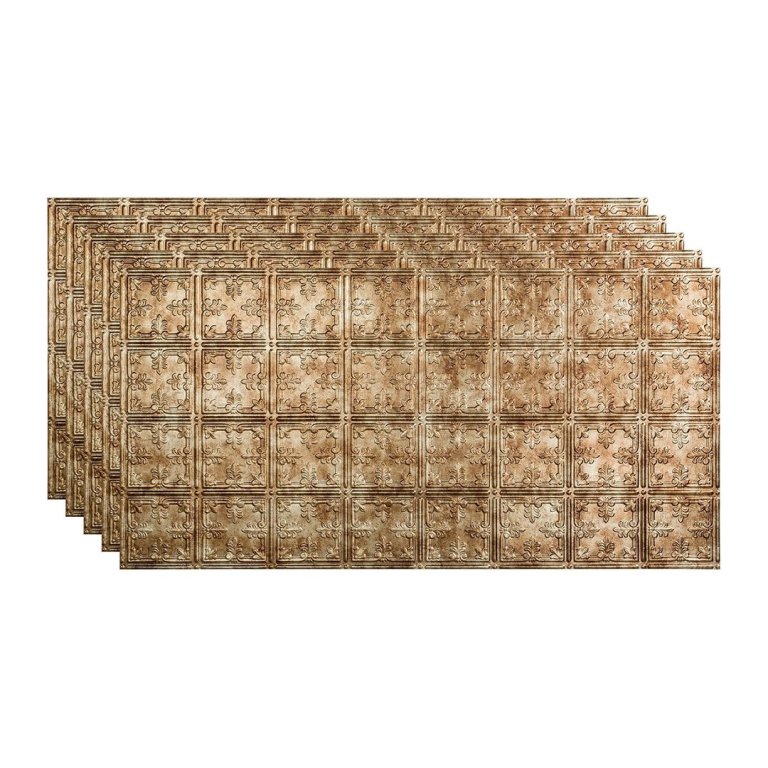
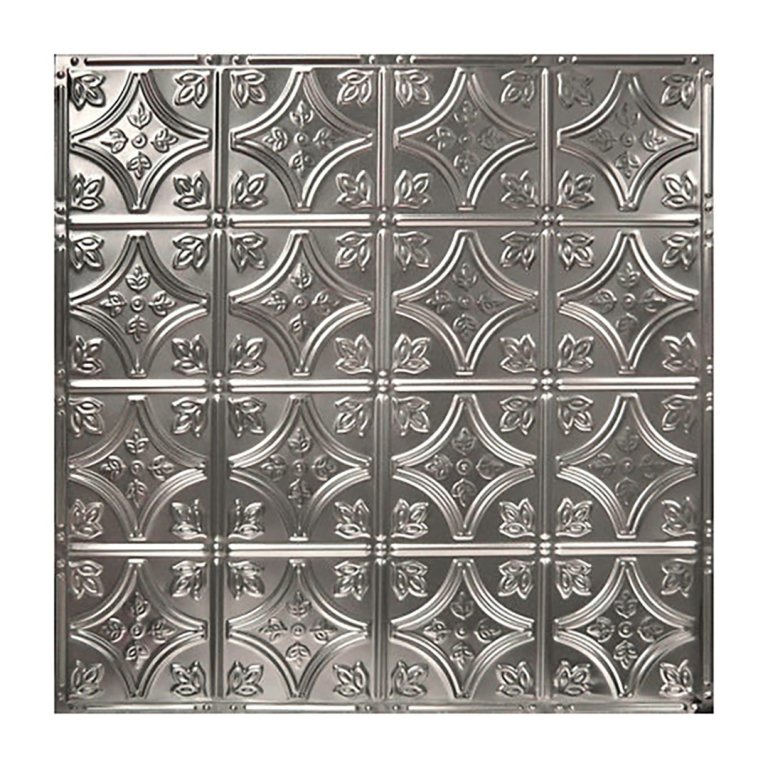
Snaplock Tin Tiles
It’s not just popcorn ceilings that you can cover up. “There were some paneled tiles in this ceiling that were probably put in in the 1970s, and I was worried about asbestos,” explains Courtney Deiter, the creative behind Heart + Home Crew, of her sons’ shared bedroom in their 1905 house. To go over the tiles with something more period-appropriate, she partnered with American Tile and chose their Snaplock product: The first tiles need to be attached in a corner of the room, and secured with drywall screws—the rest of the tiles connect together from there, no more power tools required. “You only need one person to put them up, and it can be a one day thing,” says Deiter. But careful attention is required when doing so: “You have to run a chalk line and keep checking that everything is straight—because you might get one tile that’s slightly off and think, ‘That’s okay.’ But then each one after that would be off, too.”
“Having tin snips is also important, and make sure you wear gloves—there’s a lot of exposed metal edges,” she adds. Would she do it again? In fact she is, right now, in her own bedroom, except this time she’s using nail-up tiles to hide a beadboard ceiling. “Ceilings can be overlooked, but I love that we’re thinking about them like a ‘fifth wall.’ Your eyes just keep going up.”
Get the Look
American Tin Ceilings
American Tin Ceilings #3 Snaplock Tiles, Brushed Bronze