We may earn revenue from the products available on this page and participate in affiliate programs.
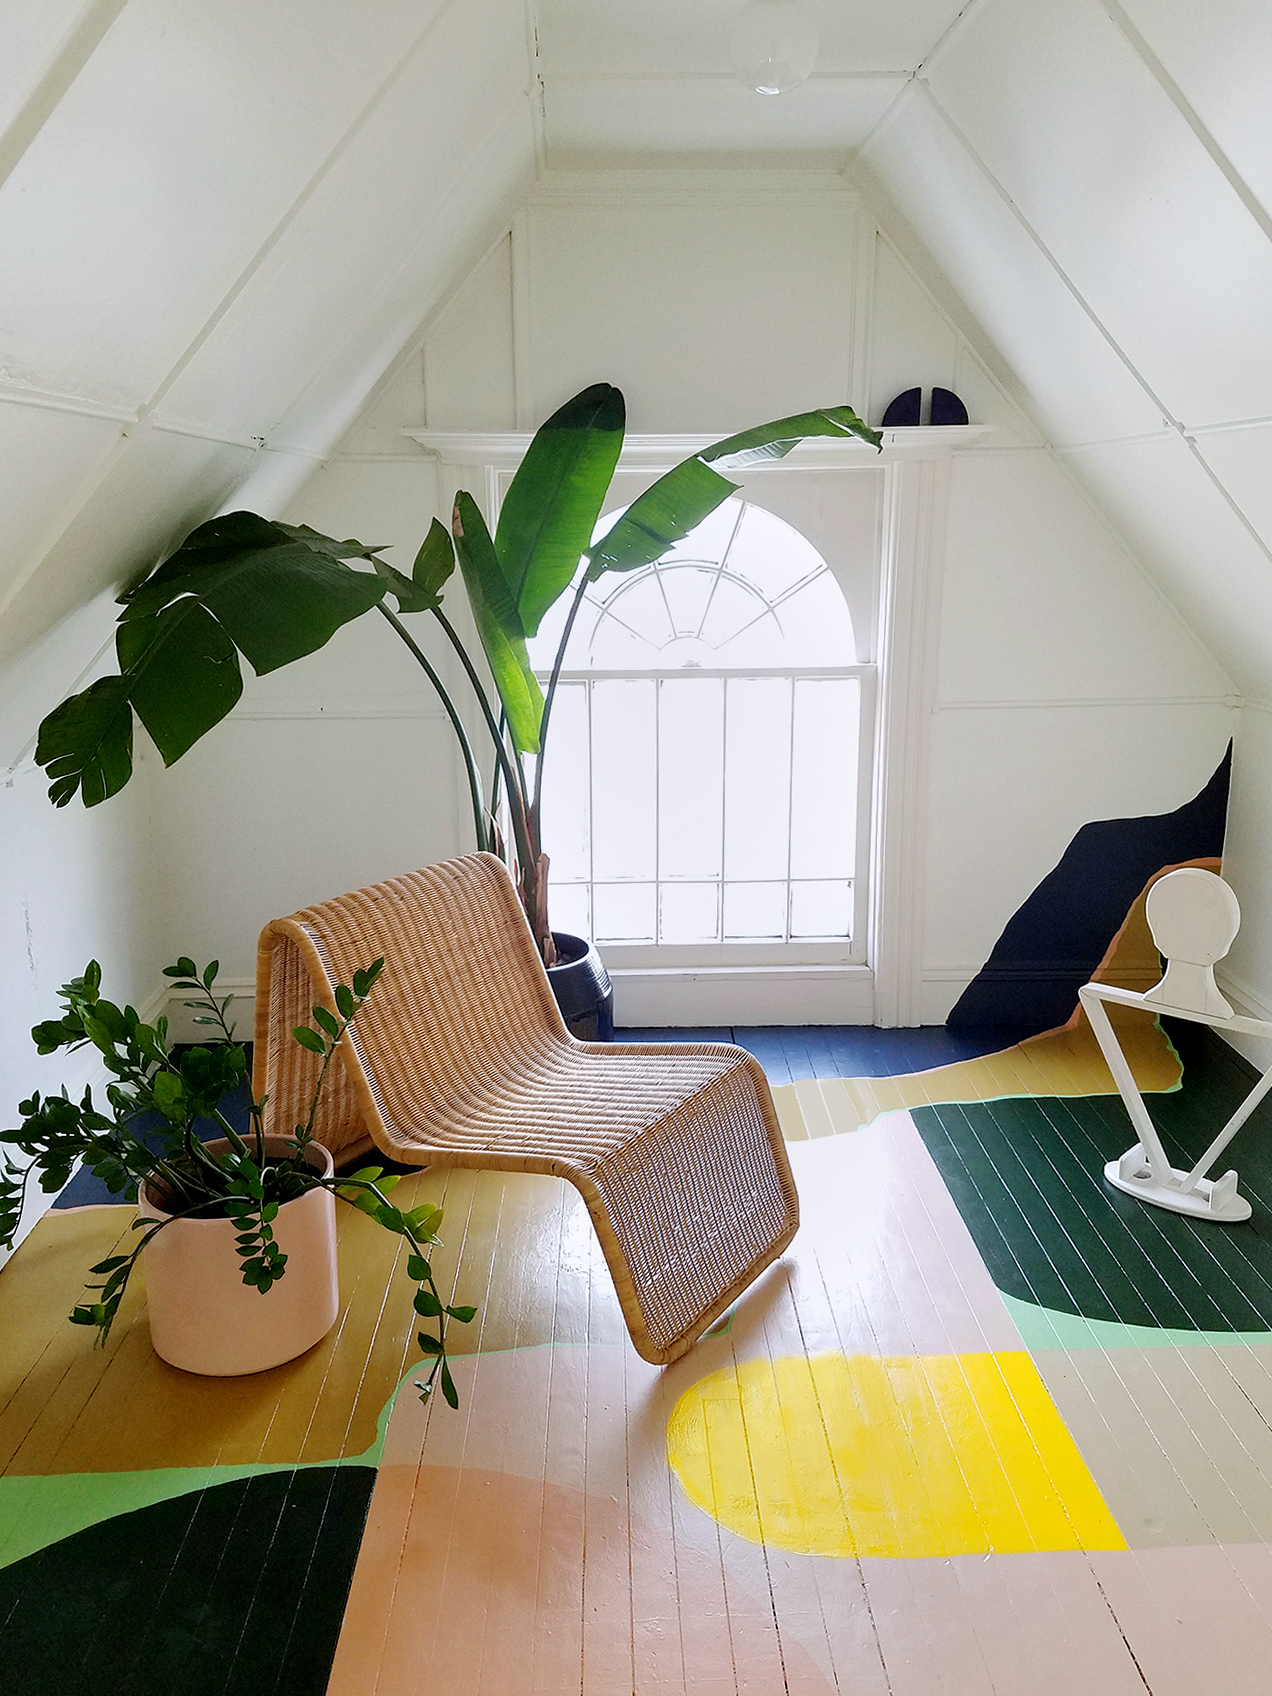
Floors often get the short end of the stick when it comes to creativity. At best, we’ll slap down a rug and call it a day. But if you’re willing to take a little time (and one big step outside the box), might we suggest a fun paint treatment? It could be as simple as giving your hardwoods a fresh coat of sunny yellow, but if you’re already pulling out the paintbrushes, you might as well follow designer and blogger Liz Kamarul and color-block the whole thing in a bevy of geometric shapes.
Kamarul did this particular project for her friends Joey and Mark’s house. Their Victorian home is full of cool vintage finds, like Michel Ducaroy’s Togo chairs and a lacquered blue coffee table, making it the ideal canvas for a funky floor DIY in one room. Her inspiration? A painting she had saved and used as the model for a color palette.
One loose sketch, seven different shades, and a few patiently waited-out days later, the original work had taken on a new life in the form of sprawling floor art. A few tips from Kamarul to know before you take on a similar job:
- Bring your inspo to the paint store. Whether it’s a painting or a postcard, it will help to hold up paint chips and get an exact match.
- Choose a durable finish. In this out-of-the-way space, Kamarul used regular wall paint, but in a heavier trafficked area, such as a living or dining room, she recommends picking a variety made specifically for floors.
- Have numerous brushes on hand. One for every hue, to be exact.
Now here’s how to master this surprisingly easy DIY:
The Supplies
- Paint colors of your choice
- Primer (she used Sherwin-Williams’s urethane alkyd enamel)
- Enough paintbrushes for each hue
- Straight-edge ruler
- Pencil
- Protective sealer
Step 1: Start With a Blank Base

Thoroughly clean the surface, making sure to get dirt and dust out of every crevice. (You want the paint to stick to the floor—and only the floor.)
Step 2: Do the Prep Work
Apply a layer of floor primer—if it doesn’t look fully opaque, do multiple coats. Let each one dry and cure completely for up to three days. During which time, might we suggest settling on a pattern?
Step 3: Get Sketching
Draw the design on your floors with a pencil, either freehand (if you’re feeling confident) or following a ruler.
Step 4: Work Slowly


Starting on one side of the room and working your way across the floor, begin filling in each shape with its designated color.
Step 5: Add the Finishing Touches

Add a clear protective coat in whatever finish you prefer (just remember that high-gloss may reflect more light than you want). Let the whole thing dry for a few days before walking on it or bringing in furniture.
Happy DIY-ing!
See more fun projects to tackle this weekend: You Don’t Need to Be an Artist to Tackle This Color-Blocked Mural Painting Your Walls Freehand Is Incredibly Liberating DIY This Former Anthropologie Artist’s Insta-Famous Wall Art in 4 Steps