We may earn revenue from the products available on this page and participate in affiliate programs.
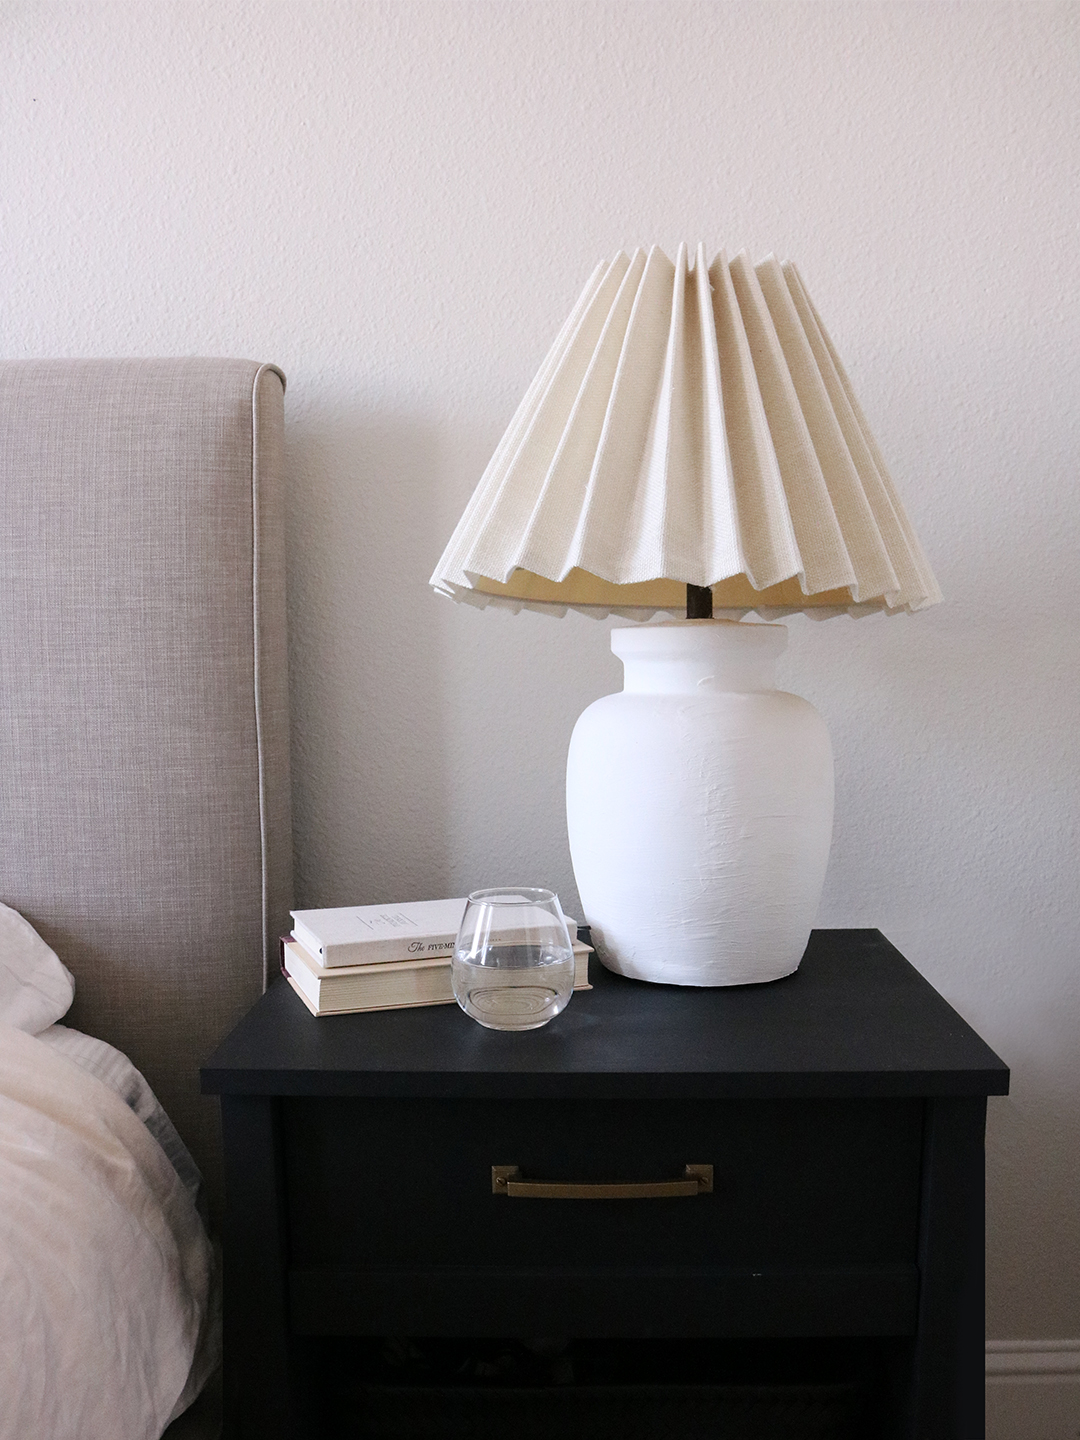
Creative Eunice Choi had no idea how difficult the search for the perfect vintage knife-pleated shades to pair with her primary bedroom’s Facebook Marketplace table lamps would be. But a month later, she still hadn’t found two A-line ones that matched and fit in her under-$100 price range. “I always loved the look of pleated shades and wanted to pull in that softness,” she explains. Being a true “if you want it done right, do it yourself” advocate, Choi decided to spruce up the shades she already owned using simple craft materials.
In just an afternoon (plus overnight drying time), she gave them a laid-back, Scandi upgrade for a fraction of the cost of a CB2 light that sparked the hunt in the first place.

The Supplies
- Two empire lampshades
- 2 yards heavyweight fabric (Choi used utility fabric from Joann)
- Measuring tape
- Pencil
- Fabric scissors
- Fabric glue
- Fabric stiffener
- A few heavy books (coffee-table books or cookbooks are perfect)
- Hair dryer
- Hot-glue gun

Step 1: Measure and Cut Your Fabric
Measure the height of the lampshade you plan on covering, then add 3 inches to that number. (The extra length will be for overhang and seam allowance.) Next, measure the bottom circumference of the shade, then double that number. Mark the measurements on the fabric with a pencil and cut a strip accordingly using fabric scissors.
Step 2: Create Clean Edges
Measure out a half-inch seam on each of the longer sides of the fabric. Then, one side at a time, fold the edge over to meet the half-inch mark and adhere with fabric glue, using your fingers (or fabric clips) to hold it in place. Allow to dry for 5 to 10 minutes; different kinds of glue have different drying times.
Step 3: Stiffen the Fabric
In order to achieve extra-crisp pleats, Choi hardened her already stiff utility fabric even more. With the fabric laid flat, saturate it with three to four spritzes of a fabric stiffener. “You’ll see the fabric start to darken, and then move on,” says Choi. Allow it to dry halfway (try a hair dryer to speed up the process), so it’s just damp to the touch and still pliable. The fabric will dry fully once you’ve folded it into pleats.

Step 4: Make the Pleats
Mark out the first 10 or so 1-inch increments along the long side of your fabric with a pencil. Next, create an accordion fold on each mark. Once you get going, the width of the pleats will be easy to eyeball. Fold until you run out of fabric.
Prop up your fabric accordion with books on either end to keep the pleats intact while they dry. Once it’s secure, run your fingers along the folds to resharpen each crease. Leave the material alone overnight.
Step 5: Attach to Frame
Use a hot-glue gun to run a strip of glue along the entire vertical length of the lampshade. Encircle the shade in the fabric and stick down the two ends of the fabric so they meet. Do the same with the pleat directly across from the seam, gluing down the inner crease of the pleat. Find the middle pleats between the two glued points and repeat (four spots will now be attached). This will help you space the rest of the pleats evenly.
Continue working around the lampshade, gluing the top and bottom of each pleat. No need to run full strips of glue; dots are equally effective. Screw the completed shades onto your lamps and bask in the glow of your handiwork.