Domino Executive Creative Director Kate Berry’s DIY Backsplash Is Totally Rental-Friendly
She talks us through the process.
Updated Oct 10, 2018 5:29 PM
We may earn revenue from the products available on this page and participate in affiliate programs.
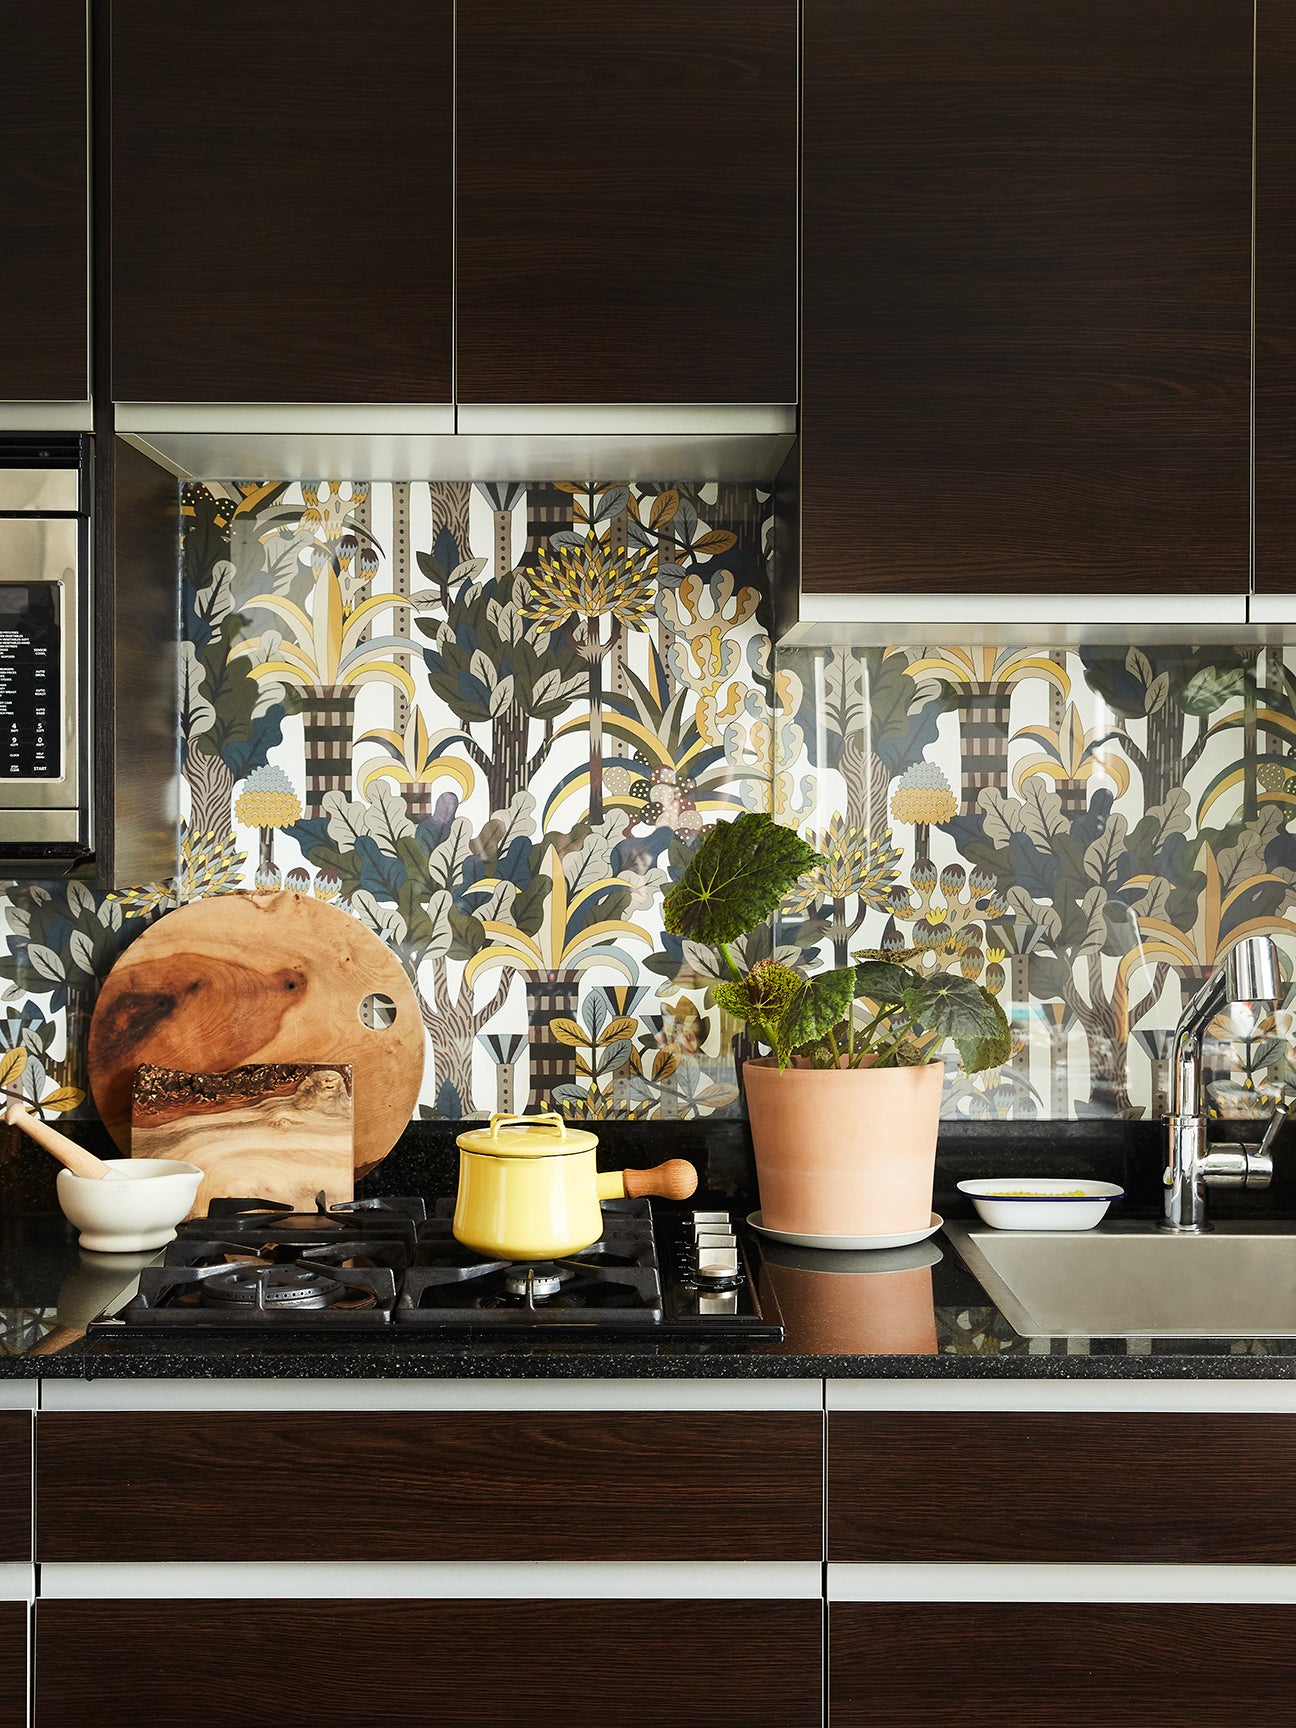
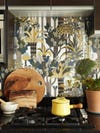
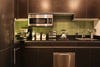
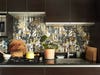
When you rent an apartment—especially in a city with real estate as notorious as New York City’s—you end up making sacrifices here and there. Maybe your space has tons of natural light, but there’s one less closet than you’d like. Or maybe the bathroom layout is a bit odd, but the living room is massive. For Domino’s executive creative director and resident plant parent, Kate Berry, compromise came in the form of a green-tiled kitchen backsplash that she didn’t totally love.
Leave it to Berry to find a surprisingly simple and stylish solution that completely changed the feeling of her kitchen—without requiring her to shell out a ton of money for renovations. “The pattern draws your eye away from the cabinets, which would cost too much to replace,” she says. “And it’s a graphic way to bring my love for floral and fauna indoors.” Best of all, it just takes a few simple steps.
The Supplies
- Medium density fiberboard
- Spray mount adhesive
- X-Acto knife
- Clear glass panels
- Silicone
- Jardin D’Osier wallpaper by Hermès, 2 yards
Step 1: Prep Your Supplies
Because of her kitchen’s layout, Berry decided to create a new wallpapered backsplash by working with three different rectangles of medium-density fiberboard and glass that she eventually puzzle-pieced together over the existing tiles. First, she cut the MDF and glass to fit the dimensions of the backsplash and made sure the measurements were as precise as possible. (Plexiglass can also work, but if you’re applying it in an area close to the stove, it’s better to use a glass surface that won’t warp from the heat.) Berry got help with this project from artist and all-around creative Nathaniel Wojtalik, but your local hardware store can lend a hand, too.
Step 2: Spray Mount the Wallpaper
Next, apply wallpaper to the MDF panels, carefully aligning them so that the pattern looks fluid up on the walls. A spray-mount adhesive makes for easy application, and an X-Acto knife ensures straight edges.
Step 3: Tack Up the Boards
Apply the clear silicone all over the back of the now-wallpapered boards, and then stick them to the backsplash. Place your cut glass panels over the papered panels and apply more silicone around the edges to keep them in place. Berry recommends running a finger over the silicone to press it into any empty spaces and give it a clean, smooth finish.
Step 4: Let It Set
It takes a full day for the silicone to cure and set, so Berry used cutting boards and books to hold her boards upright. Once the 24 hours were up, she was left with a beautiful custom backsplash that completely changed the vibe of her space. And renters, don’t worry—when it’s time to move or you feel like changing up your kitchen yet again, Berry explains that it’s easy to take the panels down by just peeling off the silicone: “That’s the beauty of it.”
See more stories like this: What I’ve Learned From Renovating 100 Historic Homes You’d Never Guess That This Kitchen’s Sink Was a $300 Amazon Find Can You Spot the 2 DIYs in This Bathroom Transformation?