You Don’t Need a Sprawling Kitchen When You Have These Designer Tricks
Four layouts that make the most of every inch.
Updated Oct 11, 2018 10:23 AM
We may earn revenue from the products available on this page and participate in affiliate programs.

Cramped kitchens are the bane of many city dwellers: fridge doors that only open halfway before banging into the wall, pots and pans stored in the oven, temporary tables you constantly have to unfold when guests come over. But great designers know that a small space is just an opportunity to make things function better.
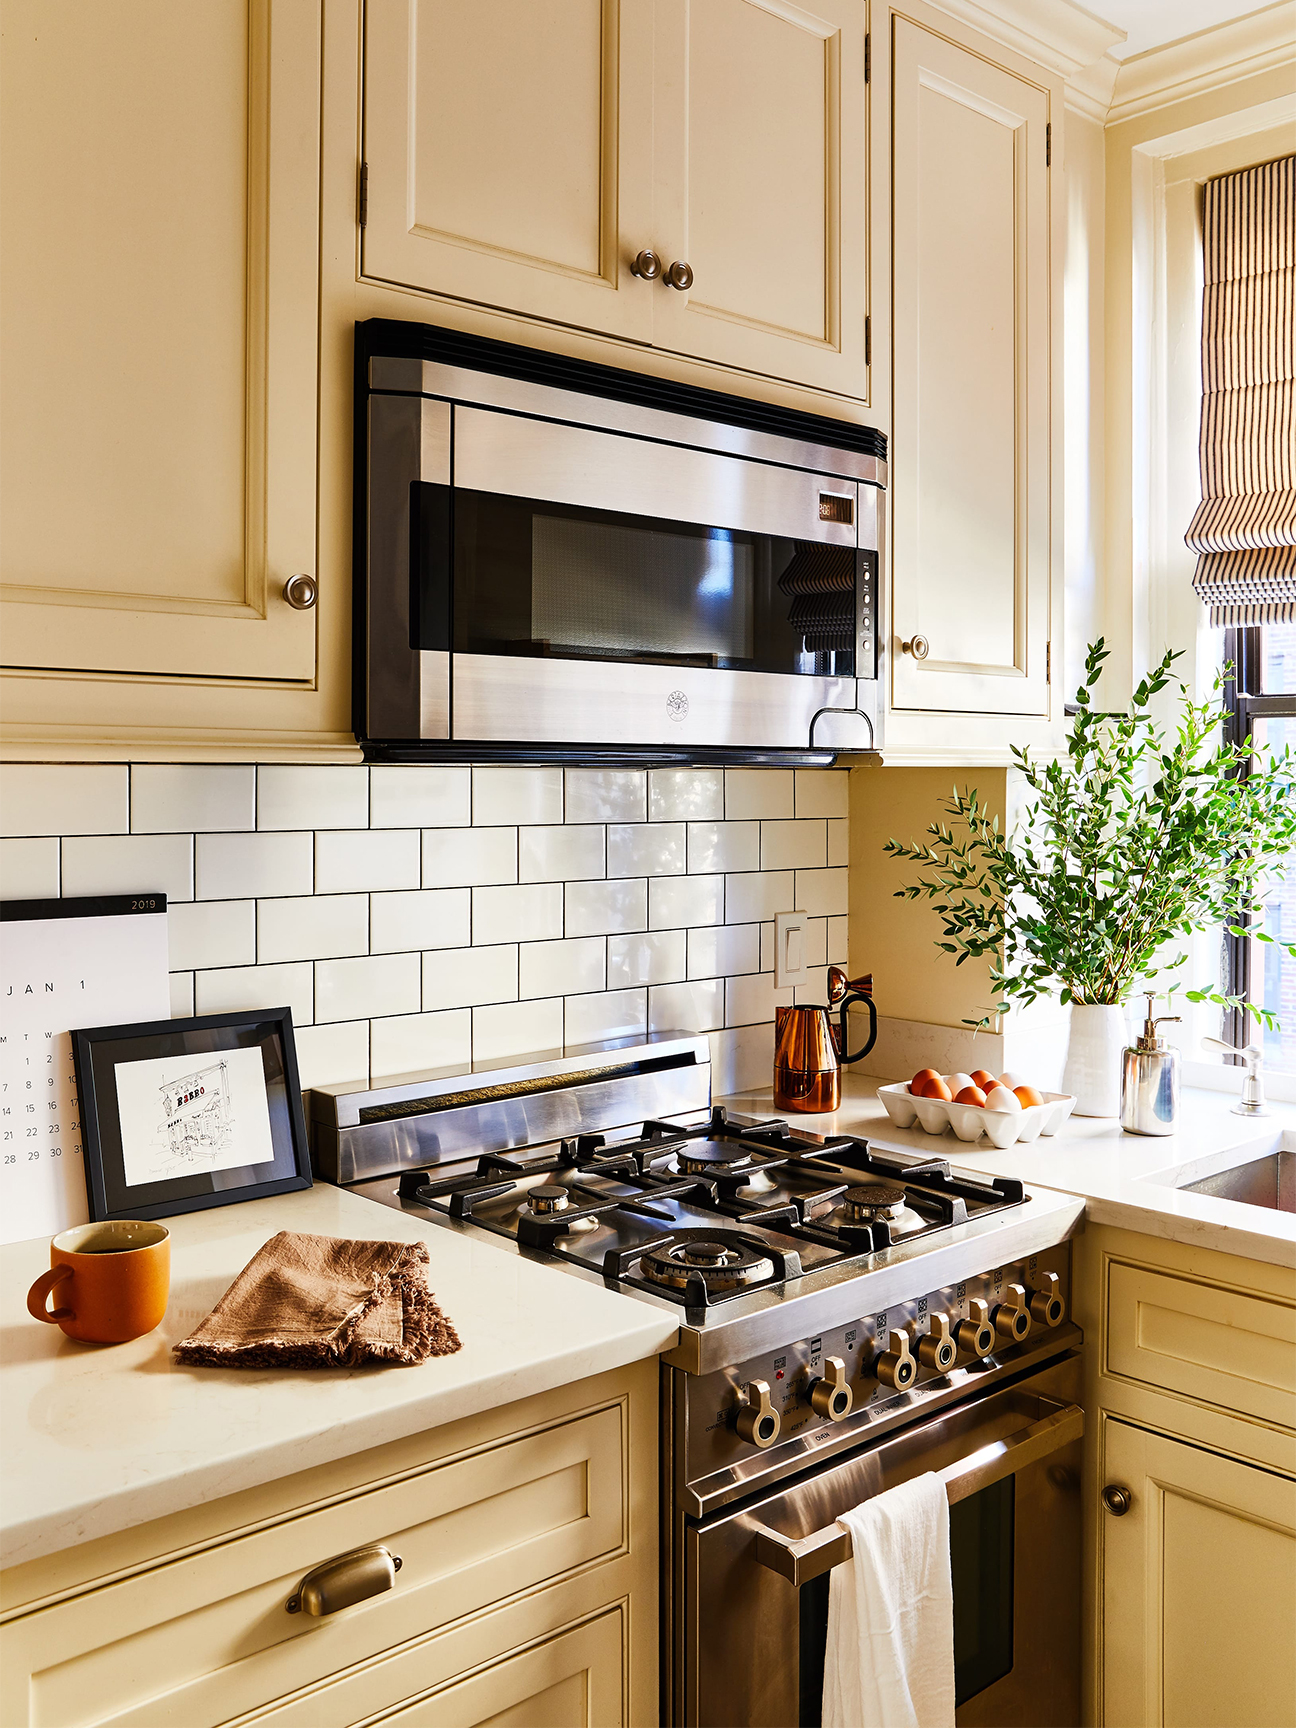
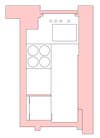
It’s with this mind-set that Michael Geller, an architect at G.P. Schafer, doubled the cabinets in his 32-square-foot apartment in New York’s Greenwich Village. “Even though the new layout is more efficient, there is still only two feet of standing room to operate in,” he says. “But the positive is that everything is close at hand.” Along with three other designers, he shares the challenges of renovating a tiny kitchen (and the tricks that made everything better).
If Your Options Are (Very) Limited

Originally a cramped half-galley, Geller’s space is now an open L-shape. He achieved this by flipping the primary cabinet wall and partially opening up the living room doorway. “There weren’t many options for how to arrange the appliances,” he says, but he and his wife wanted a full-size refrigerator (after living in a studio apartment that only had a dorm fridge), so they placed it in the back corner. The sink got a prized spot under the windowsill, and Geller installed the range next to it. “We didn’t want the oven door to open into the living room, so it had to go there with the microwave above it. Basically, the kitchen planned itself,” he notes.
Pro tip: “Consider what appliances you can’t live without. We would have loved to have a dishwasher and a built-in coffee maker, but we just couldn’t justify giving up any cabinets for it.”
If You Live in a Rental


Jess Bunge, editorial director at Emily Henderson Design, knew that a full-scale reno project was out of the question in her rental, but she saw the opportunity to majorly improve her long and narrow room by upgrading her fridge to a smaller Smeg and adding in a dining banquette. “Finding a seating situation I liked was so hard,” she remembers. “Nothing fit correctly.” Her old bistro table could only accommodate two people, but the new solution meant that she could now entertain four comfortably. She also improved the overall look by adding a plywood cover over the ugly granite countertop.
Pro tip: “Don’t be afraid to customize. The kitchen world is not super small-space friendly. So always remember that you can DIY (or hire someone) to create something beautiful that will work best for you.”
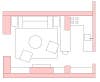
If You Have a Lot of Stuff
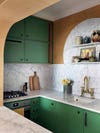
In this petite windowless London room, designer Beata Heuman paid a ton of attention to clever storage: A “magic” corner unit features several shelves that unfold when you open the door, while a concealed low-level fridge and a washing machine are tucked under the peninsula. “We had already decided to use caning to close off the radiator in the corner (allowing heat to pass through), and we chose to continue this across the bar to hide the laundry area,” Heuman explains.
Pro tip: “Make sure the space is comfortable to move around in; it’s easy to get so caught up in aesthetics that you forget how important being able to navigate is. Think about what cupboard doors will open onto, and in what order you’ll generally be using them.”
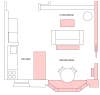
If the Room Next Door Is Huge
Before Lauren Bugliarisi, managing partner at Marrimor, came along, the kitchen in this airy Vancouver apartment was closed off to the living room and felt stuffed in a corner. After removing a couple of nonstructural walls and throwing in an island to double the counter surface, the designer installed a full-height cabinet that ran all the way down the entry hall and hid the fridge inside it. (The existing range was already in the most logical location, so it became the starting point for the rest of the layout.) The microwave was tucked under the island to keep counters clear.
Pro tip: “Whenever possible, one area should serve multiple useful purposes. For instance, an island should be large enough to serve as a prep space and a laptop zone. Plus, the full ceiling height should be used—so the area designated for the fridge can also have storage above.”
Discover more clever layouts we swear by: One Open-Plan Living Room, Four Different Layouts We Asked 3 Designers Exactly How to Lay Out a Master Bedroom 3 Ways to Live Large in Your Studio Apartment (No Matter the Size)