A Crumbling Ceiling Sparked This Room’s Technicolor Makeover
The designer left no wall bare.
Updated Oct 11, 2018 3:37 PM
We may earn revenue from the products available on this page and participate in affiliate programs.
When Brenda Carey’s Victorian ceiling rose (a decorative detail from which lighting is hung) came crashing down in the middle of the night, she knew it was time to call in a pro. The video game designer had been living in her dream apartment in Edinburgh for two years by then but hadn’t gotten around to decorating the living room (save for installing that ill-fated chandelier).
Although Carey had fallen in love with the place’s gracious proportions, she found them daunting to decorate. “I had no idea how to buy furniture and objects to fill the space without it being haphazard, so it was underfurnished with a rug the wrong size and sat largely unused,” she recalls. “It was a waste.” Luckily, she knew exactly who could rise to the challenge: designer Sam Buckley, whose home she vividly remembered for its bold palette and similarly cavernous size.
“I only mentioned my ceiling rose and that I wanted it modern,” says Carey. “I specifically said don’t ask my opinion, as I’d definitely try to dilute the vision unintentionally.” With total free rein, Buckley set out to turn the room into a kaleidoscope, with no surface left unpainted. As for how he came up with the vision? It all started with a rug…
Finding That Spark of Inspiration


Buckley was designing a carpet collection for CC Tapis at the time, spending his days playing with colorful graphics with striking patterns, so he knew we wanted to include one in the room and translate the motifs onto the walls. For inspiration, he pulled out a book from his library called Supergraphics to get large-scale wall art ideas. Then he combined his findings with the shapes and colors from the rug to create the design that would cover every surface of the space.
Building the Scheme One Fabric at a Time

Using the rug and a green striped velvet textile from Le Lievre that had caught Carey’s eye as a jumping-off point, Buckley started building the palette: bright turquoise, deep coral, sunny yellow. “It’s not always easy,” he admits. “As you add more colors, it can sometimes become difficult to manage, but this combo seemed to come together quite easily since all the shades were repeated somewhere in the furnishings.”
Planning in Advance (But Staying Open to the Unexpected)


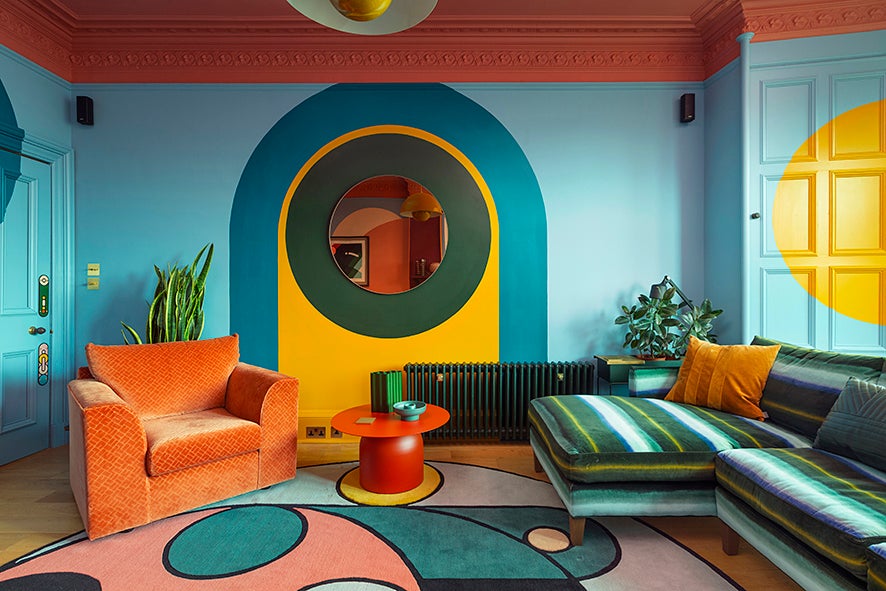
One thing Buckley knew from the start: To keep the room from feeling too busy, he didn’t want to outline the many architectural features in the room. “There is a beauty in color-blocking such details instead of highlighting them,” he says. He imagined large arches around the mantel, yellow ovals lining the windows, and tiny triangles tucked away in bookcases—and he figured out most of it on his computer using a 3-D modeling program.
When it came time to mark the walls for the painters, Buckley had a last-minute change of heart. “I got on-site and realized that the original layout wasn’t going to work, so I flipped it,” he says. He was finally ready to have his vision come to life.
Pulling the Space Together

With the sofa freshly upholstered and the rug laid out, the rest of the room came together organically: a coral side table here, an orange armchair there. He stumbled upon the round rose-tinted glass mirror by accident while scouting for another job and hung it in the middle of a forest green circle surrounded by teal and yellow arches. “I feel like it’s there to bring the room into a calm focus, then reflect the craziness back at you,” says Carey.
As for the ceiling rose, it’s now an abstract plaster showpiece created by Buckley himself and serves as the crown jewel of the room. Sometimes all you need is a sign from above to nudge your decorating projects into gear.
It’s hammer time: Follow @reno_notebook for easy rental updates, clever DIYs, and tips to nail your next project.