This Kitchen Reno Relied on a Hardware Store Staple
And it only cost about $325.
Updated Oct 11, 2018 10:07 AM
We may earn revenue from the products available on this page and participate in affiliate programs.
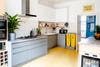
When designer Laura Wellington and her husband, James Abbott-Donnelly, cofounders of coworking space Duke Studios, bought their four-level home in the English city of Leeds, a kitchen renovation was under way—so they halted it immediately to bring their own style into the space. Already there: gray and white Howdens cabinetry (a U.K. standard), laminate countertops, some white tile, and not much else. Which made for a great blank canvas for the creative pair, who filled out the rest of the L-shaped room with a common hardware store staple: plywood.
Yes, you read that right. Because they had already used the hardworking material on commercial jobs, the couple knew about its benefits: It’s inexpensive, neutral, and can be cut to any shape or size, making it ideal for custom jobs. “We work quite a lot with plywood, and we like how it creates individuality,” says Wellington.
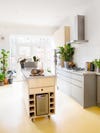
Customizing their cabinets with the common surface allowed them to add a feature that they couldn’t live without—a stand-alone console they affectionately call Party Island because of its beer fridge and, most impressively, a drawer that contains two Pioneer turntables.
When they entertain, Abbott-Donnelly mostly plays the records, but Wellington is determined to get on the 1s and 2s. “I will learn how to deejay!” she says. “It’s on my list of to-dos.” And if you want to make plywood a part of your kitchen’s decor, here’s your list.
Begin With the Finish
“Raw plywood is really lovely when you first sand it, but if you don’t treat it, it eventually turns yellow in the light,” Wellington says. To keep theirs looking fresh and clean, they use Osmo wood finish, which, when dry, creates a whitish surface and is food-safe. The only downside? “It takes ages,” she notes. They used three layers of the stuff, with 24 hours of drying time in between each coat.
Get Scrappy
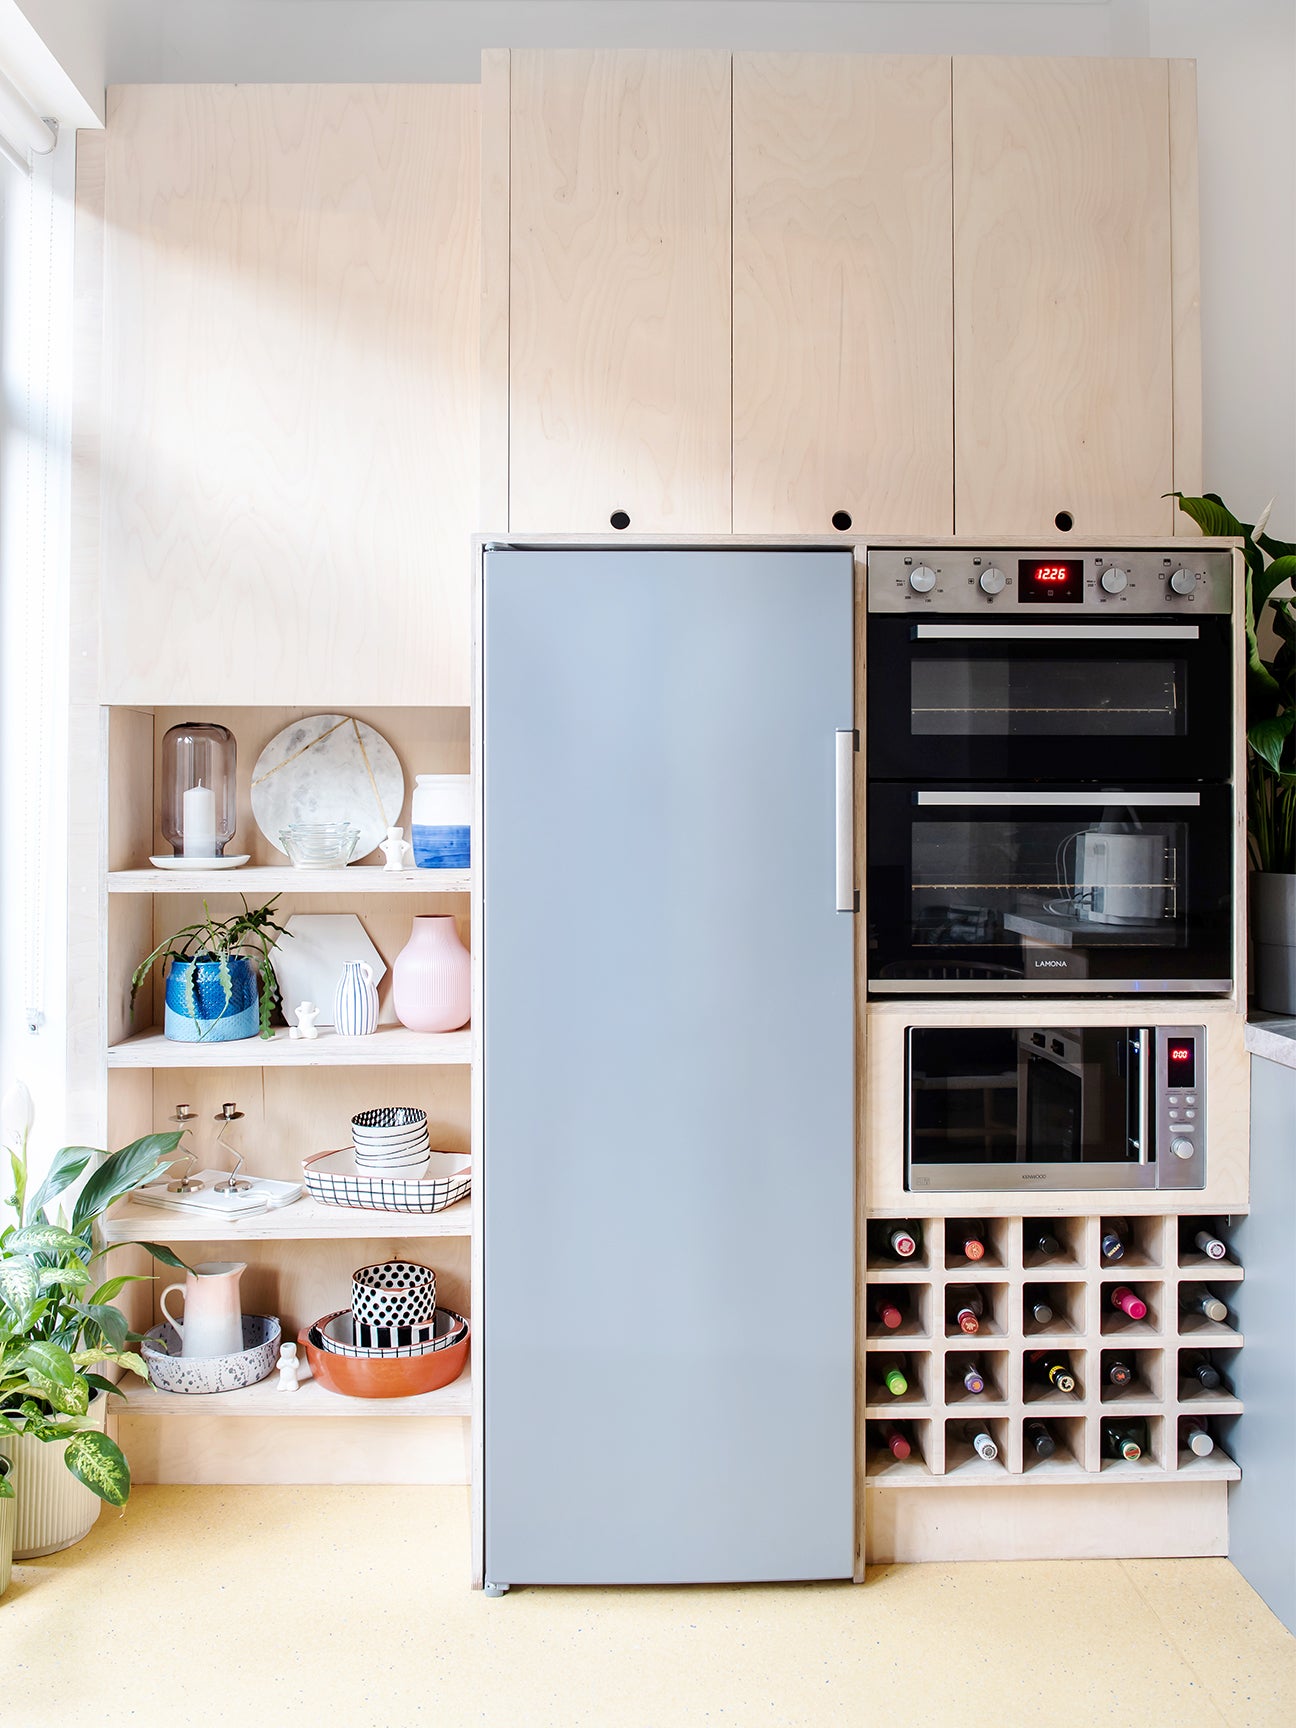
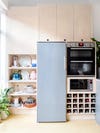
When their wood budget ran dry, the couple got creative with plywood leftovers. The entire set of cabinets next to the stove and fridge were built from offcuts from Party Island and commercial clients’ projects. To make it all fit, they tweaked the room’s layout so that the oven was at eye level. The rest of the extras went toward shelving to display their serving dishes and candleholders, or as Abbott-Donnelly calls it, “the crockery museum.”

Hardware? What Hardware?
Forgoing knobs and pulls is another way to save, but Wellington promises that it wasn’t purely a money-based decision. “Hardware can make things look better, but it also dates a space,” she points out. To avoid having to swap out handles as the years go by, the couple instead chose to drill holes into the cabinets for easy opening and closing—a detail that will never go out of style.
Create Contrast
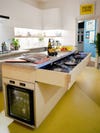
After a tile nightmare that cost them around $3,000—the person they hired didn’t clean the back of the pieces before installation, so they popped off—the couple eventually decided to install Polyflor (an inexpensive vinyl flooring) in a sunny yellow shade, which creates a colorful diversion from the rest of the room’s neutral tones.

Shine a Light
To put their serving dishes on full display (and because the space doesn’t get a ton of light in the winter), Abbott-Donnelly lined the top of each shelf with LED lights that hide behind a thin strip of—what else?—plywood.