This Blink-and-You-Miss-It Paint Trick Is Eyeliner for Your Walls
Allow us to explain.
Updated Oct 11, 2018 11:07 AM
We may earn revenue from the products available on this page and participate in affiliate programs.
Come spring, who isn’t craving major color? With our latest issue on newsstands, we’re celebrating all things bright and bold with Color Month on Domino. Check back daily and sign up for our newsletter to see vibrant spaces, palettes that pop, and our series Stroke of Genius, a step-by-step breakdown of weekend paint projects even total rookies can manage. Let’s get chromatic.
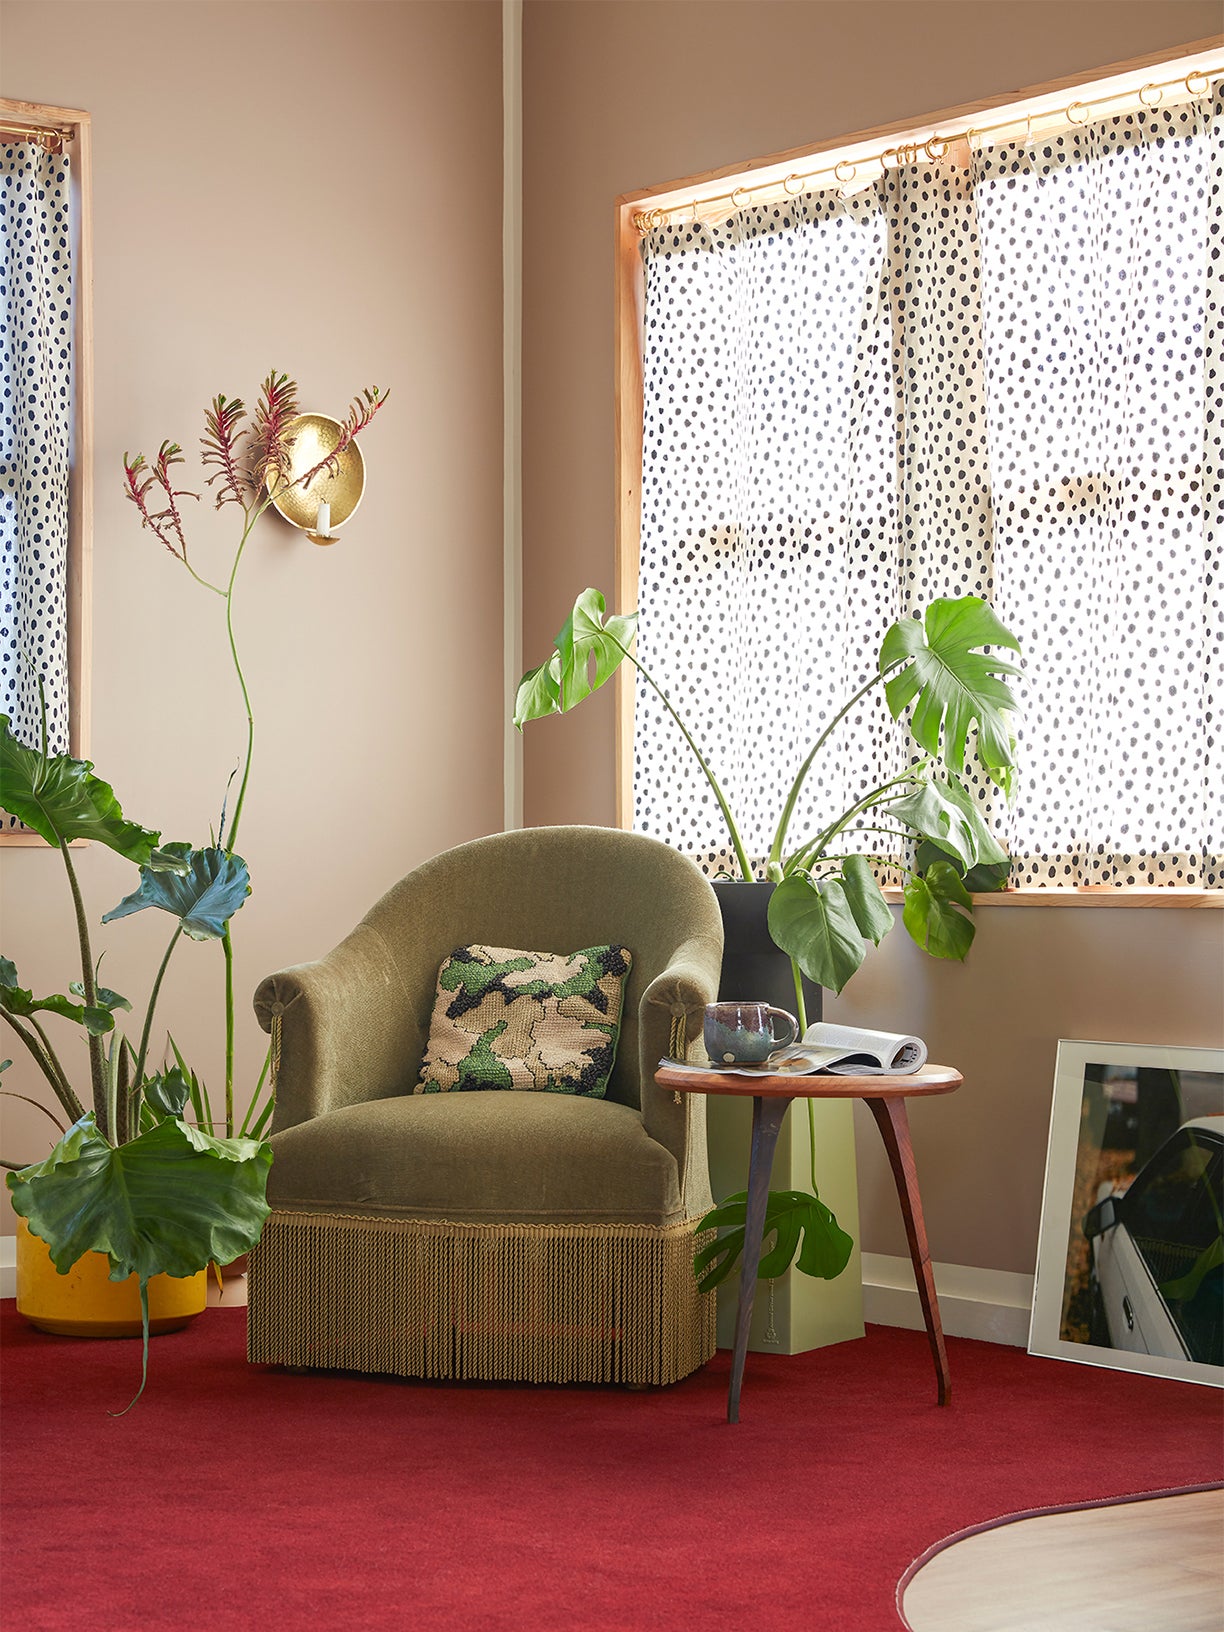
A cursory glance at this San Francisco home’s mauve- and citron-covered surfaces reveals that owners Luke and Joanne Duong Bartels love color, but that’s not all. When we peered closer, we discovered a subtle trick: In almost every room, the couple outlined each wall with a thin border, the decorative equivalent of eyeliner.
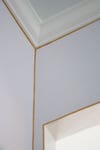
Timothy Balon, a designer and friend they tapped to help with their house renovation, came up with the idea. They had opened up the floor plan and, needing a way to delineate the individual areas, he settled on literal lines. “The white border allows the darker color to float on the walls,” explains Balon. “It’s also a nod to Blinky Palermo and his site-specific wall abstractions.”
The beauty of the design is that it works with any architectural style (some walls had crown molding; others didn’t). Balon’s biggest challenge was figuring out the corners, but once he had that down—hint: it requires a lot of careful taping—the rest was smooth sailing. Here’s how you can re-create the look this weekend:

The Supplies
- 1 to 2 rolls of Frog Tape (depending on how big your room is)
- Mechanical pencil
- Level
- Drop cloths
- Reusable paint tray
- Paint roller (Balon recommends Purdy or Wooster)
- Ladder
- Paint color of your choice for the wall (again, the amount depends on how big the area is)
- Optional: sanding sponge, dustcloth, and angled brush
Step 1: Prep the Surface
In this case, the walls were fresh and ready to go, but if you’re dealing with an older home, Balon suggests going over the walls with a sanding sponge to lightly roughen them up so the paint adheres better, then wiping them down with a dustcloth. Be sure to clean those baseboards, too.
Step 2: Tape It Out
Balon used the width of the painter’s tape to guide the thickness of the border. Using a level and pencil, mark the width at each corner, both vertically, where the two walls meet, and horizontally, across the adjacent ceiling and baseboard, so you can eyeball the final look. Once everything appears even and your corners are figured out, tape off the lines.
Step 3: Lock It In
Go over the edges of the tape with your finger for a tight seal, which will prevent the paint from bleeding into your white border.
Step 4: Add Color
Using the roller, paint all of the walls evenly. Wait for them to dry entirely—depending on the temperature and general humidity in your space, this could take merely an hour—then apply a second coat. Once that is completely dry (wait overnight just to be safe), slowly remove the tape. Fill in any gaps with the angled brush, then stand back and admire your new digs.
See more easy paint projects: For a Truly One-of-a-Kind Fireplace, Grab Your Paintbrush Fake High Ceilings With This Easy Paint Trick You Don’t Need to Be an Artist to DIY This Color-Blocked Mural