We’re Crushing Hard on This Pink Front Door DIY
Here’s how to get the look for just $50.
Updated Jan 17, 2019 1:04 PM
We may earn revenue from the products available on this page and participate in affiliate programs.
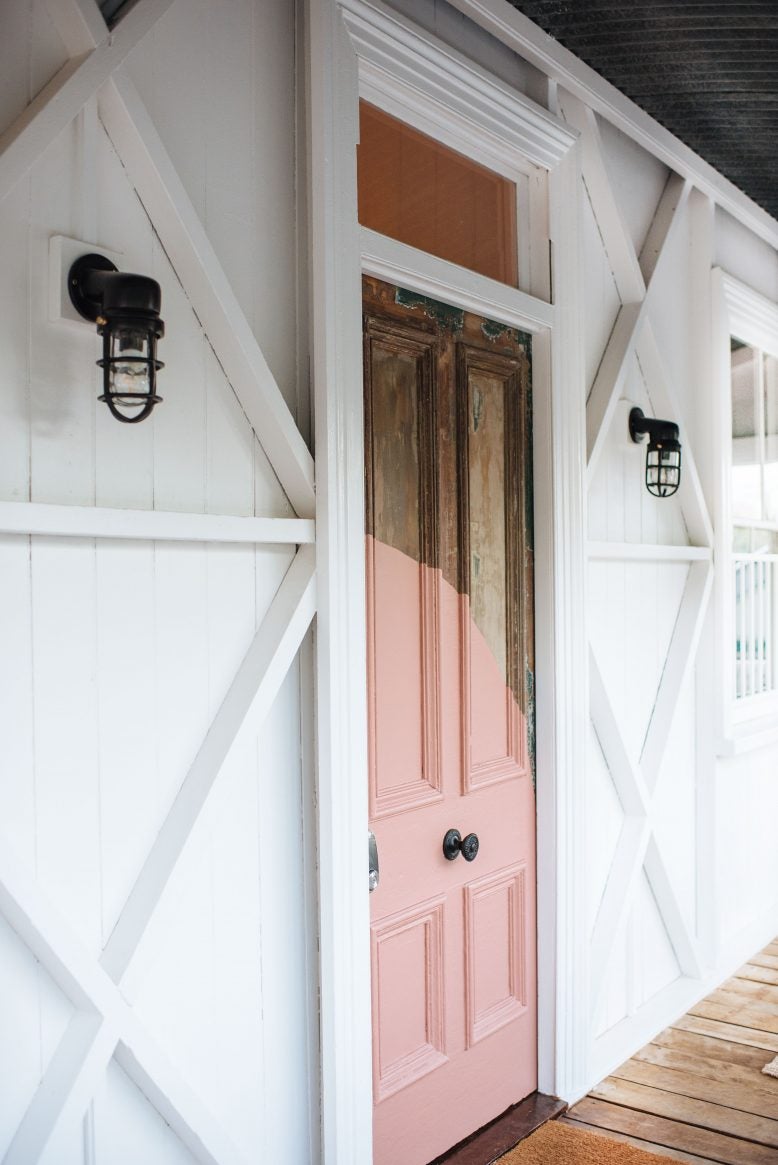
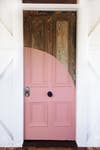
Out of the 75,000-plus photos tagged #DoorLove on Instagram, Geneva Vanderzeil’s half-pink entrance is easily our favorite. The A Pair and a Spare blogger’s front door checks off everything on our list: It’s colorful, it’s got character, and, most important, the project only cost $50.
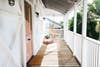
Vanderzeil is the first to admit that the makeover was a bit of a gamble. Committing to a blush front door (and a partially painted one, at that) would either be, as she puts it, “fantastic or a fantastic failure.” Fortunately, the touch of paint landed squarely in the former camp, adding some serious curve—err, curb—appeal to her charming Brisbane, Australia, cottage. Below, the pro DIY-er invites us onto her sunny porch to walk us through the transformation.
1. Pick Your Paint(s)

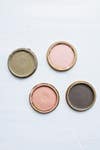
Queenslander homes are known for their bright and airy verandas, but Vanderzeil’s was a moody forest green. So before tackling anything else, the blogger and her partner, Ben McCarthy, refreshed the exterior with a lick of white paint. The dramatic shift set the stage for a fresh pop of color on the door—but not too big of a pop. “I wanted a pink that was a little more muted,” says Vanderzeil. “Nothing too candy colored.”
After careful deliberation, they settled on Australian paint brand Haymes’s Humas for the arc. Because the couple, along with McCarthy’s father, handled all the labor themselves, the only real expense was the paint, which rounded out to around $50.
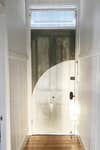
2. Strip and Sand the Door
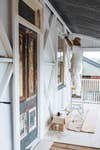
Understandably, Vanderzeil and McCarthy were determined to preserve the home’s original 1800s door, but it was time to say goodbye to the dark green hue here, too. “If the door had been a more neutral color, we might have left it and simply painted the arc over the top, but the green wouldn’t suit the new scheme, so it had to go,” shares Vanderzeil. To get back down to the bare timber, the pair used a paint stripper to work their way through the rainbow of colors the door had been painted over time. Between scraping, sanding, and the eventual painting, the project took about 10 hours (essentially a day’s worth of work) to complete.
4. Mark Your Arc and Remove the Hardware
You don’t need a fancy protractor or stencil for this part—just a trusty pencil and a piece of string that measures the width of the door. “We wanted the arc to meet up with the timber cross-beam on the wall, so we lined up one end of the string with that and held the other piece straight down at the other end,” explains Vanderzeil. Holding the bottom end of the string in place, slowly move the top end of the string until it reaches the other side of the door, following along the arc with your pencil. Note: It’s helpful to have a partner in crime for this project. (Bonus points if they have a steady hand.)
At this time, you’ll also want to unscrew the doorknob (it will make your paint job a lot easier). When Vanderzeil’s arc was said and done, she replaced the original lock with a fancy one from Samsung.
4. Fill in the Blank
Once your arc is drawn, the rest is just a matter of staying inside the lines. To ensure a smooth surface for the pink paint, start by coating the arc with a white primer. Once that’s dry, Vanderzeil suggests applying at least two coats of the colored paint.
5. Don’t Abandon the Other Side!
You might ask, why even bother with the inside of the door? Isn’t the whole point to stop guests in their tracks before they come in? Vanderzeil had the same thought. But after some convincing from McCarthy and his dad, she decided to take the two-tone look full circle.
See more stories like this: You Don’t Have to Spend a Fortune on a Stunning Concrete Fireplace—We Did It for $215 The Case for Painting Your Door Frame…Yes, Just Your Door Frame If You’ve Got an Hour, You Can Reupholster a Chair