An IKEA Hack Disguises the Not-So-Pretty Stuff in This $11K Kitchen Remodel
And a super-simple layout trick ensures everything is in its right place.
Updated Oct 12, 2018 12:37 AM
We may earn revenue from the products available on this page and participate in affiliate programs.
Location: Aberdeen, Scotland
Budget: $11,000
Square feet: 169
Top priority: Reversing a misguided kitchen renovation.
In Renovator’s Notebook, homeowners open up about the nitty-gritty of their remodels: How long it really took; how much it actually cost; what went horribly wrong; and what went wonderfully, serendipitously, it’s-all-worth-it-in-the-end right. For more tips to nail your next project, follow @reno_notebook.
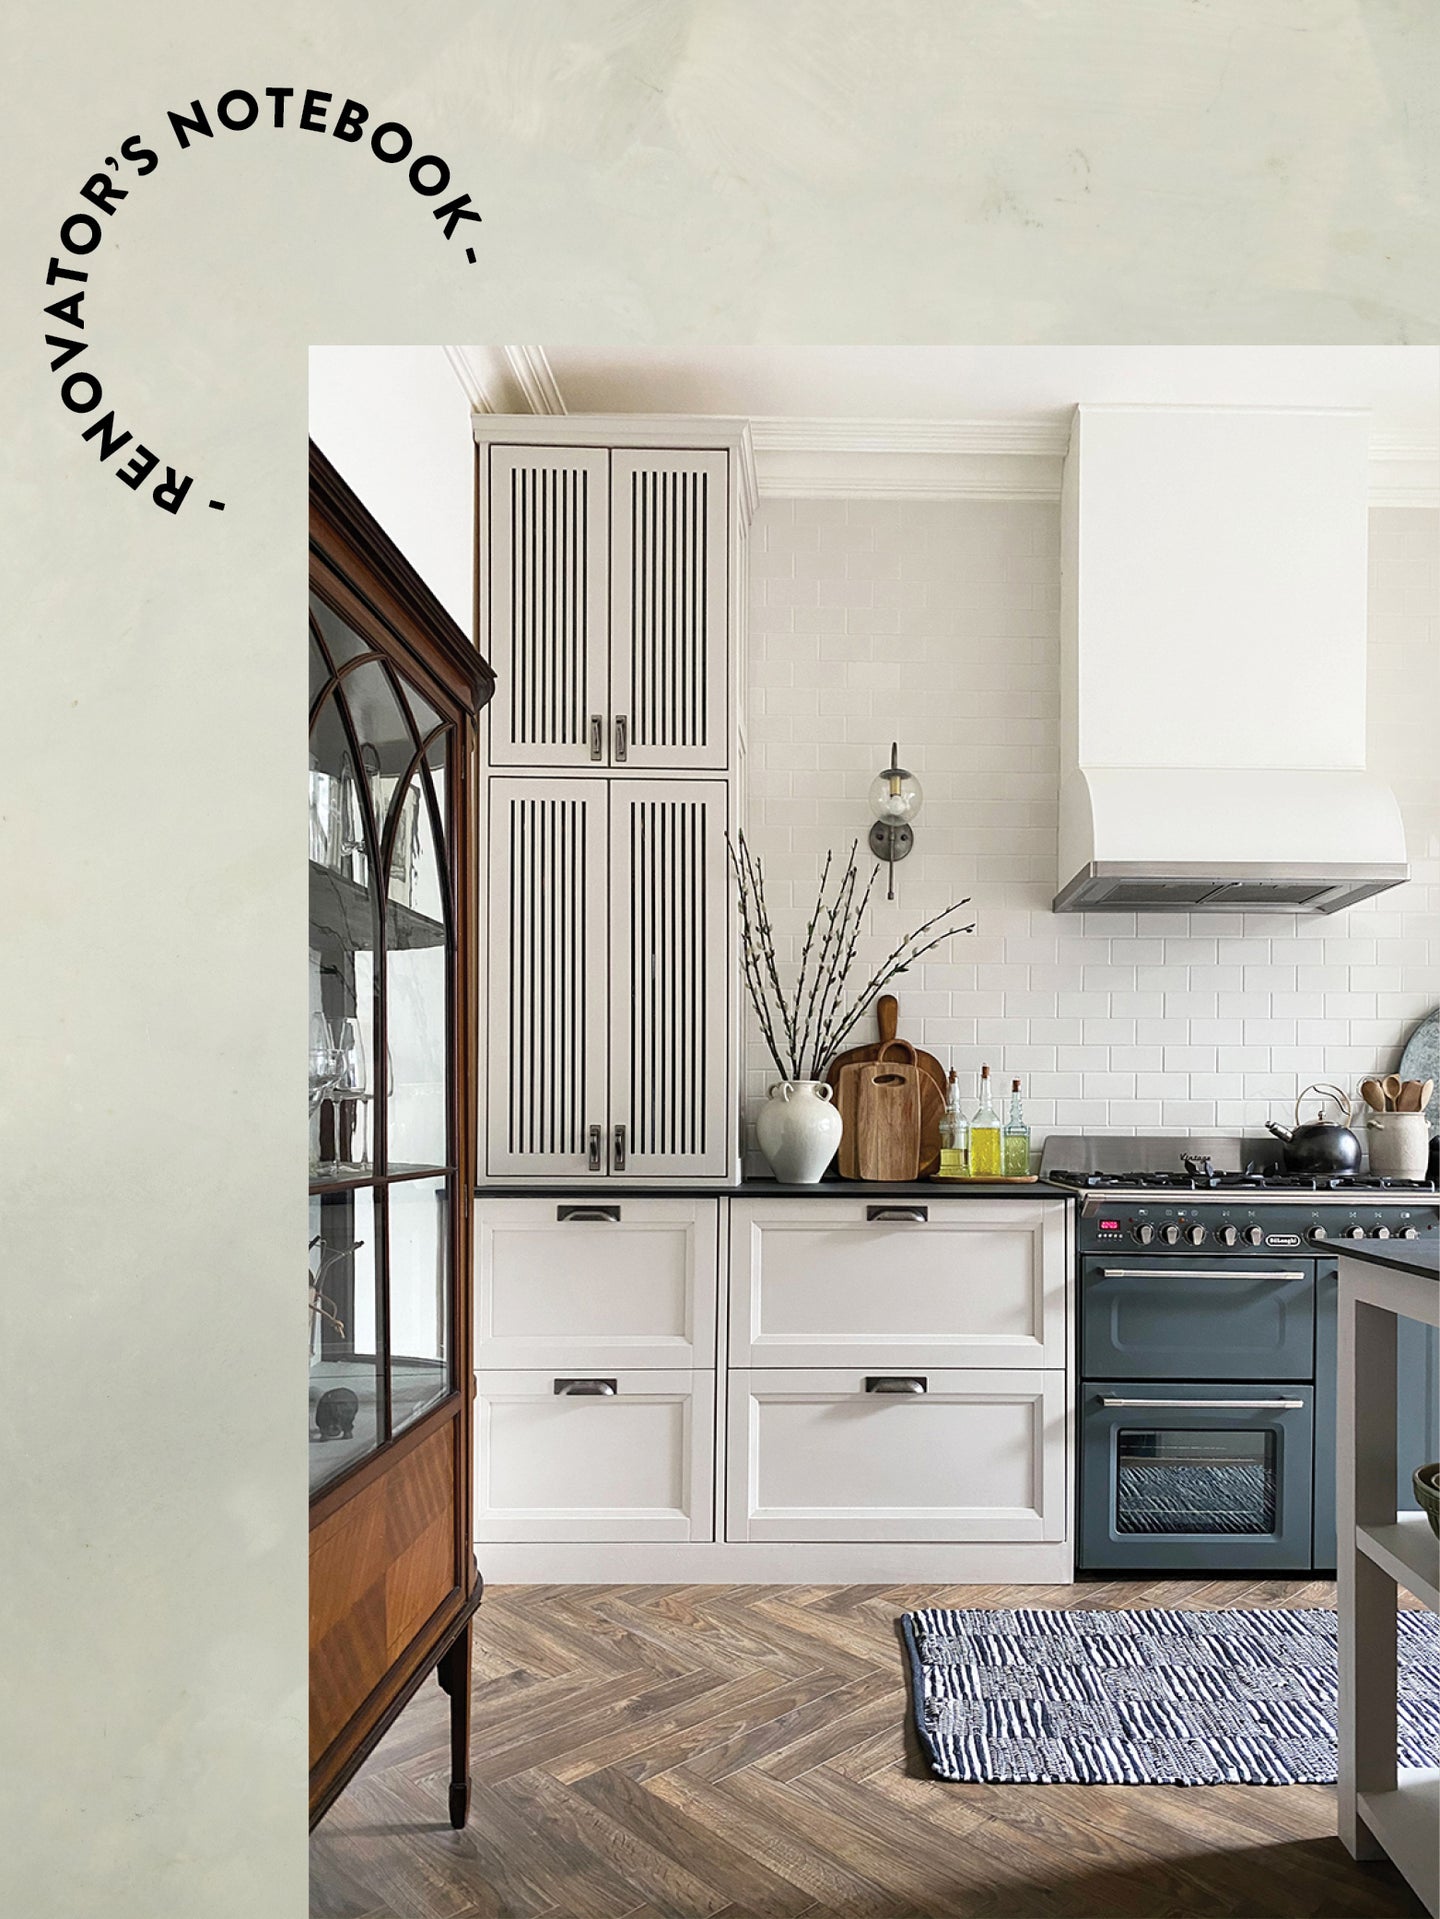
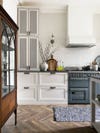
A lot has changed since avid DIYer (and lecturer) Malcolm Begg and his partner, Brian, a nurse, moved into their circa-1865 Victorian in Aberdeen, Scotland, in 2016. They’ve installed new floors, played layout Tetris, and restored the central staircase’s millwork in a bid to reinstate the property’s original charm. Last year, after months of saving up, the couple finally brought the rear kitchen addition overseen by the previous owner down to the studs. Its perplexing cabinetry choices (some yellow and mod; others wood and classical), tiny white fridge, and dingy carpeting had to go to give it the same sense of grandeur as the rest of the house.
The project’s tight $11,000 budget meant Begg had to stretch his DIY muscles like never before—and he delivered. From the IKEA cabinetry to the lighting, each item bears his mark. Ahead, in his own words, he shares exactly how he gave the new kitchen an old-world slant.
Save: Construct a Cardboard Model to Perfect Your Floor Plan
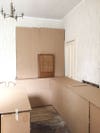
Instead of paying an architect thousands of dollars to draft a layout for me, I built a life-size cardboard kitchen out of leftover shipping boxes. Then I sliced and diced it until the flow and countertop height fit the space like a glove. Through the process I realized that situating the sink at the end of the island would free up valuable under-cabinet storage and afford us more countertop space. Brian was once a chef, so he was thrilled by these lucky little extras.

Splurge: When You Can’t Build Out, Build Up
Since the kitchen’s footprint is only 169 square feet, I had to make the most of vertical space in order to maximize storage—and the price tag reflected that. It cost $4,500 to extend the IKEA cabinetry all the way to the ceiling, and an additional $700 to ring the room with crown molding, add a second row of trim to the doors, and attach paneling to the cabinets that flank our stove. While I wasn’t hell-bent on period authenticity, these traditional touches really helped tether the room to the rest of our house.
Save: Hack the Cabinetry to Hide Eyesores

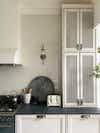
I didn’t want to weigh down the kitchen with a second wall of cabinets, but we had to hide our mismatched dishes and the unsightly boiler to the right of the stove somewhere. I mounted half-round wood dowels to a few glass-front IKEA doors—and voilà! Now everything is there, but also not, and it only set us back $150. Why did I attach them to the inside of the doors? To hide the seams and stray glue marks.
Save: Fake Lighting That Matches the Other Finishes
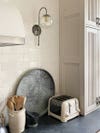
I wanted to frame the exhaust hood with pewter sconces that played nice with our hardware, but all the ones I came across were way too expensive. Unwilling to compromise, I snapped up a chrome pair for $40 and whipped them into shape. First, I glazed the glass shades with three coats of transparent texturizing paste for a handmade look. While they dried, I scoured their metal bases with sandpaper before priming and spraying them with black paint. Then I used a stippling brush to apply a pinch of pewter-effect paste and buffed them to a soft sheen. The whole project took a weekend.
Save: Make Happy Hour Happier by Teaching Old Furniture New Tricks
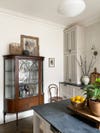
After the renovation, I sprinkled in a few antiques, including a Thonet-style dining chair and Edwardian cabinet that I bought at a secondhand shop for just $100. In its heyday this piece would have been filled with curiosities, but I’ve refashioned it as a bar. Unfortunately, due to COVID, we haven’t been able to crack it open and entertain, but we are ready when everyone else is and can’t wait to cheers to our new kitchen.