My First-Ever Kitchen Gut Reno Involved Some Serious Salvaging
A French architect on how she got scrappy.
Updated Oct 11, 2018 12:53 PM
We may earn revenue from the products available on this page and participate in affiliate programs.

In Renovator’s Notebook, homeowners open up about the nitty-gritty of their remodels: How long it really took; how much it actually cost; what went horribly wrong; and what went wonderfully, serendipitously, it’s-all-worth-it-in-the-end right.
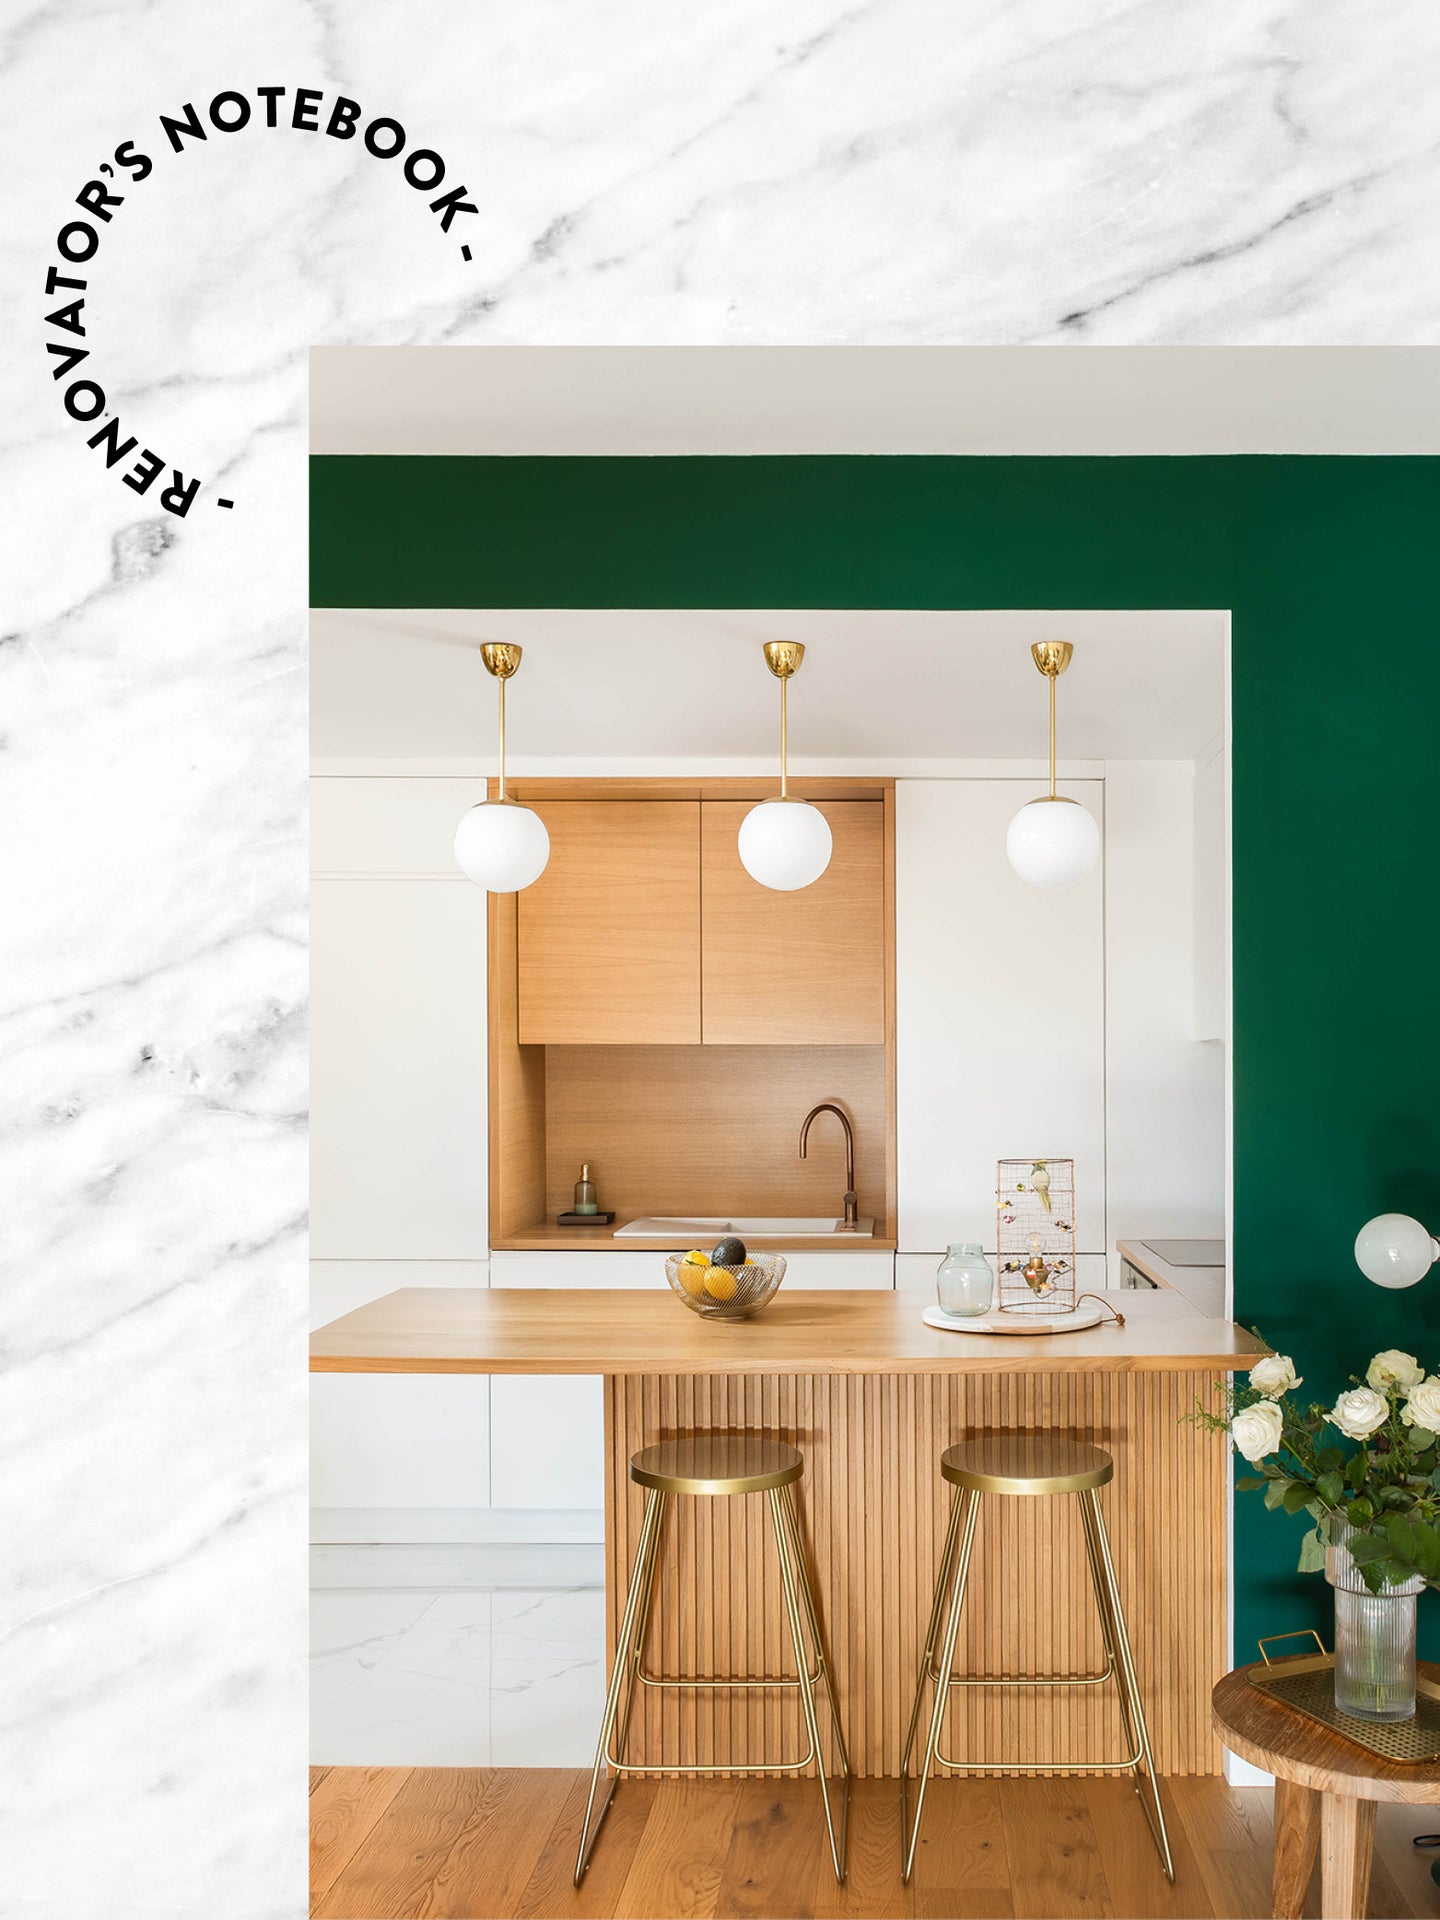
Style wasn’t even on the wish list when Julie Sergent-Ferreri was apartment hunting in Corsica. Instead, the architect was drawn in by one thing and one thing only: what could be seen from the windows. The 538-square-foot flat she found was situated on the high point of Route des Sanguinaires, a picturesque stretch of capital city Ajaccio with the most incredible sea view. “I knew I could do a few things to make it fit my taste,” she says. She signed the lease and got to work.
Even though Sergent-Ferreri designs houses for a living, she hadn’t actually done much with interiors before—so to avoid disaster she turned to a network of friends in the industry (including a carpenter who installed the custom textured paneling) and her mom, who helped lay the marble-effect tiles and paint the wall a vivid emerald. She mapped it out slowly, waiting until she had the budget totally ironed out before she took the plunge. Fast-forward a couple months and around $21,877, and she had her dream kitchen setup. You’d never guess the old room had black laminate cupboards and dated stonework.
“Things were done by improvisation,” she says—though the now-polished space looks anything but ad-libbed. Here’s how Sergent-Ferreri made the tiny nook work for her.
Go Ahead, Overthink the Details
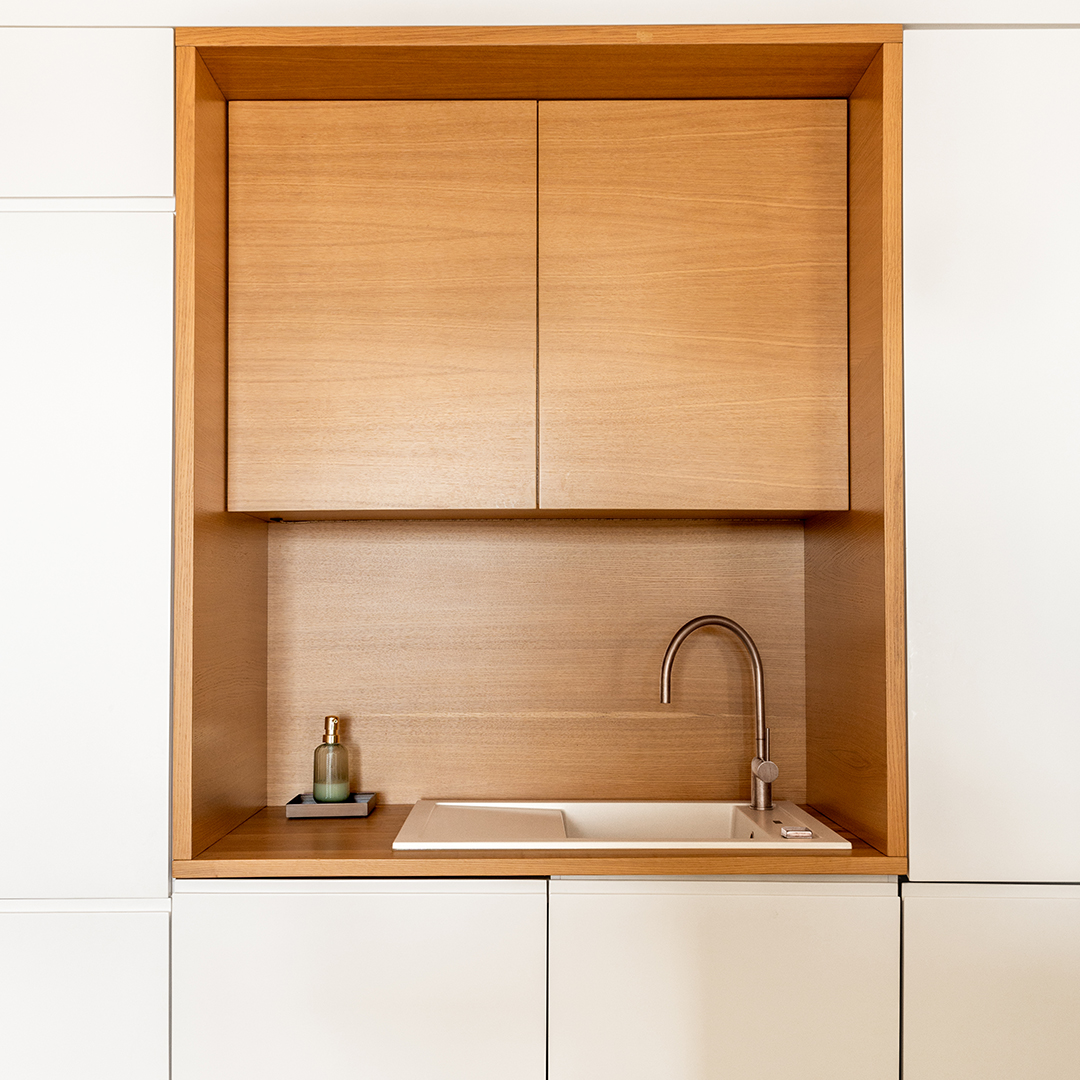
The first thing I bought was the kitchen tap. I absolutely wanted something in brushed copper, but I couldn’t find a good one with a reasonable price tag. After some digging, I finally found the perfect fixture on an English site that sells factory scraps called Olif. I paid $342 with a 40 percent industry discount, and I still don’t see any deterioration.
Be Realistic About the Timeline

It only took one day for the demolition and a second one to clean the walls—but between deliveries and unexpected challenges, the remodel was drawn out. The biggest complication was figuring out how to take the linoleum off the floor, which was fully stuck to tiles underneath. I finally found a solution on the Internet: Spread cola directly on the glue to break it up. It was surprisingly effective!
Keep in Mind an Open Floor Plan
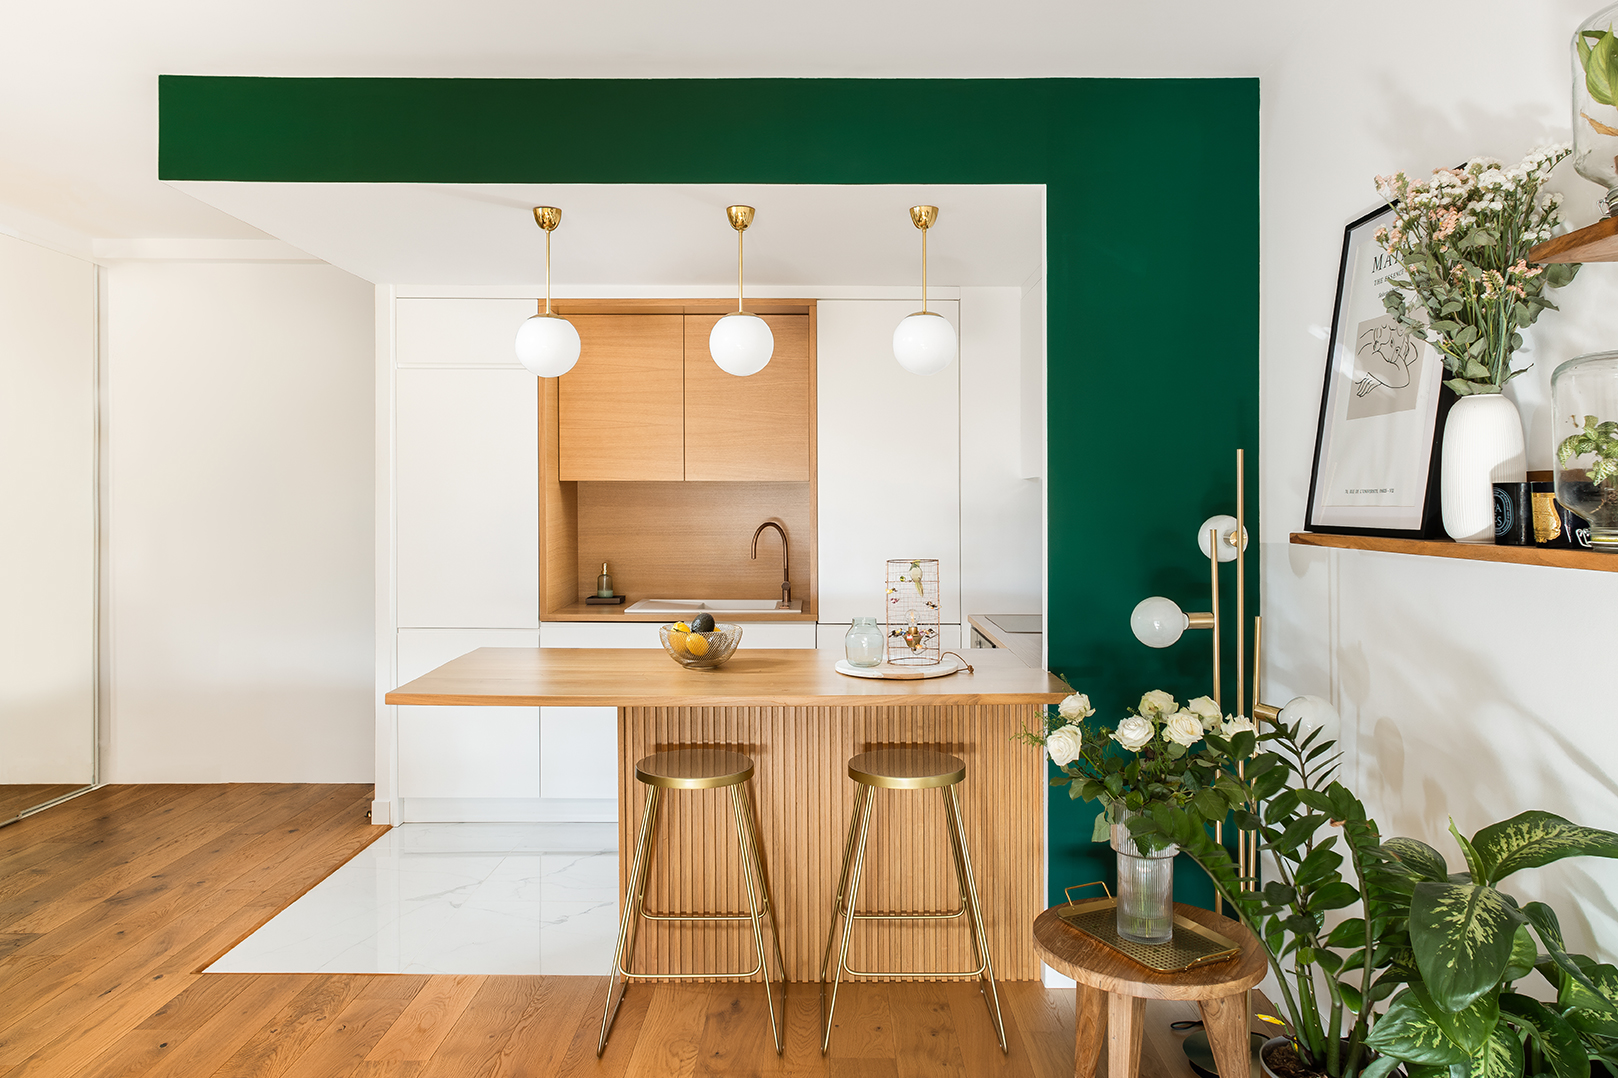
I started with the idea of a box, to delineate the kitchen from the living room. The biggest difficulty was then to successfully hide all the more functional elements of the kitchen as much as possible from the sitting area—I tucked the microwave into one of the cabinets and chose a white range and oven to blend in. In the end, the only thing I would do differently is swap my coffee maker for a more designed one.
Make One Detail Your Signature

I wanted something simple but well highlighted in the room. In keeping with the idea of a box, I picked green paint to make a border. The color I wanted only existed in exterior paint, so I re-created it at a specialized store, and that made the shade work indoors, too. A touch of originality can make the whole thing pop.
See more renovations that wow: This Emerald-Tiled Kitchen Renovation Was 17 Years in the Making We Saved $3,000 on Pantry Cabinets All Thanks to This Unexpected Mistake This L.A. Couple Sacrificed Their View for a Larger Kitchen—Or Did They?