3 Easy Hacks to Upgrade Your Boring Ikea Shelves
These super affordable upgrades take Ikea's plain jane shelves to the next level.
Published Aug 23, 2017 4:45 PM
We may earn revenue from the products available on this page and participate in affiliate programs.

Our starting point for this Ikea hack was thinking about the little things that make a house feel like a home (Goddess is in the details, after all). Everyone knows that good linens, a well-placed vase, or even a particularly chic knob can make or break domestic bliss. Shelf brackets, on the other hand, are an easy thing to overlook. But that’s why they matter so much—and why we made it our mission to prove it.

First, you’ll want to pick a bracket. There are so many styles to choose from, but we went with brackets from Ikea’s Ekby series; they’re a reasonable $2-4 each, plus the style is so simple and functional. They’re a good size and shape, making them easy to modify and create a major style moment with minimal effort. We paired the brackets with simple shelves (that also got makeovers) from the same Ekby line to create three fun—and super easy—set-ups worth of shelfies.
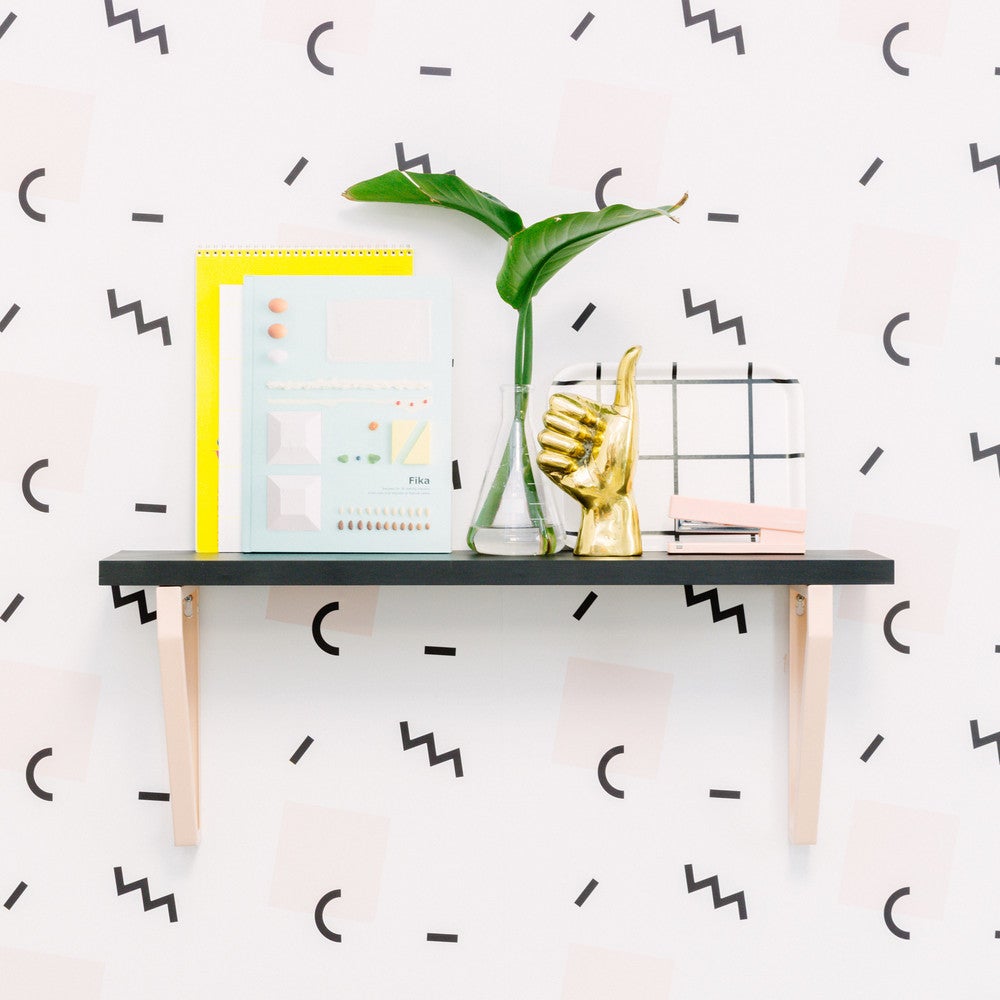
LOOK #1: Coordinating
Try your hand at coordinating brackets that match the room or backdrop. Here, we wanted this shelf to coordinate with the Basic ’90s wallpaper in pink from Chasing Paper. If you’re going for an even bigger statement, make the color match with your bedding or window treatments.
Just make sure you choose your colors wisely. Test them in a smaller area beforehand so you can be sure to get the shade right.
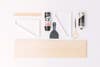
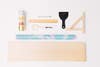
Supplies:
- 1 Ekby shelf. We used a 31 1/8×7 1/2″ the Ekby Jarpen in birch veneer.
- 2 Ekby Lerberg brackets
- Spray paint in two colors of your choice
- Screws and plugs
- Drill
1.
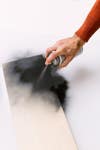
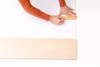
Knowing that we had a black, pink, and white wallpaper we were working with, our first step was to spray paint our shelf black.

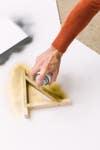
2.
Paint your brackets. Be sure to spray paint in a well ventilated area, and use a mask. Allow the brackets and shelf to dry for at least two hours, but ideally 24 hours.
3.
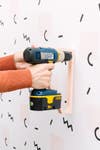
Attach the brackets to the wall with screws, approximately 24 inches apart. Always best to use a plastic screw anchor to ensure stability. Ikea sells a 26-piece kit for $7.99.
4.
Attach the shelf to your brackets. Every Ikea bracket has pre-placed holes, so it’s easy to know where your screws should go. To make sure that your screw will not poke through the other side, first measure it against the width of the shelf.

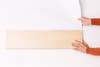
LOOK #2: Contrasting
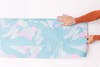
For this second option, we wanted to create contrast between the bracket and the shelf. First order of business: We covered our shelf in excess wallpaper so that it would blend in with the background and make a stronger juxtaposition. Camouflage, much? (Here, the wall and shelf are covered with Chasing Paper’s Banana Leaves print.)
Supplies:
- 1 Ekby shelf. We used a 31 1/8×7 1/2″ the Ekby Jarpen in birch veneer.
- 2 Ekby Valter brackets
- One panel of temporary wallpaper. We used Chasing Paper, which measures 2′ x 4′.
- Spray paint in color of your choice
- xact-o knife
- Screws and plugs
- Drill
1.
Spray paint your brackets so they can dry while you wallpaper your shelf.
2.
Measure the wallpaper. Think of it like you’re wrapping a gift. Lay the shelf on the paper, with one side flush against the top of your sheet of wallpaper.
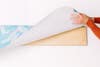
3.
Fold the paper over the shelf and mark how much you need. Make sure you’re pull the paper taut so there’s not a lot of extra.
4.
Cut the paper to fit the shelf.
5.
Peel and stick the wallpaper to your shelf. Carefully press along each side to ensure no air bubbles.
6.
To cover the short sides, fold one side down so the shelf is covered. Cut off excess paper with an xact-o knife.
7.
Attach the brackets to the wall with screws, approximately 24 inches apart. Always best to use a plastic screw anchor to ensure stability. Ikea sells a 26-piece kit for $7.99.
8.
Attach the shelf to your brackets. Every Ikea bracket has pre-placed holes, so it’s easy to know where your screws should go. To make sure that your screw will not poke through the other side, first measure it against the width of the shelf.

LOOK #3: Vanishing
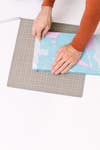
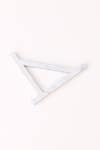
Another great idea? Make the brackets disappear. First, you’ll want to cover your shelf in a temporary wallpaper. We used a marble pattern to get a more luxe final effect. It’s also less to worry about when it comes to matching up corners. No one will really be able to see it from a distance.
Then we covered our brackets in the same paper, in the same pattern and colorway. Again, this is where the marble pattern really helps—don’t worry as much about matching up each edge too precisely. Finally, using an xact-o knife, trim away any excess paper from each bracket—et voila!
Supplies:
- 1 Ekby shelf. We used a 31 1/8×7 1/2″ the Ekby Jarpen in birch veneer.
- 2 Ekby Valter brackets
- Two panels of temporary wallpaper. (You won’t use it all, but it’s good to have extra in case you mess up.) We used Chasing Paper, which measures 2′ x 4′ per panel.
- Xact-o knife
- Screws and plugs
- Drill
1.
Wrap the bracket with wallpaper. The best way to do this is to lay one wide side of the bracket flat on the paper. Use an xact-o knife to cut out two sides of the inner triangle, and along the edge of the bracket. Remember to press out all air bubbles.

2.
Fold the excess paper over, to cover the edges and inside of the bracket. You won’t be able to cover the entirety of it like this, but you’ll get a few edges.

3.
Cut additional pieces to fit the exposed surface area until the entire bracket is covered.
4.
Cover the shelf with wallpaper. See steps 2-6 of Look #2 for instructions.
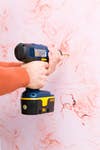
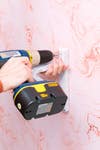
5.
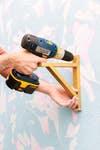
Attach the brackets to the wall. To insert the plug first, drill a hole and use a hammer to tap in the plastic anchor.
6.
Hang the brackets, attach the shelf, and style away!
See more Ikea hacks:
How to Turn an Ikea Table Top Into One Hot Headboard Use This IKEA Hack to Give Your Home a Retro Vibe How to Turn an IKEA Pendant Light Into a Decorative Accent