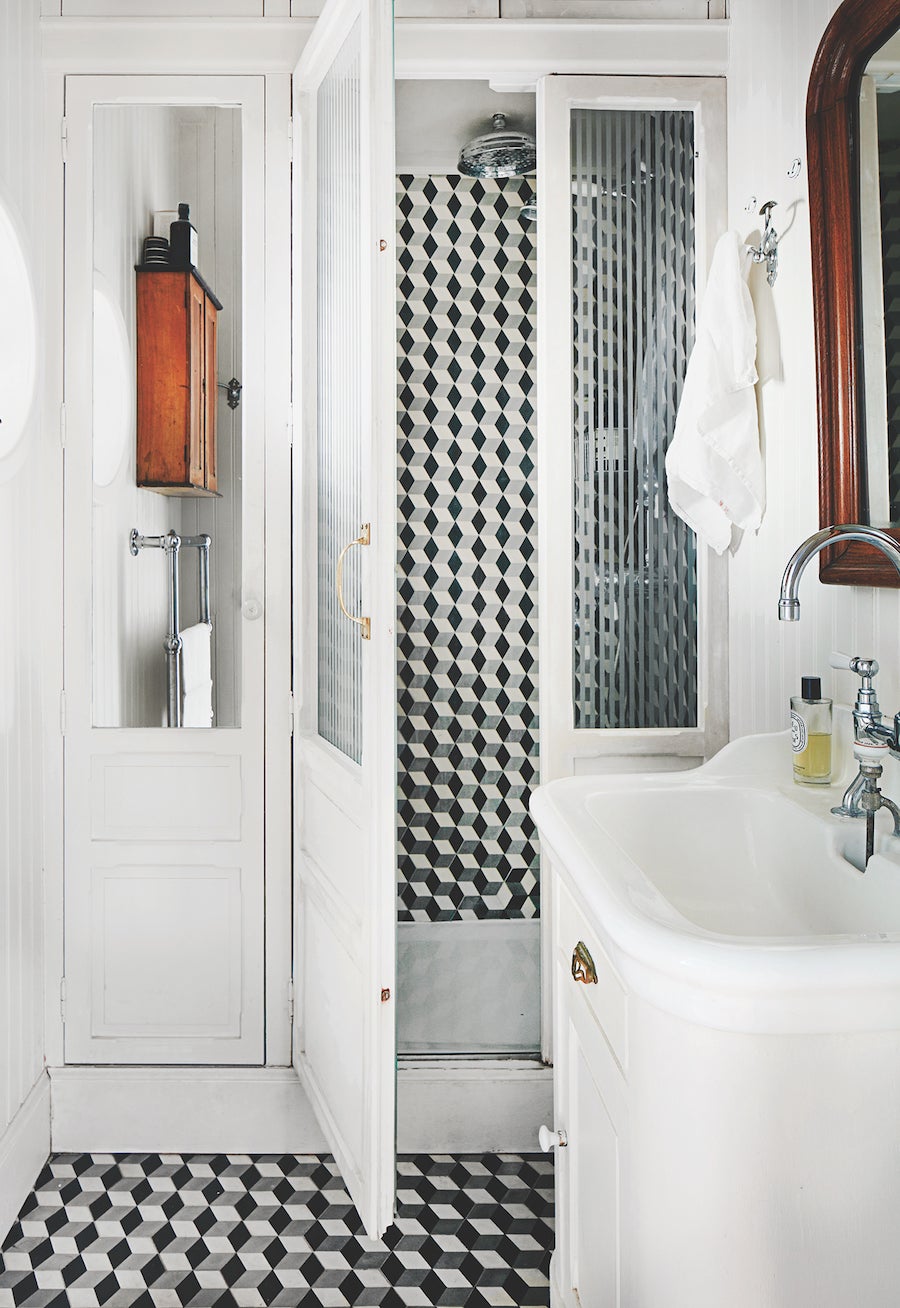
How to Tile a Bathroom Floor Yourself
Rule number one: Always order extras.
Updated Oct 11, 2018 4:54 PM
We may earn revenue from the products available on this page and participate in affiliate programs.
When we asked the experts at Block Renovation how to tile a bathroom floor, one common thread kept popping up: Overplan, always. Unlike paint jobs and hardware updates, this is one DIY project that’s harder to fix when gone awry—but that doesn’t mean it’s not worth trying. Revamping your flooring makes even the tiniest space look more personal, and the extra prep work will be worth it in the long run.
First, you’ll need to demo and level your existing surface (you can either hire a pro or try your hand at it; A Beautiful Mess has an easy-to-follow tutorial)—once you have the backerboard (the surface over which you’ll be tiling) in place, then comes the fun part: Planning your design. “Sketching is a great tool,” says Stephanie Lee, a designer with the company. “That way you’ll be able to anticipate any weird conditions and can adjust before you start installing.” Some of her other tips for making the process go smoother:
- When in doubt, over-order. This will account for anything that gets broken and any required cuts you need to make to fit angled walls.
- Choose larger pieces of tile. The fewer you have to lay, the easier it will be.
- Opt for basic silhouettes. Shapes like squares and rectangles are way simpler to map out than hexagonal options.
Expect the tile laying to take anywhere from a few days to a week, depending on the complexity of your pattern and the size of the room. Crank up your favorite playlist, rope a friend into helping out, and take your time with the process. We tapped Eric Heinowitz, a construction supervisor at Block, to share the lowdown on how to get the tiled bathroom of your dreams.
The Supplies (amounts needed will vary)
- Thinset mortar (follow instructions on the package to mix)
- Tile (to figure out how many square feet you’ll need, multiply the length of your room by its width)
- Spacers
- Grout
- Notched trowel
- Tile saw (optional)
- Rubber grout float
- Stone sealer
- Sponge
Step 1: Map Out the Pattern
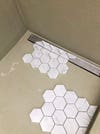
Do this before applying any sort of adhesive to catch problems before they happen—according to Heinowitz, it’s most common to start in the center of the room and work your way out, but if you have oddly sized corners (or oddly sized tiles, like a hexagon), begin at the edges of the room to account for any tricky gaps. You can also sketch a layout directly onto the floor, if you’d rather fill in the lines that way.
This is also the step where you’d cut tiles to fit any custom floor plans: If you need to do this, measure and mark the cutoff point on each little shape, and use the tile saw to trim it down.
Step 2: Install the Tiles
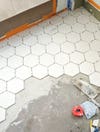
For smaller tiles, slather an even coat of thinset directly onto the backerboard, working in a small section at a time and using a notched trowel to texture the mortar. If you’re installing natural stone or large format tile (anything greater than 12 inches in any dimension), follow this step and then “back butter” each one: Apply the mortar to the back of the tile with the trowel in a straight line. Then lay and firmly push each square to set in the desired location.
Step 3: Insert the Spacers
Use spacers or leveling clips to keep the distance between each stone piece even—this will come in handy for the grouting step. Let it set for roughly 24 hours before removing these tools.
Step 4: Spread the Grout

It may seem like a small choice, but picking the right grout tone makes a big difference in the final look. Heinowitz suggests choosing a matching shade as your tile if you want a seamless finish, or a contrasting color for something a little edgier. Pro tip: Darker grout will stand up better in high-traffic areas and show less wear and tear.
To prepare the paste, make only as much as you need (anything leftover will quickly solidify) and mix thoroughly to ensure a consistent coloring. Then, using the float, evenly work the grout into the tile spacing, focusing on small areas at a time. Wait for it to harden—this should only take a few minutes—then wipe away any excess with a damp sponge, being careful not to pull any out from the corners or edges.
Step 5: Add the Final Touches
Once the grout is completely dry, finish off the room with a sealer approved for natural stone surfaces. And you’re done! Get ready to enjoy your new customized bathroom.
See more bathroom tile stories: 9 Ways to Refresh the Humble White Subway Tile 7 Grey Bathroom Floor Ideas That Are Anything But Blah 12 Porcelain Bathroom Floor Tiles That Will Make You Forget About Paint