How to Make Curtains Look Custom Without Starting From Scratch
IKEA is involved, of course.
Published Mar 31, 2022 1:00 AM
We may earn revenue from the products available on this page and participate in affiliate programs.
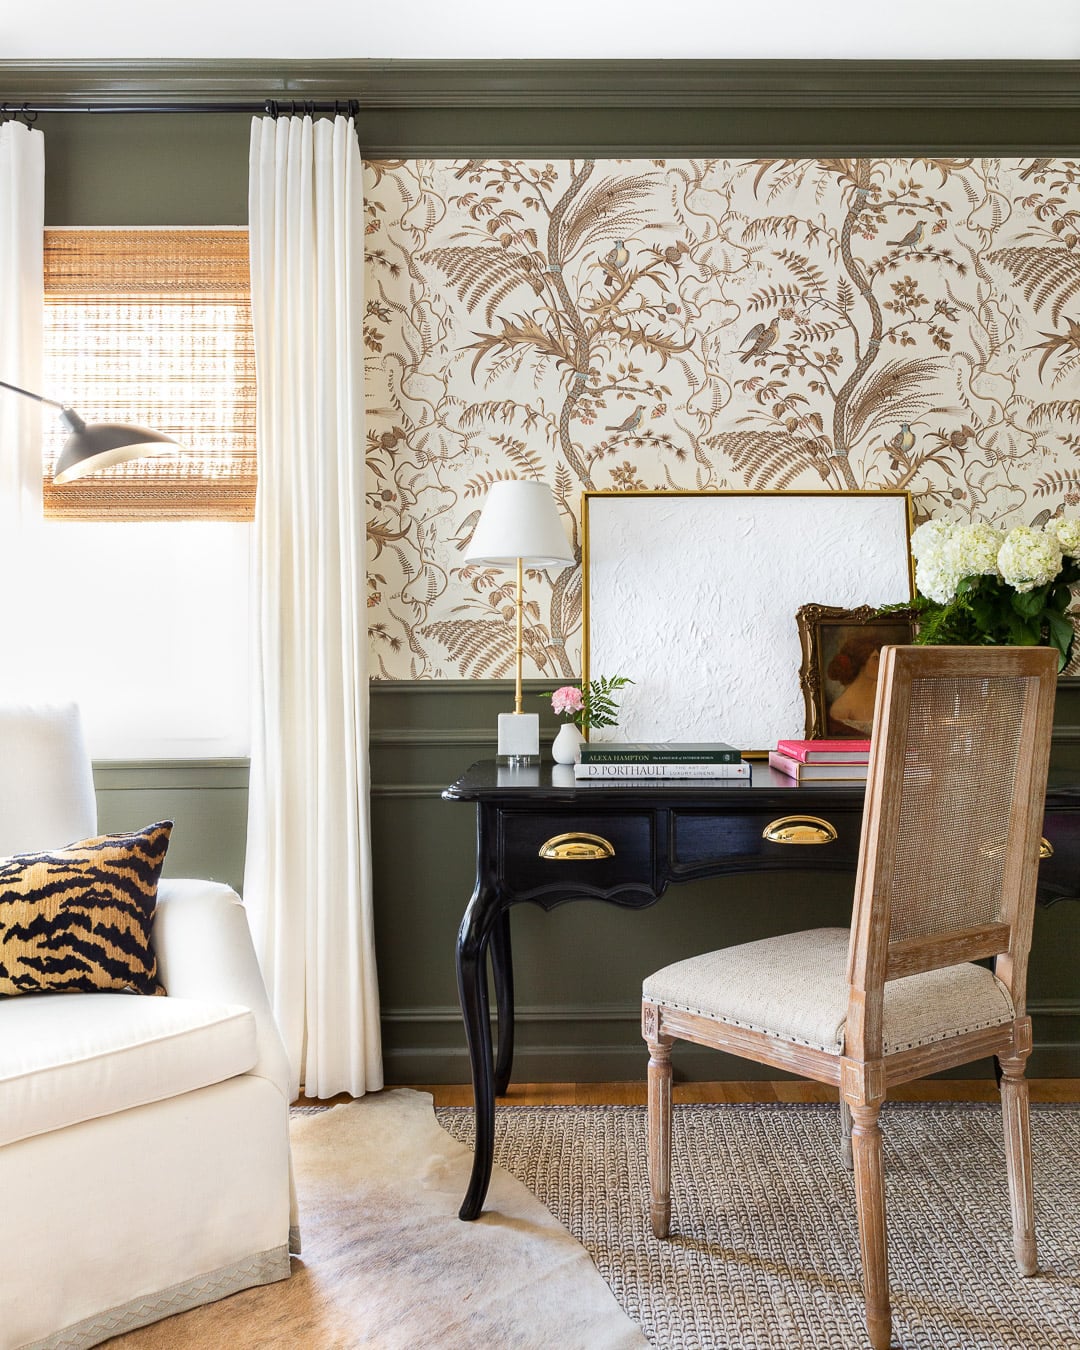
Often referred to as the jewelry of any space, curtains are the finishing touch needed to take a design from blah to Insta-worthy. But impactful or not, there’s no denying that they can leave a major dent in your budget if you go fully custom. Just ask Alisa Bovino, the design influencer and (unofficial) patron saint of curtains, who ran into this exact issue when completing her office for the 2019 One Room Challenge, a project she vowed to furnish at least 75 percent secondhand.
Case goods and other finishes were no problem thanks to her Facebook Marketplace expertise, but when it came to sourcing curtains that fit her design scheme, she was batting zero. Instead of continuing to search endlessly, she settled on four gently used IKEA Ritva panels from the site and got to work giving them a bespoke look herself—for under $150.
Since that project’s success, Bovino has gotten the hang of how to make curtains feel custom—she even swears she’d grab an altered pair of Lee Jofa Althea curtains in a fire (along with her cat, of course).
“When we first bought our house, I had no idea what I was doing,” says Bovino, who lives in New Jersey with her husband. “I remember buying a pair of grommet-top curtains, hanging them up, and thinking to myself that something just didn’t feel right about them. I started doing more design research, and it was like this whole world of curtains opened up to me.” Below, she shares her step-by-step instructions (and a few bookmark-worthy tips) for creating custom curtains on a budget.
No Machine? No Problem
For those of us unwilling to add one more task to our to-do list, Bovino has good news: You can make old curtains new again without learning to use a sewing machine—or a needle and thread, for that matter. The key lies in starting with an almost-there set of curtains and making strategic additions to help them stand out. Bovino likes to glue on trim, strategically fold in some pleats (more on that later), and focus on nailing the perfect proportions.
Curtain Customizing Mistakes to Avoid
Not Starting With Quality
When on the hunt for a set of curtains to upgrade, Bovino suggests keeping quality top of mind—especially if you’re searching on a secondhand site like Facebook Marketplace, where you run the risk of inheriting a stinky or stained piece of fabric from someone else’s home. “Make sure to ask plenty of questions before purchasing used curtains,” says Bovino. “Did they have pets? Are there any stains, rips, or pulls? Is there any visible damage?” Know that any fabric is likely going to carry the scent of someone else’s home. Bovino’s air-out method: Leave your find outside for a few days, or sprinkle baking soda on top, let it sit, then vacuum it up a few hours later.
Opting for Too-Short Curtains
On this point, Bovino is adamant: The “floating” curtain effect can cheapen the look of even the highest-end fabrics. “Too long is always better. That’s a fix that can be easily tackled. But any curtains that are too short (more than 1 to 2 inches off the floor) will look wrong,” she says.
Already fallen in love with a pair that are too short? Try steaming the fabric, tugging gently as you do so to release any wrinkles and encourage it to loosen slightly. If that doesn’t work, Bovino recommends applying a trim border to grant you an extra inch or two. Need more than that? Having a seamstress add a panel to the bottom could be the solution. “If I had a floral curtain that wasn’t long enough, I’d add a ticking stripe at the bottom to lend extra length—florals and stripes always look good together,” Bovino points out.
Buying Too Few Panels
If you’ve ever seen custom curtains in real life, you know they always look lush and super full. This is by design—bespoke designs often contain far more yardage than curtains from a big-box store. To mimic this appeal, Bovino will usually buy a few extra panels. For her signature IKEA hack, she used four curtains per window (two on each side) instead of the traditional two.
How to Make Curtains Look Custom
Editor’s note: Bovino started with IKEA Ritva curtains as a base, but you can apply her techniques to any product.
The Supplies
- IKEA Ritva curtains
- Your choice of trim (tassels, ribbon trim, a Greek key trim, etc.)
- Liquid fabric adhesive
- Curtain rings with clips
- Curtain rod
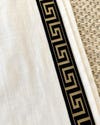
Step 1: Apply the Trim
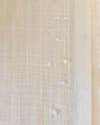
Make sure you’re working on a wide, flat surface and that your curtains are free of any major creases or indents. Using your liquid fabric adhesive, apply your chosen trim to the curtains. Work slowly down the length of the curtain and apply glue as you go, placing the trim about 1 inch in from the edge of the fabric. Let dry per the adhesive’s instructions.
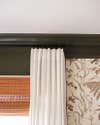
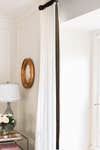
Step 2: Hang the Curtain Rod
Designer Paloma Contreras walked us through the hanging process from start to finish, if you need assistance. “I always try to hang the rod as close to the ceiling as possible,” says Bovino. “Or if I have crown molding, it’s as close to the crown molding as possible. However, if I end up working with a pair of curtains that are too short and I’ve done everything I can to lengthen them, I will bend that rule a little and maybe hang the rod a bit shorter.”
Step 3: Create the Pleats
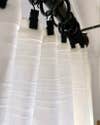
Custom curtains typically come with intricate pleats that lend an additional layer of luxury, like box or pinch pleats. To mimic that look, Bovino relies on curtain rings with clips. After adding your curtain rings to your rod, clip your first panel with three rings for stability. To create the pleats—one on each end of the curtain and one in the middle—fold the fabric over itself and, using a ring clip, clip the two sections together near the fold. Repeat the process down the length of your curtain, making sure to maintain the same spacing and gather the same amount of fabric each time. (Bovino placed her pleats 5 inches apart.)
Step 4: Steam the Pleats (Optional)
If an extra-crisp look is what you’re after, a steamer or hand-iron is your best friend. Follow the creases of the pleats down the curtain to create super-distinct lines. IKEA who?