before-and-after: the ultimate family room makeover
A modern and colorful transformation.
Published Feb 18, 2015 4:00 PM
We may earn revenue from the products available on this page and participate in affiliate programs.
Let’s just start with the “design cure all” (aka top secret design knowledge from
Pencil and Paper Co): white paint makes just about everything a little bit better!
We have done ALOT of renovations….and it never fails. Our go-to paint color is “Delicate White” from Porter paint. Yes, we’re quite loyal to this local “southern favorite” paint.
We’ve moved five times in the past three years. We’re addicted to buying, designing, and renovating houses! Typically, we hunt down older homes (I like to call them “vintage”). We’re drawn to the diamond in the rough. The old house with great bones that no one has touched for the last 50+ years (and usually no one else wants). Honestly, I like an un-renovated house the best! Something with good bones that we can bring back to life!
This house was purchased as a temporary home while we completed a long-term renovation across the street. We often find ourselves without a place to live because we’ve sold our current home before we have something new ready. We call it our “motivation” for a speedy renovation. We knew we could complete a quick renovation on this simple 1950s ranch and live in it while we rackled the more elaborate construction project nearby.
It’s the heart of the home–and where we knew we would spend the majority of time because of the amazing fireplace that anchors the space (and it houses the TV).
Step 1: Simplifying the space.
We removed heavy dated drapes and valences and the fireplace hardware. And, obviously, we painted everything white! Instant transformation. It’s the fastest, cheapest, and most impactful update you can make during any renovation. I also love how white modernizes vintage details.
Step 2: Painting.
The brick fireplace instantly feels transformed and becomes a modern anchor to the family room gathering space. I have yet to see a brick fireplace that did not look better painted! We also loved the bookcase with the original regency cabinet details. No need to replace the cabinetry. We did make it feel more current by removing the original doors on the upper cabinets and replacing the hardware with simple chunky polished chrome knobs.
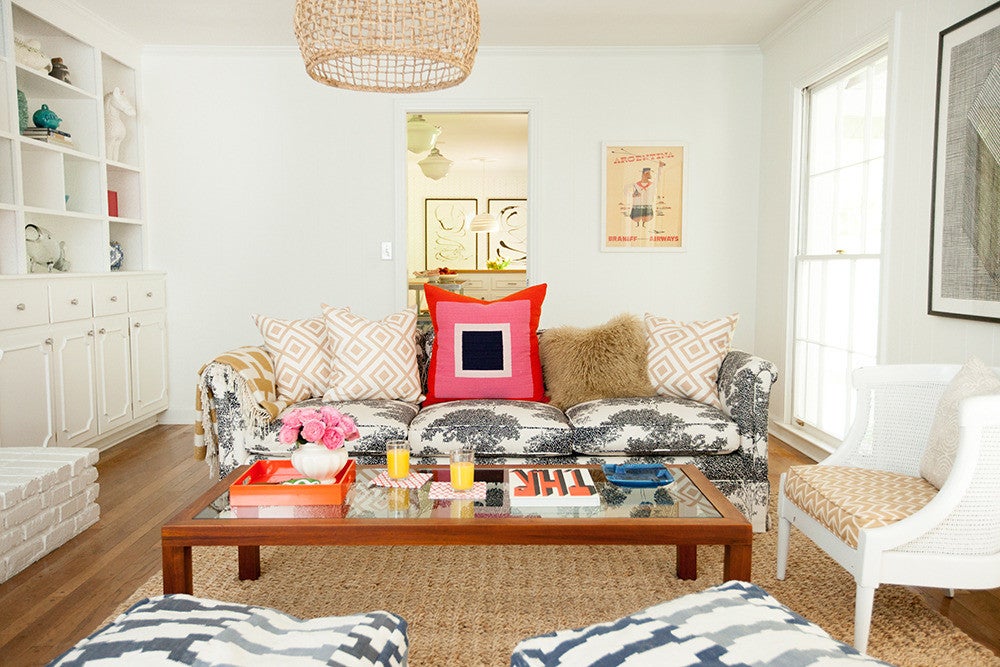
Step 3: Creating a hangout zone
The floor plan is long and narrow, which is challenging. Plus, there are doors on every wall. This was also the room with the TV. I think it’s important that the furniture layout is conducive to creating conversation and makes a statement as you enter the space. We chose to float the furniture off the walls to create both an intimate gathering space as well as good visibility to the TV. The large sofa is the anchor and faces you directly as you enter the room. Also positioned are low comfy poufs in front of the TV for additional kids seating (without interrupting the sight lines of the TV). We rounded out the arrangement with a simple sisal rug to ground the arrangement.
We took our favorite comfy (hand me down) sofa and brought it back to life with an amazing print!! This fun graphic black and white tree graphic is my “ode to Billy Baldwin”.
We also chose to take advantage of the great natural light by leaving the big open windows uncovered- bonus nothing obstructs the view of the park like view.
Overall the room has a classic neutral base. Then we added in a bit of whimsy with a playful mix of pattern and color through pillows and accessories. I love the idea of keeping the bones of the house timeless and then having fun with the items that can easily be swapped out